Replacing frame ventilation fans, Replacing the air filter – Grass Valley Kaleido-MX 4K (1RU) v.7.80 User Manual
Page 28
14
Installation
Replacing Frame Ventilation Fans
Replacing Frame Ventilation Fans
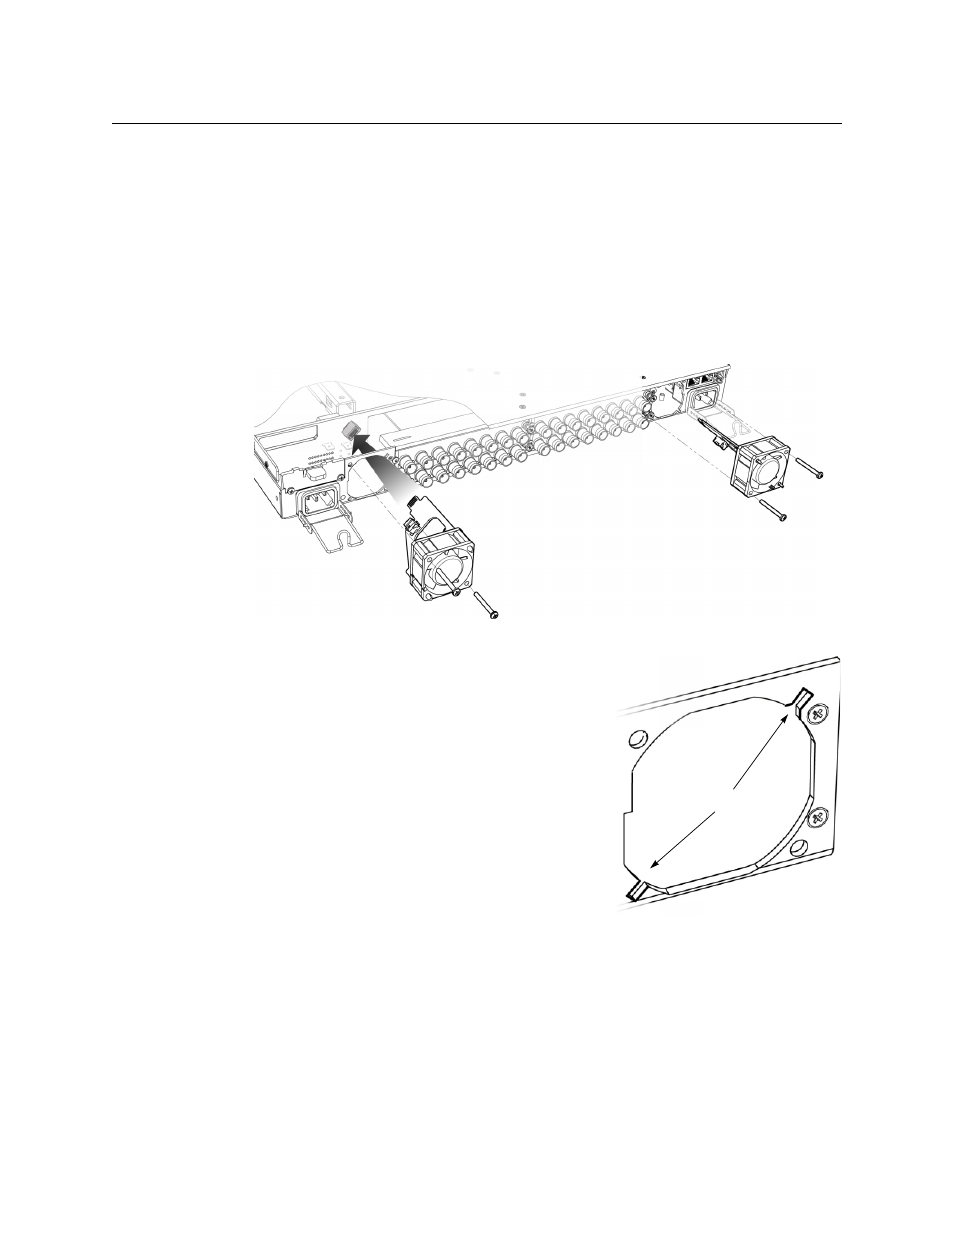
The main cooling fans on the rear of Kaleido-MX 4K (1RU) frames may be replaced in case of
failure. Replacement part number is #0969-2100.
To replace a frame ventilation fan in a Kaleido-MX 4K (1RU)
1 Remove the two screws that secure the fan assembly to the frame, and pull the fan
assembly straight out of the frame.
Retain the screws, as they will be used with the replacement fan.
2 Slide the new fan assembly into the opening on the rear panel, pushing it straight in,
and ensuring that the connector on the assembly mates with the socket in the frame.
The two ventilator fans are mounted at different angles, as shown in the above figure.
3 Align the circuit board on the fan assembly with the
notches in the edge of the rear-panel opening (see
arrows in figure at right) to ensure the correct
alignment.
The socket into which the circuit board connects is
hidden from view by the fan assembly during
installation and there is no guide to ensure that
they are aligned. The easiest way to make sure that
the connector and socket have mated properly is to
install the fan with the frame power turned on. You
will hear the fan start up when the connection is
made.
4 Use the two screws you retained from the old fan, to
secure the new fan assembly to the rear panel.
Replacing the Air Filter
You may remove the air filter for cleaning or replacement.
To remove the air filter
1 Open the front panel of the frame (see
2 Grasp the top of the filter installed on the rear of the door, and pull it gently out of its
mounting slot.
Alignment
notches