Grass Valley K2 Dyno PA Configuration Manual v.2.0 User Manual
Page 28
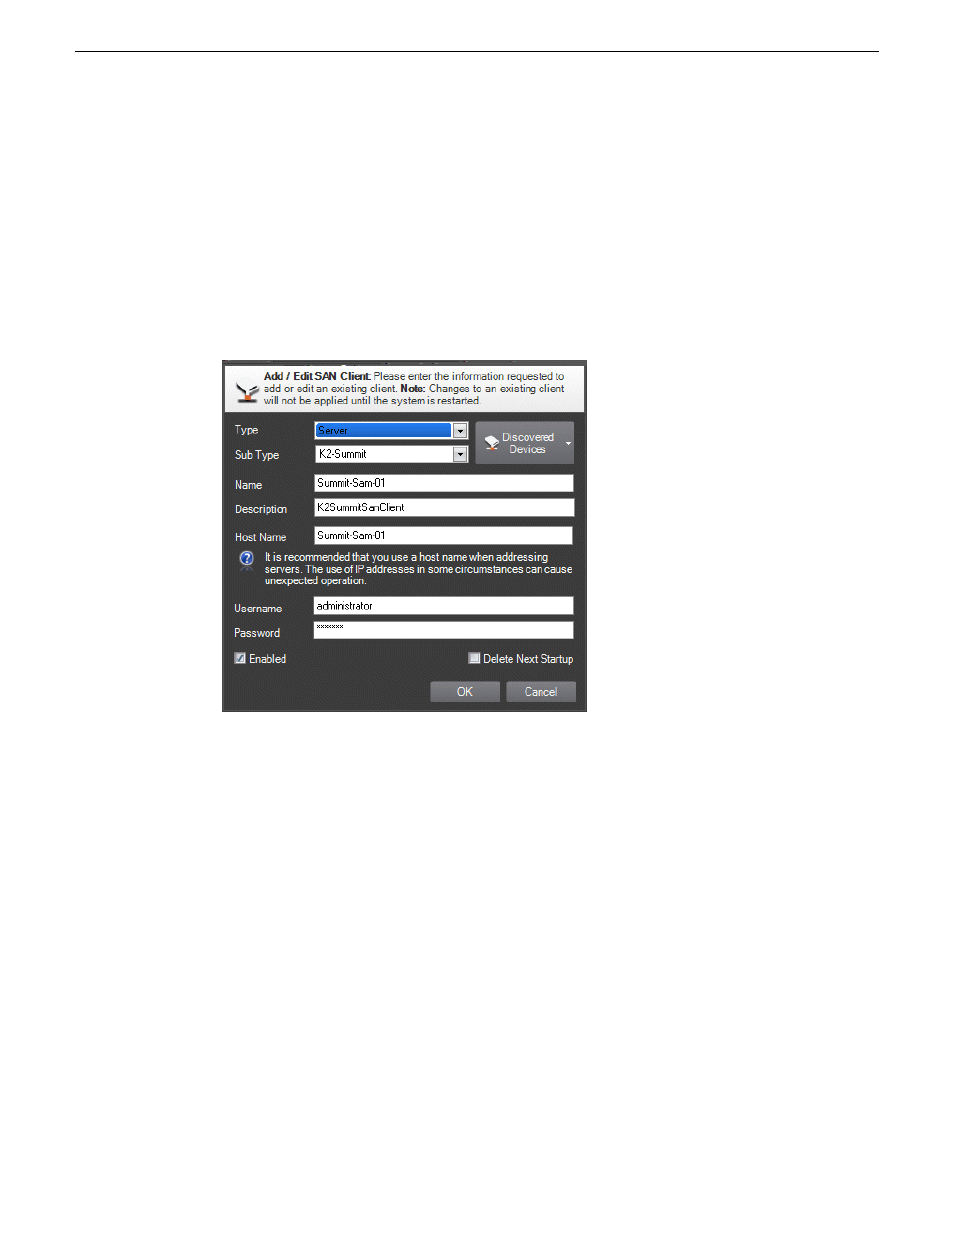
5. Add the following information:
•
Type: Server (Currently, there is no other option)
•
Sub Type: From the drop-down list, select the SAN client you want to add from the list of
available SAN clients.
•
Name: Enter the name of the SAN client.
•
Description: If desired, you can enter a description.
•
Host: Enter the host name of the SAN client, for example Summit-01.
•
Username: Enter an administrator-level username for the SAN client.
•
Password: Enter the matching administrator-level password for this SAN client.
6. Click
OK
to exit the Add/Edit SAN Client dialog box.
7. Click
OK
to exit the Add/Edit SAN Server dialog box.
The K2 SAN system appears in the Navigator pane. While Dyno PA is in the process of
establishing a connection with the system, the icon next to the K2 system turns yellow.
NOTE: In the SAN system, the V:\ drive is displayed in the Navigator pane under the SAN
while the individual Dyno sessions are displayed under each K2 Summit Production Client
that uses the SAN for storage. In the standalone server, the V:\ drive and Dyno sessions are
all listed under the standalone server.
8. If you are not planning to use the Browse feature of the Dyno PA, proceed to Adding a bin or
Adding a repository, depending on your workflow.
9. If you are planning to use the Browse feature of the Dyno PA, refer to Installing the generic
iSCSI Client software in the K2 Dyno Production Assistant Configuration Manual.
Related Links
Configuring the K2 Summit SAN and K2 Dyno PA
on page 21
28
K2 Dyno Production Assistant Configuration Manual version 2.0
22 June 2011
Configuring the K2 Summit SAN and K2 Dyno PA