Airaid 511-734 User Manual
Installation instructions, Fig#1 fig#2 fig#3
Installation Instructions
For Part Numbers :
510-934 Modular Intake Tube
510-734 Jr. Kit
850-054 Airaid Oiled Media Filter
511-734 Jr. Kit
851-054 SynthaMax Dry Media Filter - Red
512-734 Jr. Kit
852-054 SynthaMax Dry Media Filter - Black
513-734 Jr. Kit
853-054 SynthaMax Dry Media Filter - Blue
1995-04 Toyota Tacoma 3.4L V6
1996-02 Toyota 4Runner 3.4L V6
Component Identification
1.
*Airaid Premium Filter
1
2.
Modular Intake Tube
1
3.
Urethane Hump Hose
1
4.
Urethane Coupler
1
5.
#48 Hose Clamp
2
6.
#52 Hose Clamp
2
7.
¼” NPT, ¼” Barb Fitting
2
8.
½” x 5/8” Connector
1
9.
¼” NPT Plug
1
10.
½” x 4” Breather Hose
1
11.
¼” x 16” Vacuum Hose
1
12
Black Speed Clamp
2
* Filter included only in Jr. Kits
Full color instructions can be viewed on our web site at Airaid.com. Use the Product Search function to find your part number, and click View Details.
I
DISCONNECT NEGATIVE (-) BATTERY CABLE
II
Remove Factory Intake Assembly
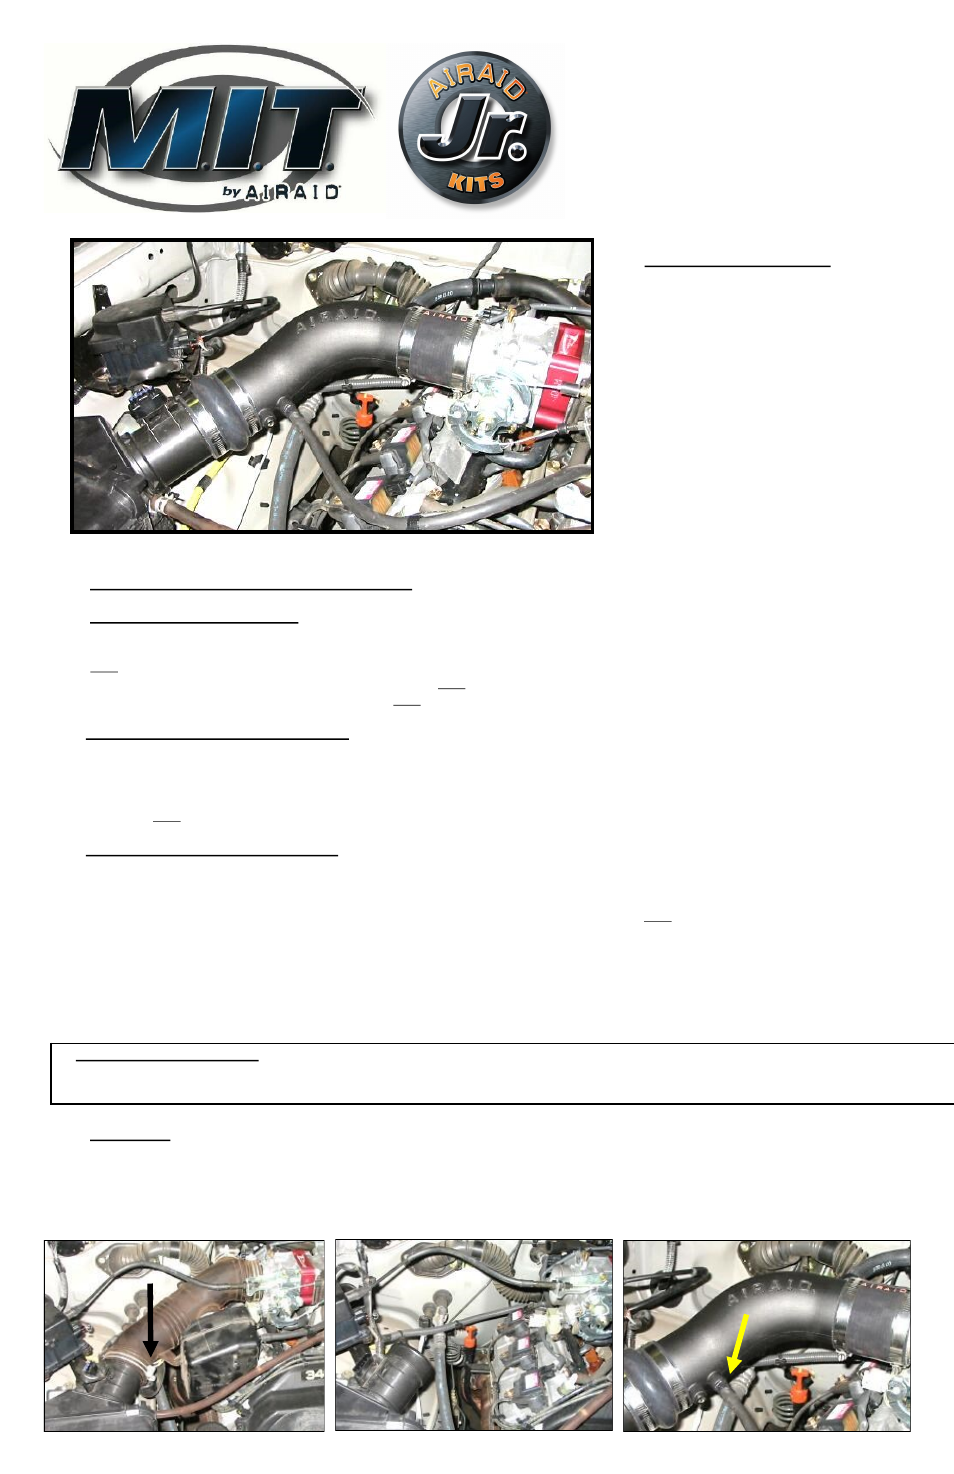
A) Using Phillips screwdriver, loosen the hose clamps on the factory intake tube. See Fig#1
B) Remove vacuum line and hose from the intake tube. Discard original ¼” vacuum line for longer vacuum line supplied with Airaid MIT.
(Note: Factory hose near throttle body will be reconnected to AirAid intake tube assembly.) See Fig#1
C) Disconnect Mass Air Sensor wire harness from intake tube. (Note: Mass Air Sensor remains in original location.) See Fig#2
D) Remove factory intake tube assembly from vehicle. (Note: factory air box assembly remains in original location.) See Fig#2
II
Assemble the Airaid Modular Intake Tube
A) Install supplied nylon barbed fitting in rear threaded hole (furthest from larger diameter tube end) of Airaid intake tube. See Fig#3
B) Install supplied ¼” threaded plug into threaded hole (closest to larger diameter tube end) of Airaid intake tube. See Fig#3
C) Early models, 1995-98 will use the second barbed fitting. See Fig#4
D) Place hump hose and two #52 hose clamps on larger end of intake tube and place coupler with two #48 hose clamps on smaller end of tube.
See Fig#3 (Note: Leave all hose clamps loose for final assembly.)
III
Airaid Modular Intake Tube Installation
A) Position the Airaid intake tube in place of the original factory assembly.
B) Connect the Airaid intake tube to the engine by sliding the coupler over the end of the throttle body.
C) Connect the Airaid intake tube to the factory air box by sliding the hump hose over the end of the air box.
D) Adjust the intake tube to insure proper alignment from the throttle body and the factory air box. (Note: Leave a gap between the tube and the
air box to allow for engine movement.)
E) Tighten all four hose clamps on the Airaid intake tube.
F) Using supplied ¼” vacuum line; connect steel tube on intake manifold to ¼” barbed fitting on intake tube.
G)Using supplied 5/8” to ½” barbed fitting and hose, connect the factory hose located by the throttle body to the intake tube. Use two supplied
#16 speed clamps to secure line to barbed ends. See Fig#5
H) Re-connect the Mass Air Sensor to the factory tube.
V
Finishing Up
A) Tighten all hose clamps & inspect overall work.
B) Check hood clearance.
C) Ensure that no foreign objects are in the intake path!
D) Re-connect negative battery cable.
IV Airaid Jr. Replacement Filter
A) If you purchased the Airaid Jr. kit, replace the factory
air filter with the Airaid Premium Filter included in the Airaid Jr. kit.
Fig#1
Fig#2
Fig#3