Installation instructions. read me – Airaid 300-567 User Manual
Page 2
2
Installation Instructions. Read Me!
1. DISCONNECT NEGATIVE (-) BATTERY CABLE.
2. Remove air intake assembly.
3. Remove throttle body intake box and save bolts.
4. Remove (3) bolts from throttle body.
5. Remove bolts from throttle linkage bracket and save.
6. Install power plate using (3) 6mm x 60 bolts and (3) 6mm flat washers. (Ref. “A”)
7. Locate (3) extension plates (short) and (3) 6mm x 20mm flat head screws before installing throttle linkage and
dipstick bracket.
* Please Note: Remove the stud from front throttle linkage mount. The dipstick must be located
under forward extension plate at flathead screw location.
8. Locate (2) extension plates (long) using (2) 6mm x 20mm flat head screws to reposition the throttle body in-
take box using saved bolts. Refer to Step 3.
9. Install air box extension plate using flange nut and 5/16” flat head screw. (Ref. “E”)
10. Inspect & Test throttle linkage for full open and closed travel before driving. Some cruise or kickdown cables
may require adjustment. Please refer to your vehicles service manual for proper adjusting.
11. Reinstall the throttle body air intake assembly using Step 2 as an example.
12. Reconnect battery cable. Enjoy!
The sound of power...The “whistle” means its working!
Rv. 02/04
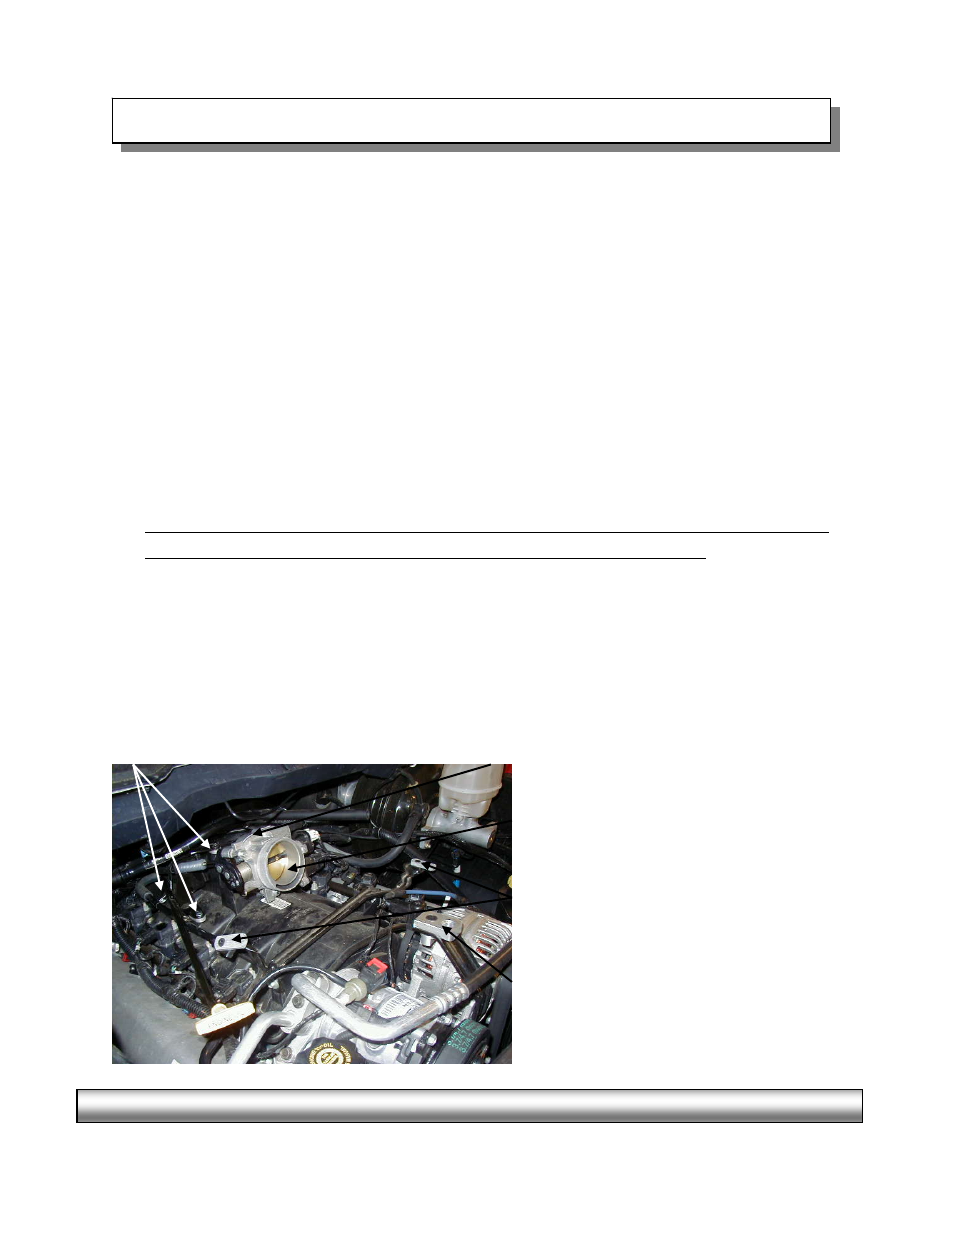
Ref. “C”- (3) Extension Plates (Short)
(3) 6mm Flat Head Screws
Ref. “A”- (1) Power Plate
(1) “O”-Ring
(3) 6mm x 60mm Bolts
(3) 6mm Flat Washers
Ref. “B”- Throttle Body
Ref. “D”- (2) Extension Plates (Long)
(2) 6mm Flat Head Screws
Ref. “E”- (1) Air Box Flange Nut
(1) Air Box Extension Plate
(1) 5/16” Flat Head Screw
AIRAID Filter Co. 2688 E Rose Garden Ln. Phoenix AZ 85050 (800) 498-6951 [email protected] www.airaid.com