Airaid 200-615 User Manual
Page 2
Instructions Revision
08/02/07
Contact your nearest Airaid dealer for an Airaid
Intake System for your car, truck or SUV.
The sound of power...The “whistle” means its working!
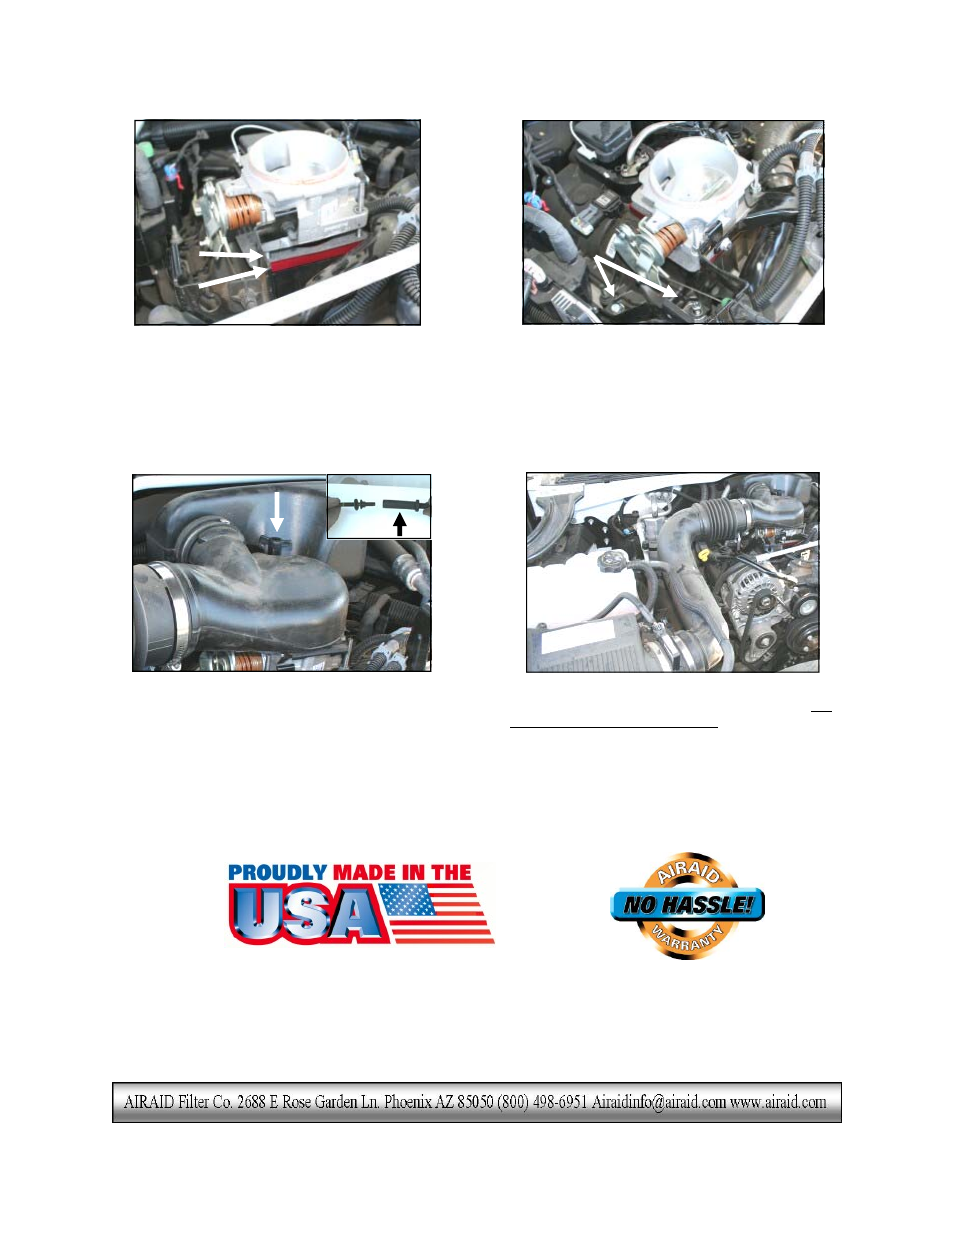
5. Place the fiber gasket (#9) between the Poweraid
spacer (#1) and the throttle body. Make sure the flat face
of the Poweraid spacer is against the throttle body with
the bore extending into the intake manifold. Use cau-
tion to retain the factory o-ring gasket on the intake
manifold.
6. Install one 1/2” round spacer (#5) under each hole in
the throttle cable bracket. Install the 6mmx 30mm bolt
(#4) in the front hole, and the 6mmx 35mm bolt (#5) in
the rear hole. Re-install the throttle cable bracket and nut
onto the front of the throttle body. Install one 6 mm
washer (#6) and 6mm nut (#7) onto each of the three
throttle body studs. Tighten all bolts and nuts securely.
Reconnect the harness plugs on the throttle body.
8. Re-install the intake tube, and tighten the hose clamps.
Re-connect the breather hose elbow to the intake hat. Re-
connect the negative battery cable!
7. Using 6mm and 8mm wrenches, separate the factory
rear throttle body stud as shown (reuse the top). Install the
top of the stud onto the rear throttle body stud. Re-install
the intake hat hold down nut. Tighten all bolts securely.
Spacers
Gasket
Spacer
Included with your Poweraid Spacer is a sticker with a California Air Resources Board
(C.A.R.B.) Executive Order (EO) number. This sticker must be placed in plain view inside of
the engine compartment. Failure to do so may prevent you from passing a smog inspection.