Menu structure, Menu screen operation basics, Menu structure menu screen operation basics – Teac DA-3000 User Manual
Page 15: 2 – names and functions of parts
TASCAM DA-3000
15
2 – Names and Functions of Parts
Menu structure
Press the MENU button to open the
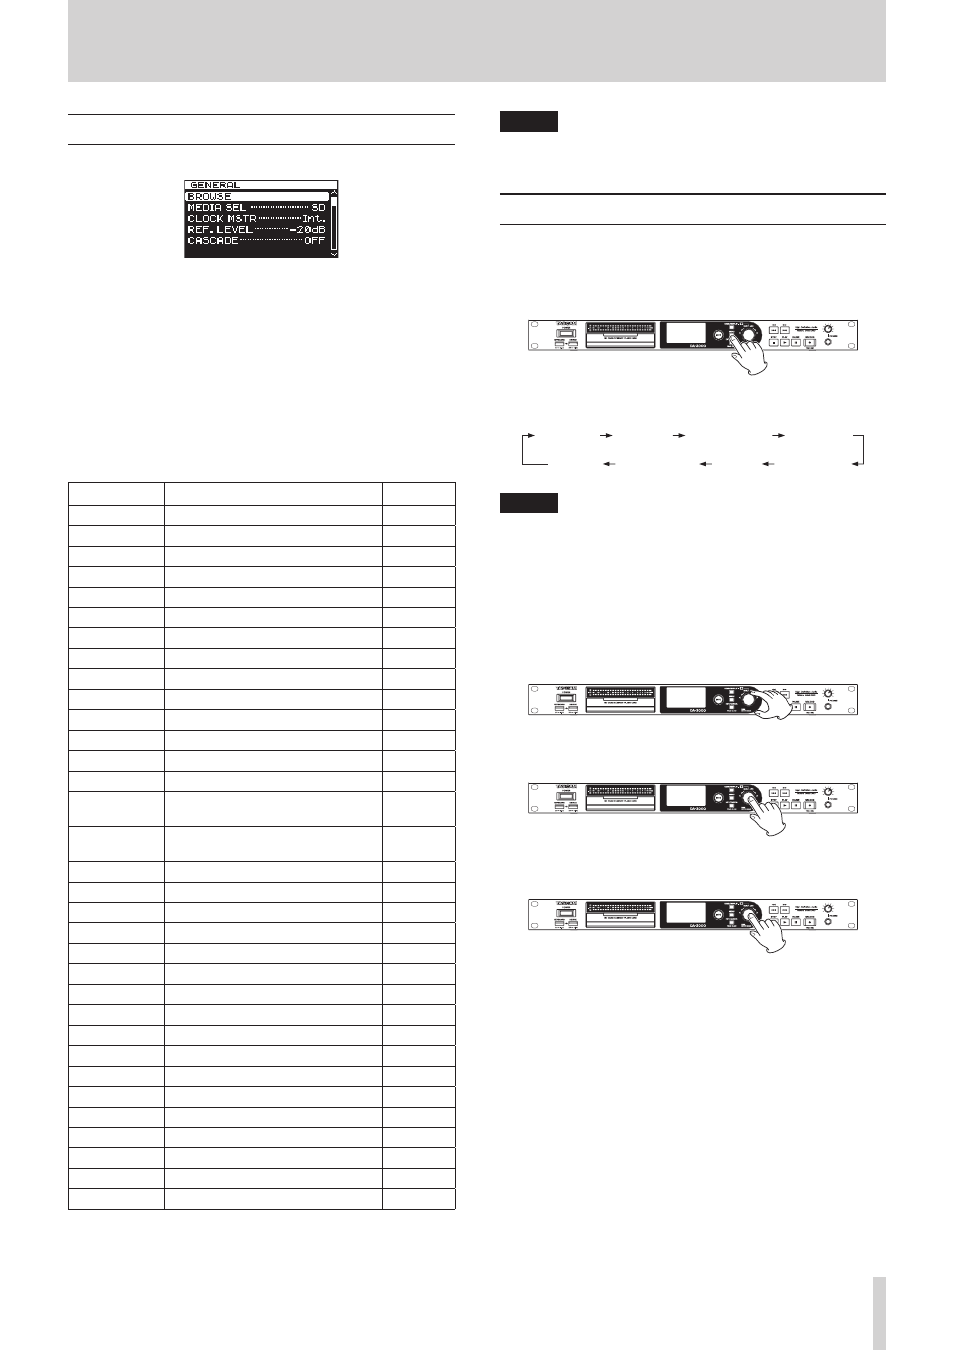
GENERAL
menu screen.
There are eight menu screens organized by menu item type.
GENERAL
:
General function settings
REC FILE
:
Recording file format settings
I/O SETTINGS
: Input and output settings
REC FUNC
:
Recording function settings
PLAY FUNC
:
Playback function settings
MEDIA
:
Media operations
TRACK EDIT
:
Current file editing
UTILITY
:
System settings and other functions
The menu items are as follows.
Menu item
Function
Pages
BROWSE
Open the BROWSE screen
MEDIA SEL
Media selection
CLOCK MSTR
Master clock settings
REF. LEVEL
Reference level settings
CASCADE
Cascade function settings
FILE
Recording file format settings
SAMPLE
Sampling frequency settings
CHANNEL
Recording mode settings
NAME
File name format settings
INPUT SEL.
Input source selection
INPUT VOL.
Input volume setting
SRC
Sampling rate converter settings
ADDA DIRECT AD/DA DIRECT mode settings
IN MONITOR
Input monitoring function settings page 24
SYNC REC
Synchronized recording function
settings
AUTO TRACK
Automatic track incrementing
function settings
AUTO MARK
Automatic mark function settings page 29
PAUSE MODE Pause mode settings
PLAY MODE
Play Mode setting
REPEAT
Repeat playback function settings page 41
TRACK GAP
Gapless Playback mode setting
FORMAT
Media formatting
COPY
Media copy type selection
INFO.
View media information
RENAME
Edit folder and file names
DELETE
Delete folders and files
DIVIDE
Divide files
UNDO/REDO
Undo/redo DIVIDE operations*
F. PRESET
Restore the factory settings
OSC
Oscillator settings
KEYBOARD
Keyboard type setting
PEAK HOLD
Level meter peak hold time setting page 24
CLOCK ADJST Time setting
* “UNDO” only appears after a DIVIDE operation has been
conducted. REDO only appears after UNDO has been used in
place of the UNDO option.
NOTE
The settings made in all the menus are retained even when
the unit is turned off.
Menu screen operation basics
You can operate the menu screens in the following manner.
To change the menu page:
Press the MENU button repeatedly until the menu page that
you want appears
Pushing the button cycles through the menu pages in the
following order.
GENERAL
REC FILE
I/O SETTINGS REC FUNC
PLAY FUNC
MEDIA
UTILITY
TRACK EDIT
NOTE
You can turn the MULTI JOG dial to move between the
GENERAL
menu screen
BROWSE
item and the
UTILITY
menu
CLOCK ADJST
item one item at a time.
However, it is not possible to move from the
UTILITY
menu
CLOCK ADJST
item to the
GENERAL
menu
BROWSE
item
or from the
GENERAL
page
BROWSE
item to the
UTILITY
menu
CLOCK ADJST
item this way.
To select an item (vertically on the screen):
Turn the MULTI JOG dial.
To confirm the selection:
Press the MULTI JOG dial.
To open a submenu that is not shown on the display:
Press the MULTI JOG dial.
To move up one level in the menu:
Press the EXIT/CANCEL [PEAK CLEAR] button.
To return directly to the Home Screen from menu
mode:
Press the HOME/DISPLAY button.