Removal and replacement: autoiq controller – Scotsman CME1356 User Manual
Page 36
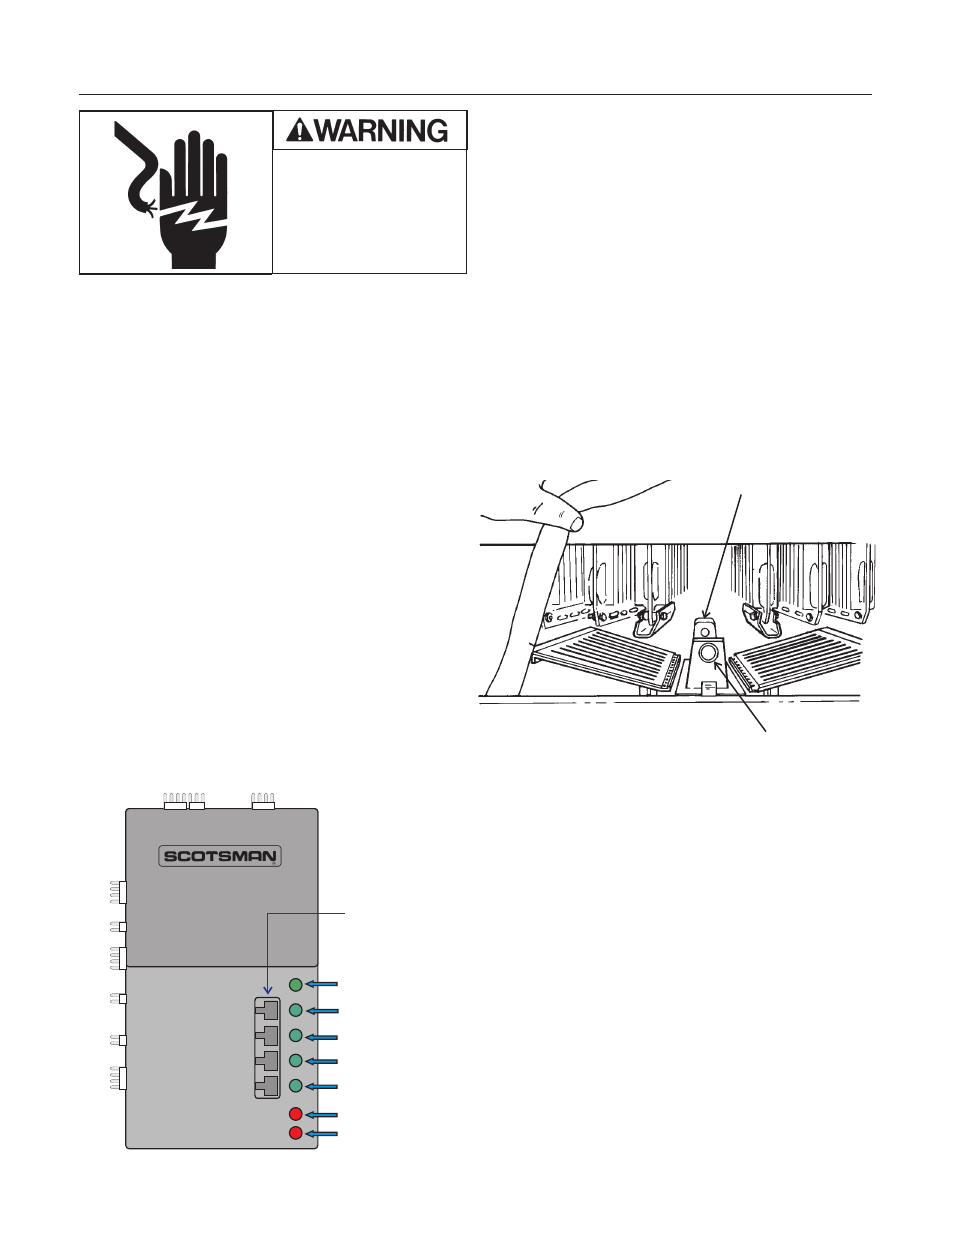
Removal and Replacement: AutoIQ Controller
1. Disconnect the electrical power.
2. Remove the front panel.
3. Remove mounting screw holding controller to
cabinet.
4. Touch a metal surface to discharge any static
electricity.
5. Pull controller out slightly and unplug all
electrical connections.
Note: Do NOT touch the back of the controller.
6. Carefully remove the new controller from its
packaging. Again, do NOT touch the back of the
controller.
7. Plug all electrical connectors into the new
controller.
8. Re-attach the controller to the cabinet.
9. Switch on the electrical power. All lights should
lite up.
10. Push and release the Freeze button.
11. Replace the front panel.
Electric Eyes (Harvest Control Sensors)
These must be replaced as a set.
1. Remove front panels.
2. Push and release the Off button.
3. Remove evaporator cover.
4. Remove both splash covers.
5. Reach into cube port area and pull the back
sensor forward until the harness connector is
available, then unplug it and remove the sensor
from the cabinet.
6. Push front sensor back into the cube port. When
it is free of the sensor holder, twist it 90 degrees
and pull it up and out of the cube port.
7. Trace wire back to the controller and unplug.
8. Reverse all steps to reassemble.
Back Sensor
1
2
3
4
5
6
7
8
9
BIN FULL
FREEZE
HARVEST
CLEAN
OFF
WATER
REFRIGERATION
PUSH BUTTON
CONTROL SWITCHES
INDICATOR LIGHTS:
DIAGNOSTIC LIGHTS:
Front Sensor
and Holder
Electrical Shock Hazard
Disconnect electrical
power before beginning
service
CME1356 and CME1656
May 2000
Page 36