Installation, Removing and installing the door, Removing and installing the insert – Montigo MD44 DV User Manual
Page 12
Part No. XG0120
Page 12
MD44-DV Direct Vent Vented Fireplace
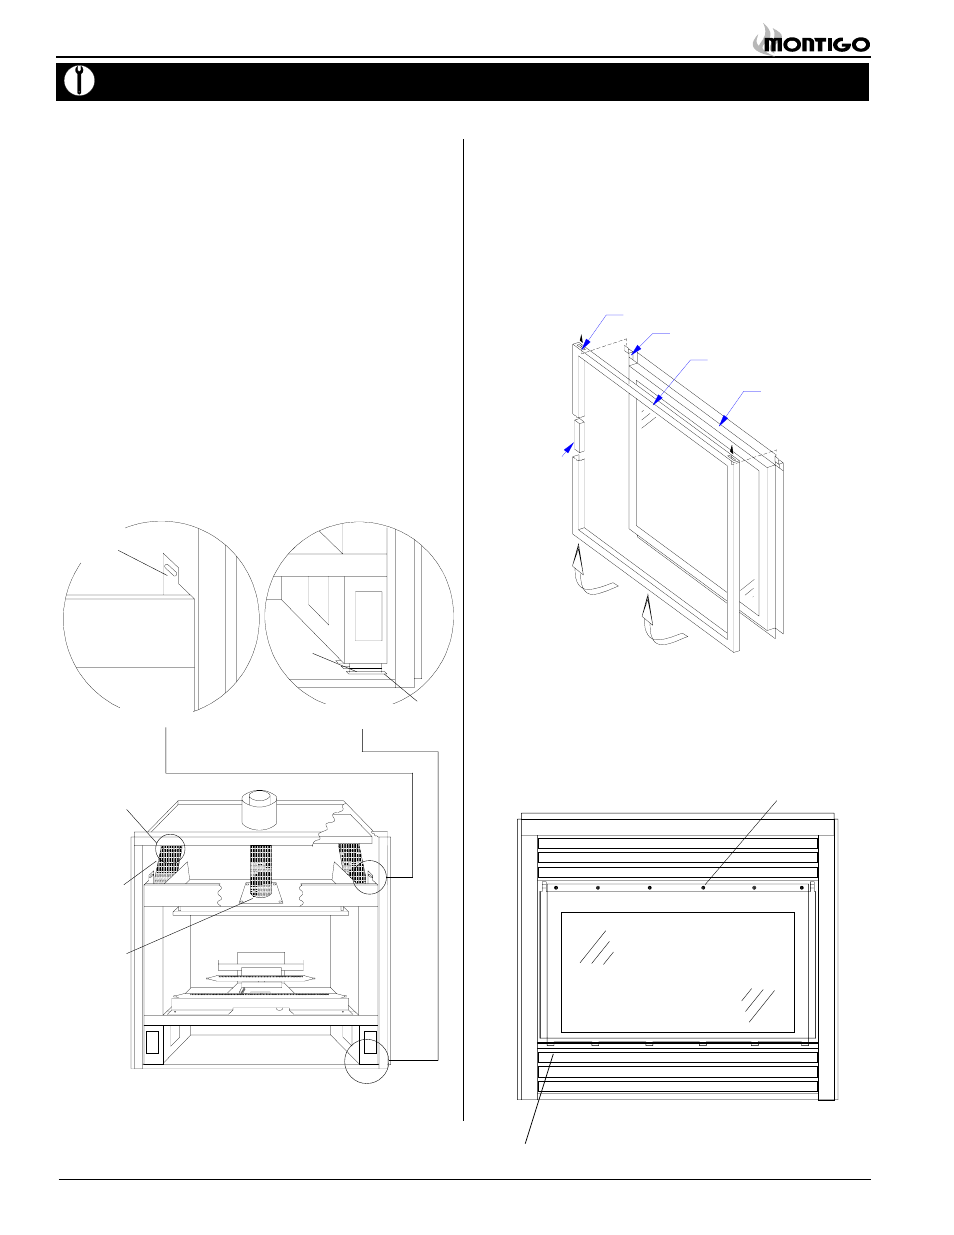
Removing and Installing the
Door
Removing the door surround:
The door surround is held in place by two metal clips at the top, and
one magnet on each side. To remove the surround, pull the bottom
outwards and lift upwards until the slots "A" are clear of tabs "B" in the
door. You may need to use a flat screwdriver to pull the door surround
outwards.
(See figure 25a).
Installation
Figure 25a.
Removing door surround.
Removing the door:
To install/remove the glass door simply attach/remove the four (4)
machine screws, align tabs at the bottom of the door with the slots in
the bottom door rail
(See figure 25b). Ensure that a good seal is
maintained.
Glass door
and frame
Door surround
Tab 'B'
Slot 'A'
Magnet
Pull bottom of door
surround outwards
and upwards.
Figure 25b.
Installing Glass Door.
Glass door
& frame
Screws
Removing and Installing
the Insert
You may remove the insert to protect it from theft and damage
during construction.
1. Remove the two machine screws (1 left & 1 right) at the top of the
insert that attach the insert to the shell.
See Inset 1.
2. Remove the fresh air flex from the collars on the shell.
See Figure
24. Important: Be careful not to damage the fresh air flex
during removal or storage.
3. Remove the 4 machine screws that hold the venting plate to the
insert.
4. Remove the insert by tipping the top of the insert outward and
lifting the tabs past the slots in the bottom of the shell.
See Inset
2.
Store the screws and clamps in a safe place to ensure that they are
not lost.
To re-install the insert simply reverse the steps above.
INSET 1
Tab
INSET 2
Mounting
Bracket
Fresh Air
Flex (4" dia.)
High temp.
silicone seal
Venting Plate
Front
Slot
Figure 24.
MD44-DV insert.