Step 3 - configure boards, Configure boards – Measurement Computing 2000 Series Daqboar User Manual
Page 15
1033-0940, rev 6.0
10-17-02
DaqBoard/2000 Series Installation Guide IG-5
Step 3
– Configure Boards
DaqBoard/2000 Series Boards have no jumpers or switches to set. Configuration is performed, in its
entirety, through software. Refer to the following figure and steps to complete the configuration. The
numbers in the figure correspond to the numbered steps immediately following the figure.
Accessing the DaqBoard/2000 Properties Tab
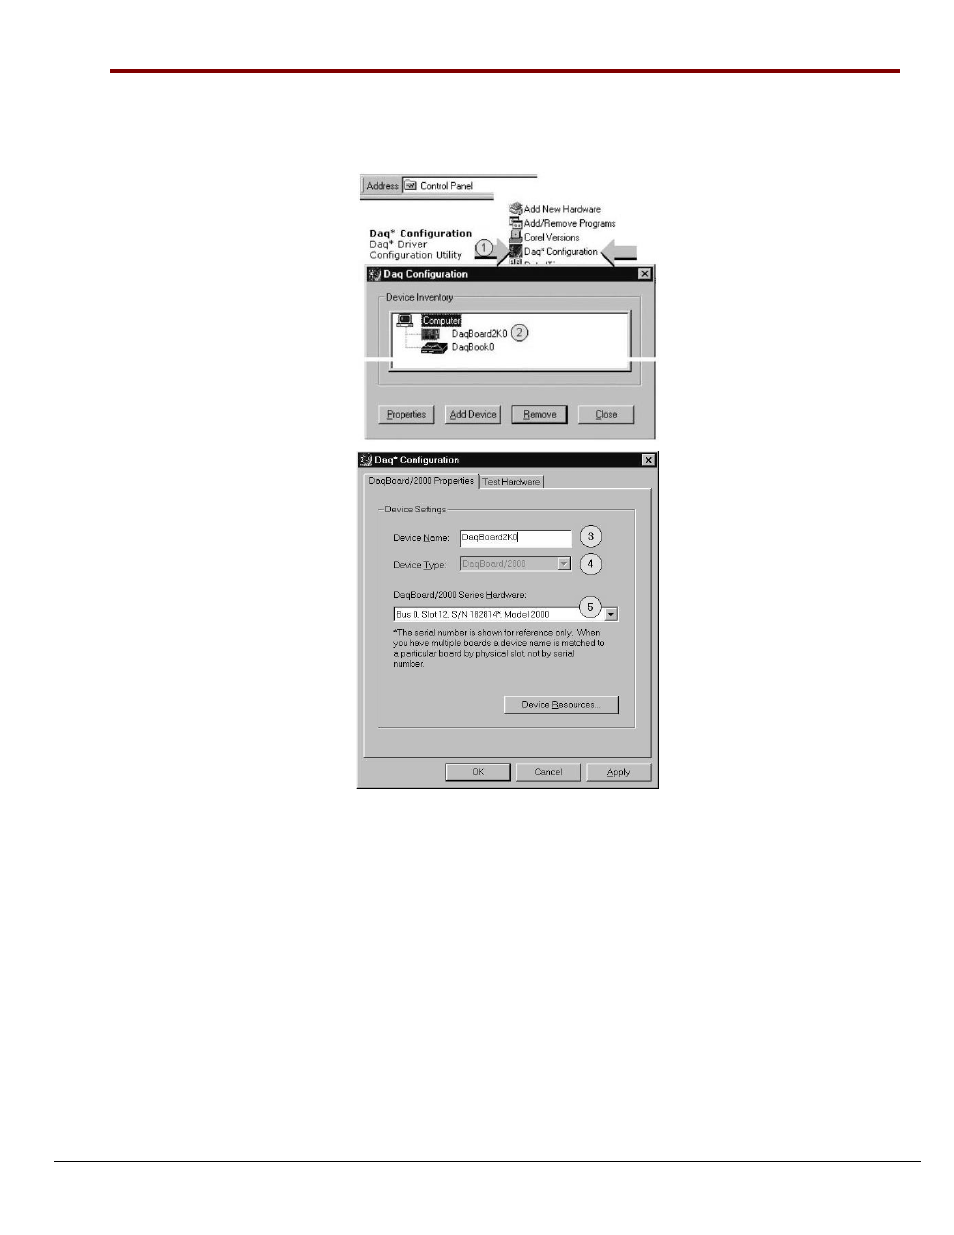
1. Run the Daq Configuration control panel applet. Navigation from the desktop to the applet is as follows:
Start
⇒ Settings ⇒ Control Panel ⇒ Daq*Configuration (double-click)
2. Double-click on the Device Inventory’s DaqBoard2K0 icon. The DaqBoard/2000 Properties tab (used for the
entire DaqBoard/2000 Series) will appear. If the DaqBoard2K0 icon is not present, skip to the Using ‘Add
Device’ section provided below.
3. Enter a “Device Name” in the text box, or use the default “DaqBoard2K0.” Device Name is for identifying the
specific DaqBoard/2000 Series board. Note that Device Name actually refers to the PCI slot and not to the
actual board.
4. Verify that the “Device Type” shows the correct DaqBoard/2000 Series board, e.g., “DaqBoard/2000,
DaqBoard/2001, etc.” Note that available device types can be viewed via the pull-down list (
▼).
5. Confirm that the DaqBoard/2000 Series text box shows a Bus #, Slot #, and Serial Number.
If this text box is empty, use its pull-down list (
▼) and select the serial number that matches the one for your
board.
Refer to the inside front cover page for serial number information.