2) make isa-daqboard connections – Measurement Computing DaqBoard-ISA User Manual
Page 16
2-4 Setup and Startup
02-10-02
DaqBoard-ISA User’s Manual
(2) Make ISA-DaqBoard Connections
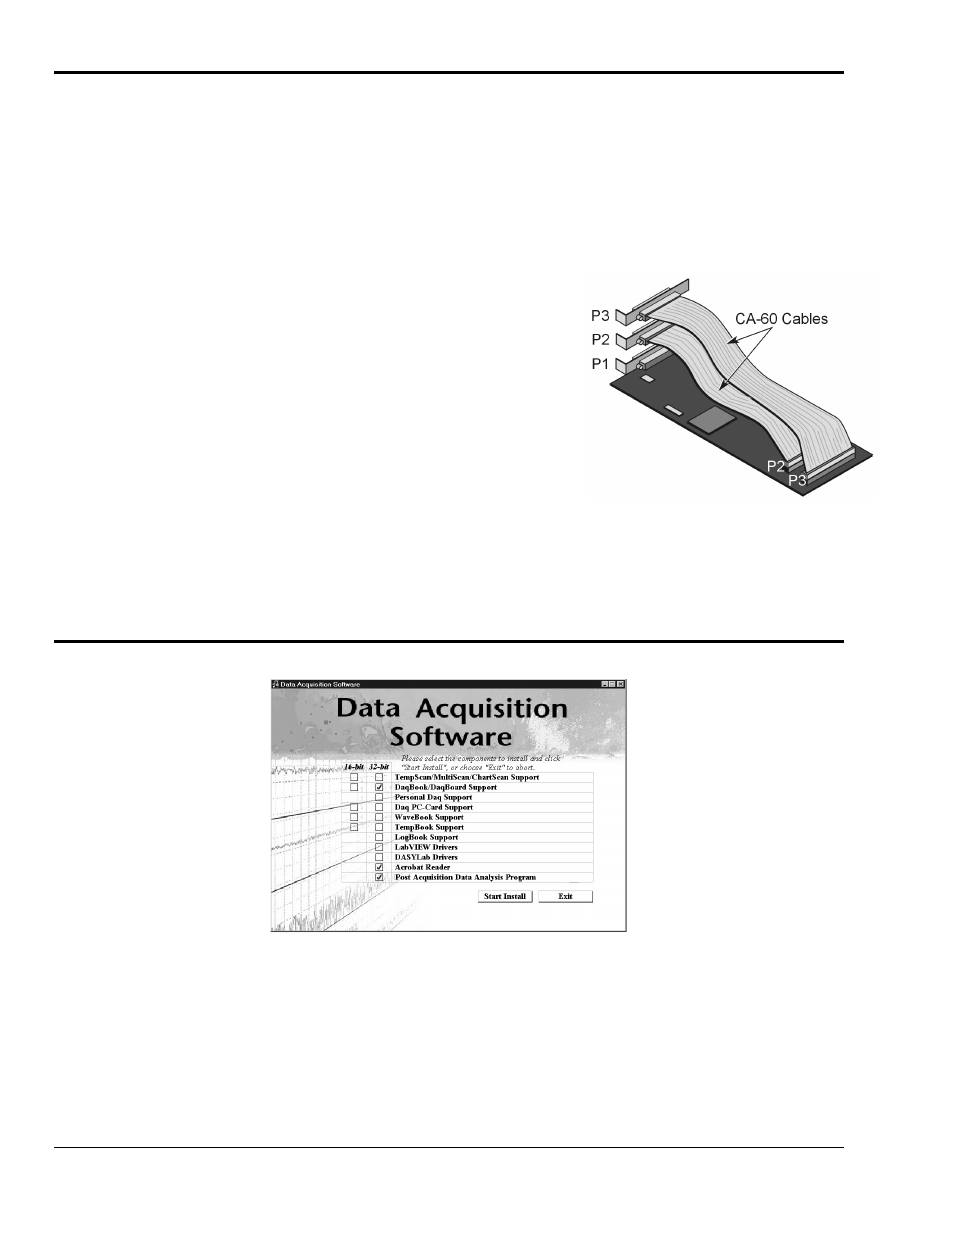
Before connecting your ISA-type DaqBoard, you should review the following connector descriptions.
P1 Analog I/O. Provides 16 analog input channels, 2 analog output channels, a 16-bit counter/timer,
four TTL inputs and outputs, and various signals for driving expansion cards.
P2 Digital I/O. Provides three 8-bit TTL programmable I/O ports and external interrupt input. To ensure
reliable operation, for P2 expansion cables do not exceed 14 inches per attached DBK card.
P3 Frequency I/O. Provides five 16-bit counters and 16 high-speed digital inputs and external interrupt
input.
(a)
Turn power OFF to the PC and all attached equipment.
(b)
Remove the PC’s cover. Refer to your PC Owner’s
Manual as needed.
(c)
Choose an empty 16-bit ISA slot. Loosen and remove the
screw at the top of the slot’s blank adapter plate. Then
slide the plate up and out to remove. Refer to your PC
Owner’s Manual as needed.
(d)
Align DaqBoard’s edge-connector with the desired ISA
slot, and with the PC’s corresponding rear-panel slot.
Gently press the board into the ISA slot.
(e)
Secure the board by inserting the rear-panel adapter-plate
screw.
(f)
If using P2, P3, or both, connect CA-60 cables to the
appropriate on-board P2 and/or P3 headers (see figure).
Secure the P2 and P3 panel connectors to the computer’s
back panel, as applicable.
(g)
Replace the computer’s cover. Plug in all cords and
cables; then apply power to the PC.
DaqBoard’s I/O Connectors
If used, P2 and P3 require cable CA-60.
(3) Install Software and Product Support Documentation
Data Acquisition Software, Master Setup Screen
(a)
Remove previous version Daq device drivers, if present. You can do this through Microsoft’s
Add/Remove Programs feature by navigating from your desktop as follows:
Start
⇒ Settings ⇒ Control Panel ⇒ Add/Remove Programs
(b)
Place the Data Acquisition CD into the CD-ROM drive. Wait for PC to auto-start the CD. This may
take a few moments, depending on your PC. If the CD does not auto-start, use the Desktop’s Start,
Run, Browse feature.
(c)
If a Licensing Agreement appears, read over the agreement, then click “Agree.” The Data Acquisition
Software Master Setup Screen appears (see previous figure).