Erase / wipe, 2 erase / wipe – Kanguru 5HD-SATA User Manual
Page 22
22
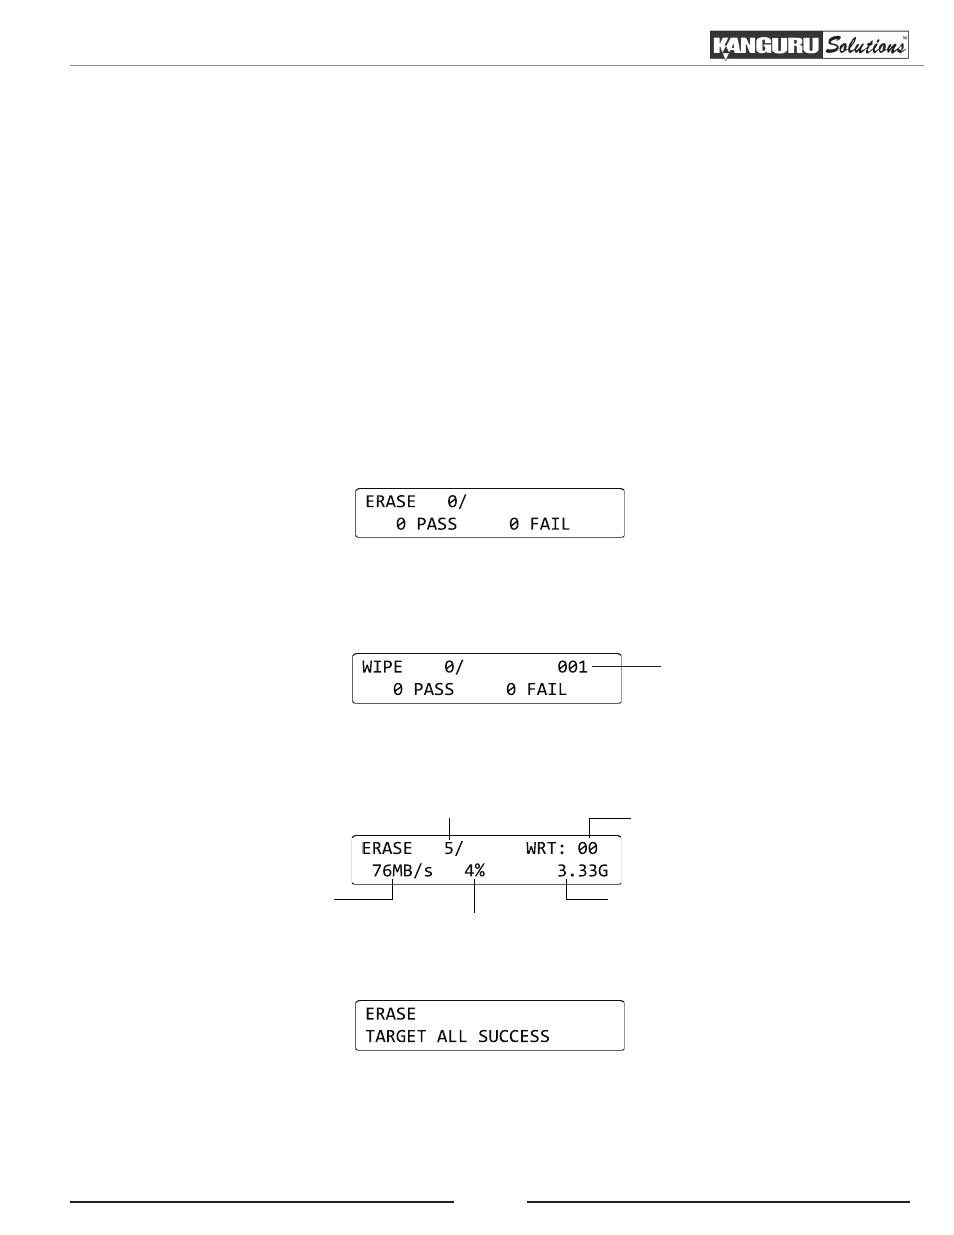
6.2 Erase / Wipe
ERASE deletes all information on any connected Target hard drives by writing zeros into each sector
of the hard drive, sector by sector.
Note: You can configure the Kanguru Clone Hard Drive duplicator to run a Wipe instead of an Erase.
Although the data is removed through the Erase operation, the data may still be retrievable with the
right tools. The Wipe permanently removes data, making it almost impossible to recover. For more
information on the Wipe operation, see section 7.3 HDD Wipe on page 26.
CAUTION! The Erase operation will delete all data and file systems on any attached Target hard
drives. Make sure that you back up any important data before executing the Erase operation. Only
hard drives connected to the Target ports will be erased. Any hard drives connected to the Source port
will not be affected by the Erase operation.
To Erase your hard drives:
1. From the Main menu, tap the ‘SET’ button to navigate to ERASE.
Note: If you have configured the HDD WIPE option under the Setup menu, then the Erase
option will appear as WIPE and will display the number of wipe cycles. For instructions for
changing the number of wipe cycles see section 7.3 HDD Wipe on page 26.
Number of wipe cycles
2. Connect your target hard drives to any available Target ports. Tap the ‘RUN’ button to begin the
Erase process. The following screen will be displayed:
Percentage completed
Capacity erased
Erase rate
Number of Target drives
Data being written
to each sector
3. Once the Erase process has completed, the following screen will be displayed:
A green LED indicator light will appear by the drives that have been erased successfully. A red LED
indicator light will appear by drives that failed to be erased.
4. Tap the ‘SET’ button to return to the Main menu.
Erase / Wipe