Kanguru 5HD-SATA User Manual
Page 20
20
4. Tap the ‘RUN’ button to change the SEL IMG FILE option.
a) The file name consists of three digits. The digit furthest to the right will be blinking, indicating
that it is currently selected. Tap the ‘RUN’ button to increase the digit by one.
b) Tap the ‘SET’ button to select the next digit to the left. Tap the ‘RUN’ button to increase the
digit by one. Repeat this step as necessary.
5. Hold the ‘RUN’ button when you have completed selecting the image file name.
6. Hold the ‘SET’ button to return to the Main menu.
7. From the Main menu, tap the ‘SET’ button to navigate to the desired copy mode.
8. Connect your Target drives into any available target ports.
9. Tap the ‘RUN’ button to execute. Once all connected disks have been detected and initialized, the
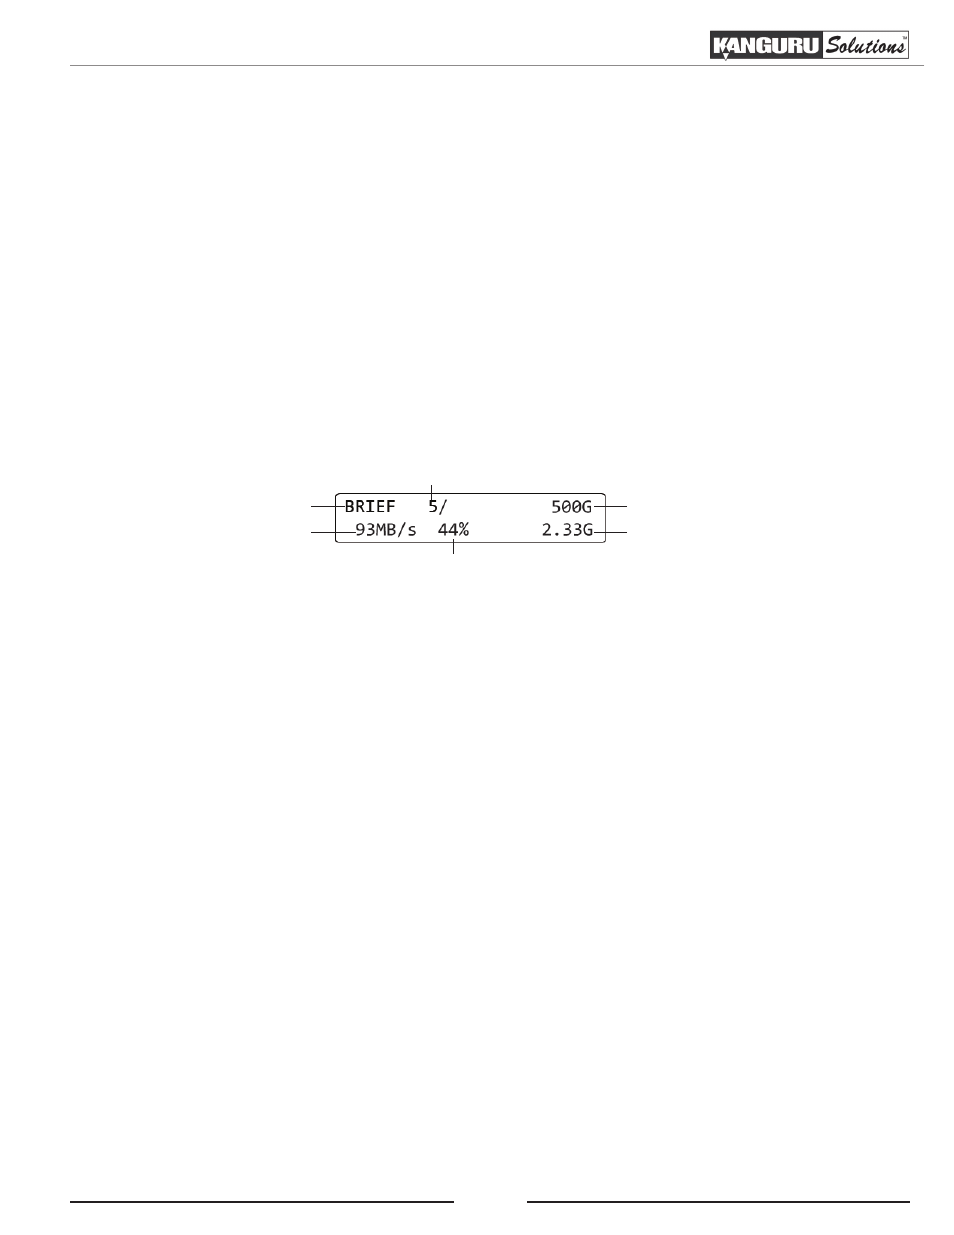
duplication process begins. During duplication the screen will display the following information:
Copy mode
Transfer rate
# of targets
% completed
Size of Source data
Data copied
WARNING! Do not remove any drives while they are in use. You can tell if a drive is in use if the
green LED next to it is blinking. Wait for a solid green or red LED before removing a drive. If you
want to interrupt the current process, tap the ‘RUN’ or ‘SET’ button.
Note: If you receive the following error message: “NO DATA FOUND”, then the image file that you
selected does not contain any data. Either select a different image file or Load the data from a Master
HDD to that image file.
10. Once the copy process is completed, Target drives that completed successfully will have a green
LED displayed next to it, indicating that there were no errors on that drive. Target drives that
failed the duplication process will display a red LED next to it.
Note: The duplicator will keep a running count of passed and failed drives until you change copy
modes.
Duplicating an Image Stored on a Storage Center