9general installation – Infloor Standard Electric Cable User Manual
Page 9
Infloor Installation Manual
9
General Installation
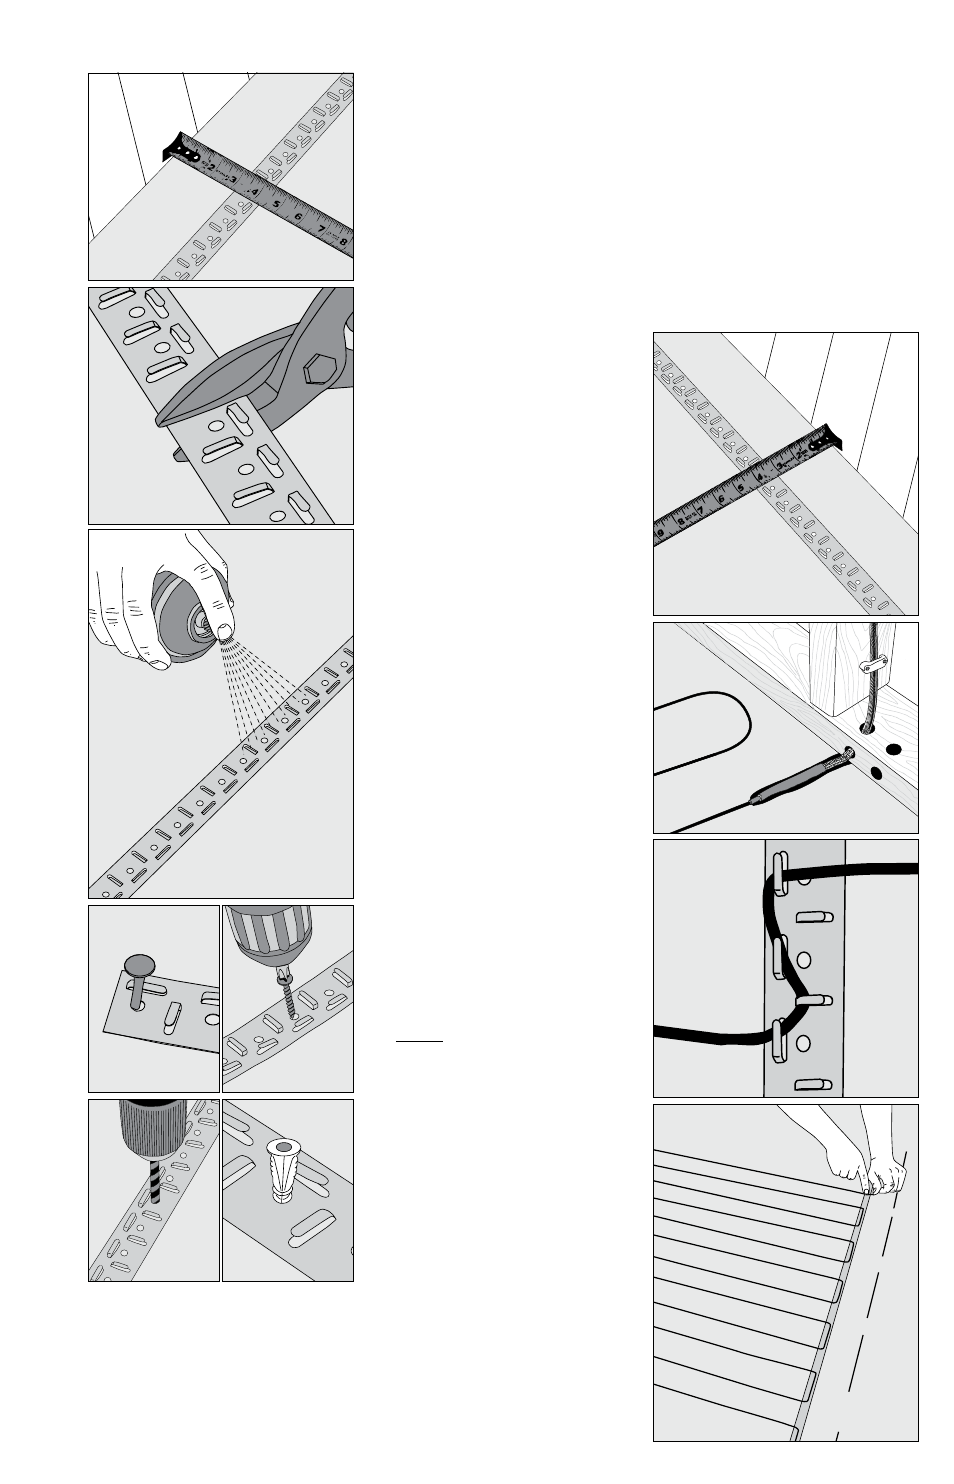
STEP 5.5 Measure about 3” from the wall for the strap . In counter or vanity
kick-spaces, install the strap so the cable will be 1-1/2” to 2” away from the
vanity base .
STEP 5.6 Cut the strap to fit the length of the first area .
STEP 5.7 Secure the strap to the floor . Depending on the floor type, differ-
ent methods may be used . Refer to the instructions provided with the strap
for full details .
· Plywood, cement board, or similar: Galvanized nails or screws may be
used to secure the strap every 6” to 10” .
· Concrete or similar: Concrete nails or similar. Double-sided tape (if
factory supplied with your cable), hot glue, or strong spray adhesive may
be used if the floor is well cleaned
and the strap is wiped free of any oils .
However, it is highly recommended to
also screw the strap down in several
places to ensure it does not come
loose . If using a strong spray adhesive,
apply to both the back of the strap
and the floor where it will be placed,
and carefully follow all spray manufac-
turer’s instructions and cautions .
STEP 5.8 Cut another piece of strap
for the other end of the area and
secure 3” from the wall(s) or other
obstruction(s) .
STEP 5.9 Unreel the power leads of
the cable up to the factory splice . Let
the coil of power leads sit on the floor
for now . Beyond the factory splice is
the heating cable itself . Factory splice
must be installed in the mortar bed .
CAUTION: Completely embed the
factory splices and heating cable in
the mortar, and never bend the fac-
tory splices. NEVER allow any part of
the splice or heating cable to enter a
wall or drop through the subfloor.
STEP 5.10 Before installing more
strap, fill in the first section with cable .
Begin by making a “strain-relief” at the
beginning so the cable is not acciden-
tally pulled loose . Zigzag the cable
under the tabs only as shown . Press
the tabs down to secure the cable .
STEP 5.11 Weave the cable back and
forth across the area at the desired
spacing until the other side of the
room has been reached . Once this
area is completed, press down all the
tabs . NEVER space the cables less than
2” apart .
STEP 5.12 If there are additional
areas to cover with cable, cut the
lengths of strap necessary, attach
them to the floor, and begin weaving
the cable into that area .
STEP 5.8
STEP 5.10
STEP 5.11
STEP 5.9
STEP 5.5
STEP 5.7
STEP 5.6