Other installations – Infloor Standard Electric Cable User Manual
Page 10
10
Infloor Installation Manual
Other Installations
Because many different room
shapes and floor obstructions
may be encountered in any given
installation, additional layouts
are provided below to assist in
determining the best way to
complete installations in odd-
shaped areas .
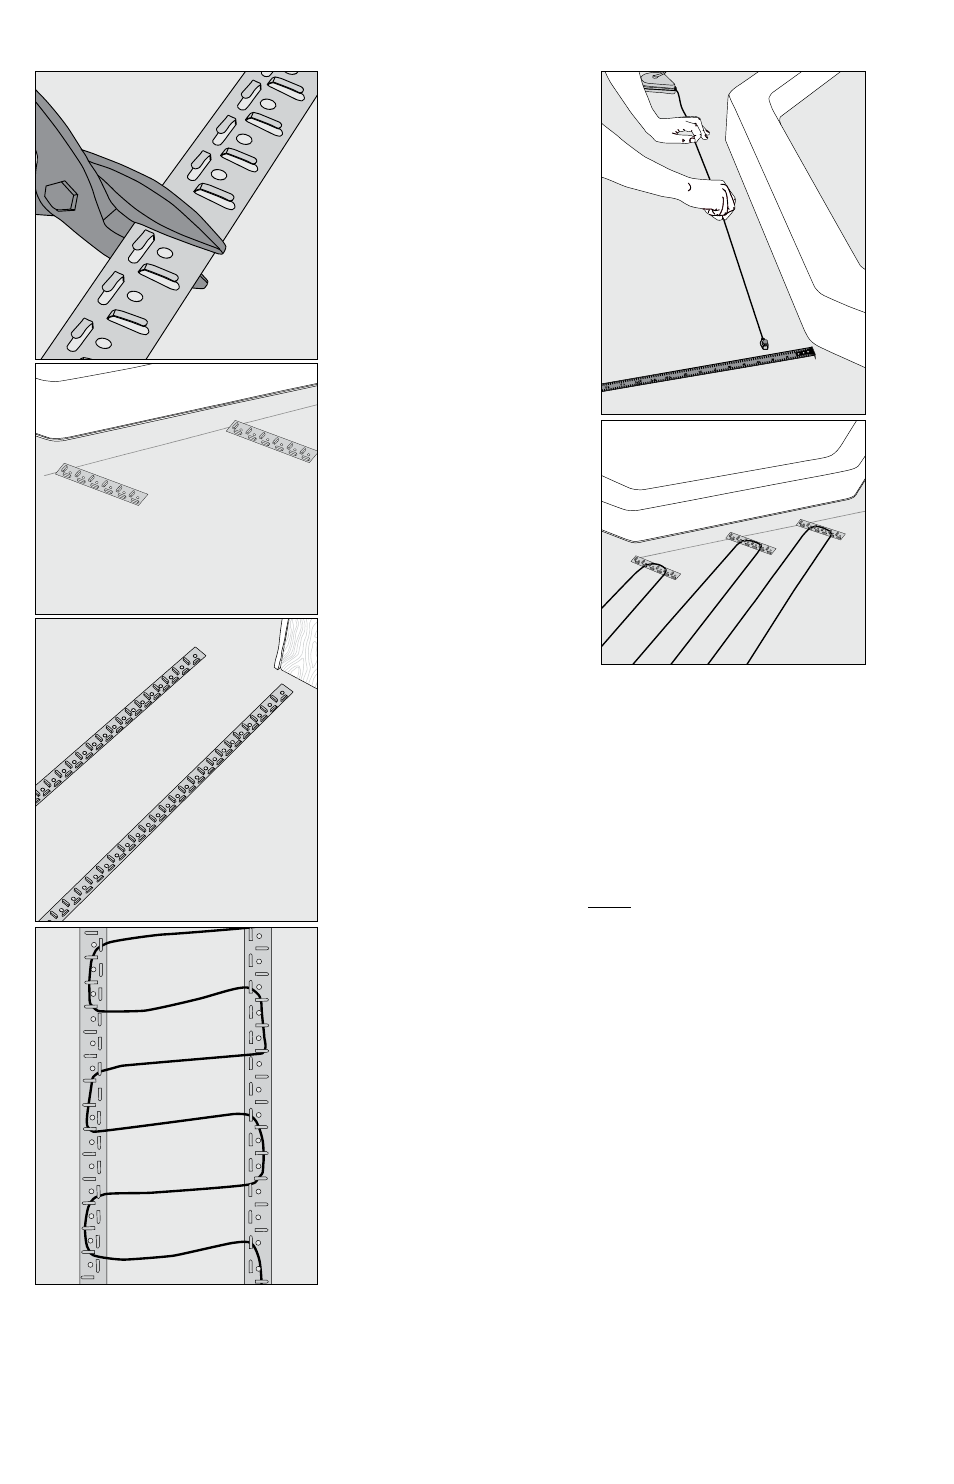
Corner shower or vanity
STEP 5.13 For an angled area,
such as a corner shower, first cut
several pieces of strap a little longer
than the cable spacing being used .
STEP 5.14 Use a chalk line or pen
to mark the floor at 3” from the
edge of the shower .
STEP 5.15 Use this chalk line to
attach each piece of strap to the
floor so that the cable does not get
any closer to the corner shower
than 3” . Make sure that the cables
are spaced evenly and parallel to
one another .
STEP 5.16 Fill in the section with
cable .
Door entryway
STEP 5.17 For an entryway or
other small area where warmth is
required, begin by cutting two lengths of strap a little shorter than the
length of the entry opening . Then secure the two straps parallel to each
other .
STEP 5.18 Fill in with cable, adjusting spacing as necessary to fill in as
much of the area as possible .
Bench Seat
STEP 5.19 If covering a bench seat or step area (not in a shower area),
place a single run up the riser . Use straps to secure the cable to the seat
area at the desired spacing, then install a single run down the riser . Again,
the cable on the riser and seat area MUST be fully embedded in mortar
and have approved floor coverings . Use hot glue where necessary to
secure the cable flat against the riser .
Shower area installation
This application into a shower area must be verified by the local inspector
or the authority having jurisdiction.
STEP 5.20 Type (-W) cable (see UL Label on product) may be installed
into a floor or bench seat located in a shower area. It must never be
installed into walls. In general, the cable should be completely embedded
into mortar directly below the surface coverings of tile or stone. Other
types of coverings are not recommended. It may be installed into a mor-
tar layer lower than this and beneath the waterproof system, however
performance will be reduced.
See Appendix 5 for an example of this type installation.
Consider installing a dedicated cable in the shower area separate from
the rest of the bath floor. In case there is ever a problem with the shower
installation, this cable could be disconnected without loss of heat to the
rest of the floor.
STEP 5.21 Make sure the power lead factory splice (the connection
between the power leads and the heating cable) is located outside the
shower area and at least 1’ away from shower openings and other similar
areas normally exposed to water. Make sure the control is located at least
4’ away from shower openings such that it cannot be exposed to water or
touched by a person in the shower area.
STEP 5.22 If the heating cable must enter the shower area over a curb,
notch the corners of the curb with a minimum 1” wide notch to ensure
the cable is not bent sharply or pinched when surface coverings are
STEP 5.16
STEP 5.14
STEP 5.13
STEP 5.17
STEP 5.15
STEP 5.18