Using the multiple gel caster, Casting homogenous gels – Hoefer SE900 User Manual
Page 17
• p11
Using the Multiple Gel Caster
Casting Homogenous Gels
1
Make sure the caster and the glass cassettes are clean and dry.
2
Close each of the glass cassettes making sure the edges align flush.
3
Disassemble the clean multiple gel caster, and lay the back of the
caster flat on the bench.
4
The two faceplate screws should be loosened, but can remain in place.
5
The triangular gasket should be put in place.
6
Place the space saver in the back of the caster.
7
Place a separator sheet over the space saver.
8
Place a glass cassette on top of the first separator sheet.
9
Place a separator sheet over the glass cassette.
10 Continue to stack alternating glass cassettes and separator sheets for
each gel being cast.
11 Complete the assembly by adding enough separator sheets to fill the
caster just above flush.
12 Lightly grease the gasket in the faceplate with gel seal to assure a leak
free casting. Replace the gasket in the faceplate without bunching or
stretching the gasket.
13 Complete the assembly with a separator sheet.
14 Slide the faceplate into place under the two screws and tighten
the screws.
15 Attach the 6 red clamps, 3 per side, along the sides of the caster.
16 Make sure the cap is on the bottom port of the caster before pouring
gels by hand.
17 Stand the assembled caster upright on a level surface.
Note: If desired, labels printed on filter paper
can be included in the cassette. Sheets of
#1 Whatman filter paper can be used to
print gel id numbers, cut into small pieces
and positioned in the bottom corners of the
cassette. When gel solutions are added the
numbers will be polymerized into the gel
matrix allowing for easier identification of
second dimension gels.
Caution! Glass edges may be sharp so handle
glass cassettes with care.
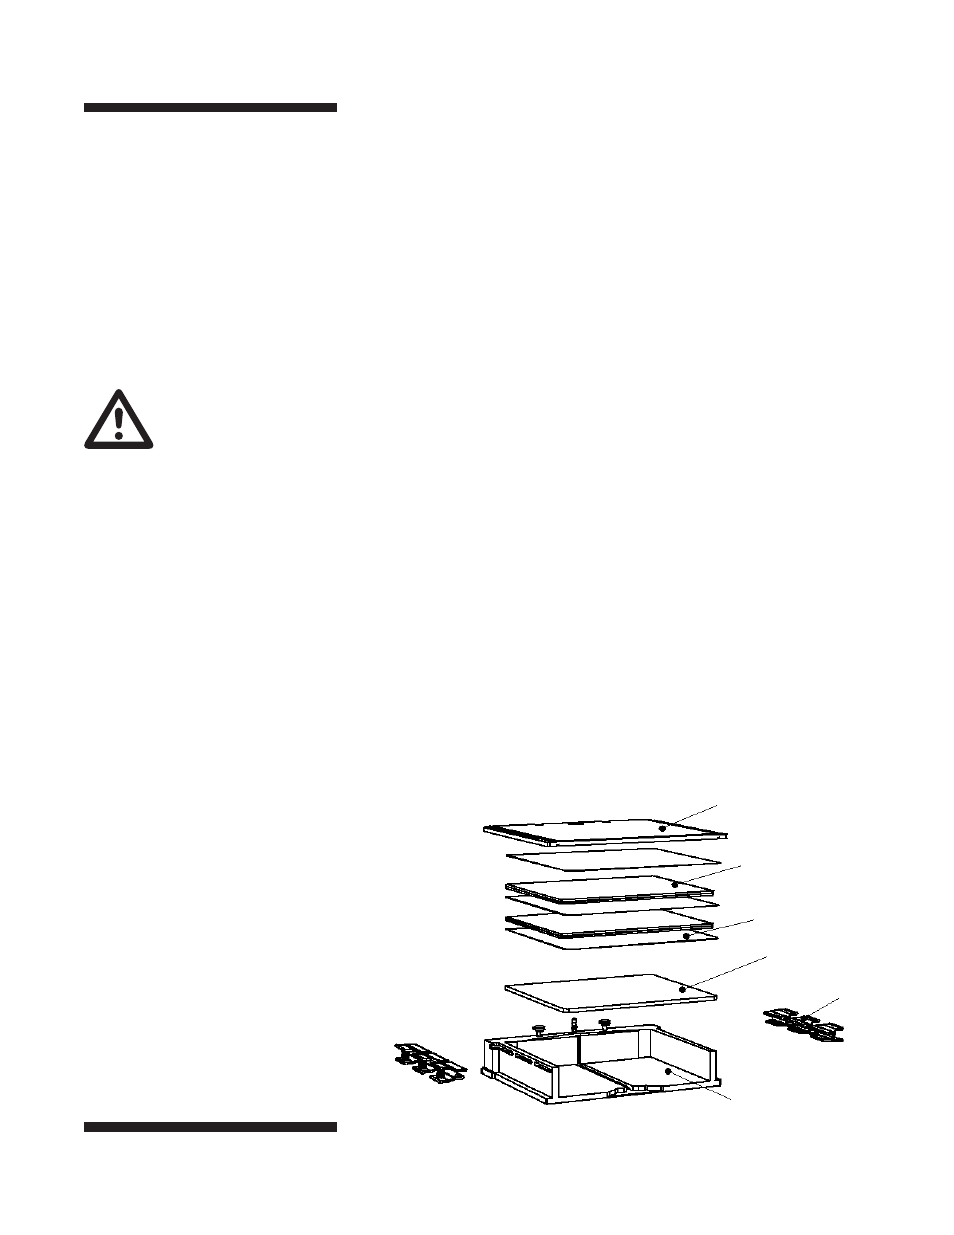
Fig 14. Multicaster assembly.
Face Plate
Glass Cassette
Separator Sheet
Space Saver
Red Clamp
Multiple Gel Caster