Mast tang assembly installing mast tangs, Installing mast tang and wire assembly – Harken 252 Lazy Jack kit User Manual
Page 3
Top View
Tangs installed
on widest part
of mast
Mast Tang
Assembly
Installing Mast Tangs
Measurement
from
Chart A
Installing Mast Tang and Wire Assembly
If you are installing the system with the mast up, you will need to take up the follow-
ing parts in the bosun's chair or send them up with a messenger line. (Follow all
precautions to insure the safety of the person aloft. Make sure no one is standing
where they could be hit with dropped tools.)
WARNING! When drilling through mast, do not let drill bit contact the halyard that
is holding you aloft! This may cause the halyard to fail. Limit depth.
Tape measure
Screw Method
Port and starboard templates (attached to pg. 3) Drill with
5
/
32
" (4 mm) drill bit
Tape for template
#10-32 Tap and handle
Tang assembly including wires and blocks
Slotted screw driver
Hammer
10-32 x
3
/
8
" (10 mm) Trusshead
Center punch
machine screws
Rivet Method
Drill with
13
/
64
" (5 mm) drill bit
Rivet gun and rivets
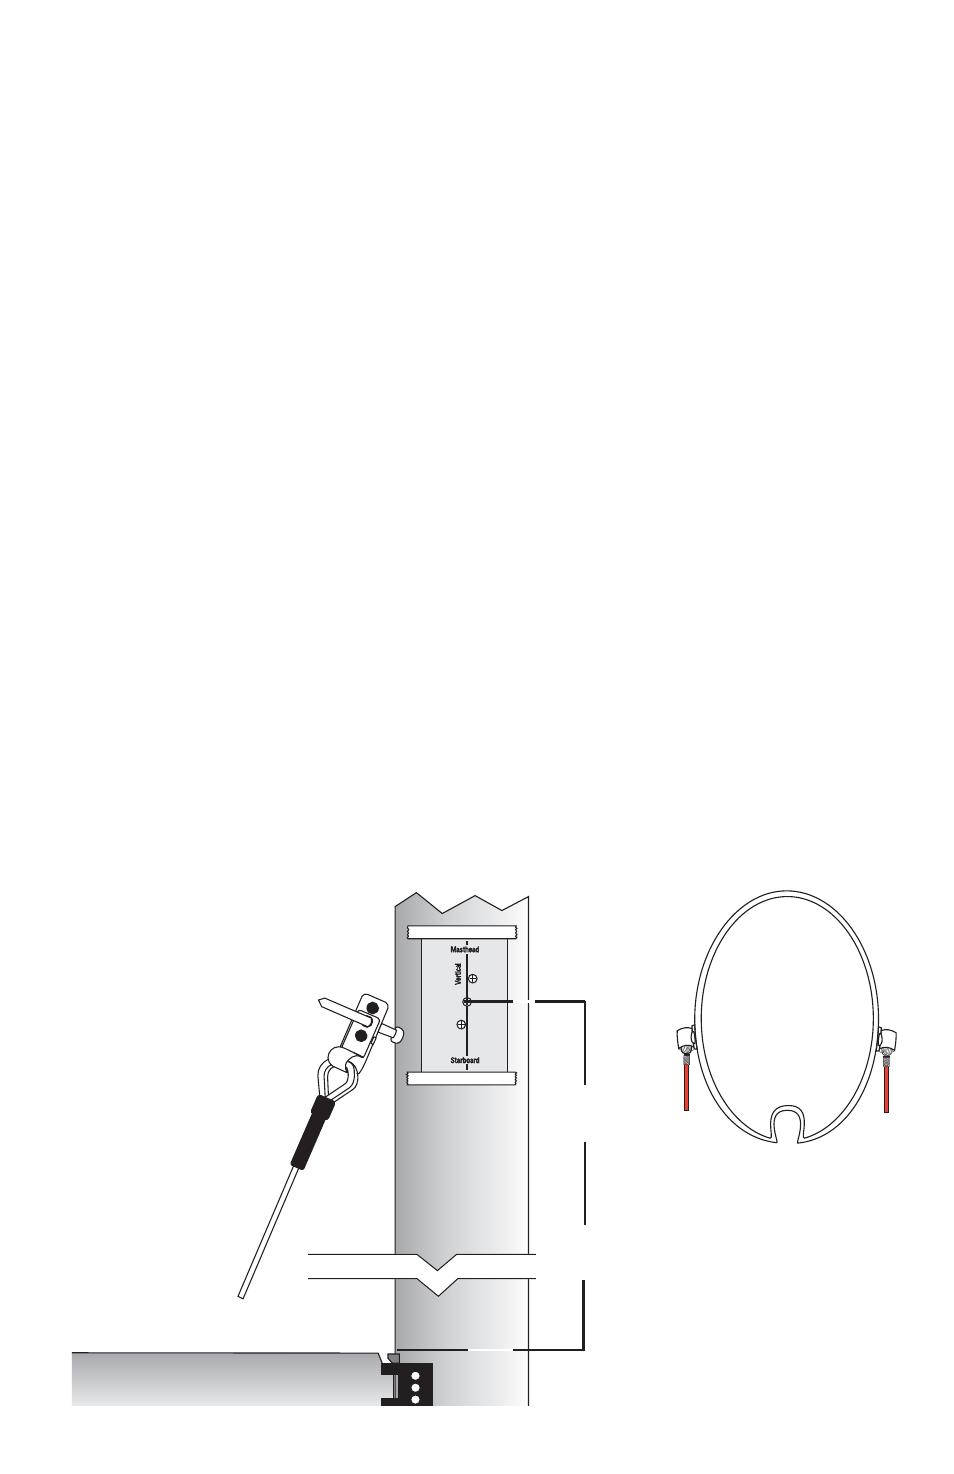
Note: before going up the mast, insert the middle screw or rivet into the tang.
Squeeze the top and bottom of the tang together to insert the screw or rivet. It
may be necessary to use a pliers or vice grips.
Measure up from the top of the boom to the height from chart A (page 2).
Moveable Gooseneck - If the gooseneck is capable of moving up and down, measure
from the top of the boom when the boom is positioned in its normal sailing position.
Mark the mast at this point.
Tape the template to the side of the mast so the middle hole is even with your mark.
Line the template up so the vertical line is parallel to the side of the mast. See
drawing below.
Use a center punch to mark three tang holes. Remove template and drill three holes:
Screws
5
/
32
" (4 mm) & Tap #10-32
Rivets
13
/
64
" (5 mm).
Attach tang starting from center hole.
3