Radial gap and alignment, Motor change-out procedure – Greenheck Vektor-MH, Vektor-MD, and Vektor-MS (464652) User Manual
Page 18
High Strength Metal Disc Coupling
Installation and Alignment
Direct Drive
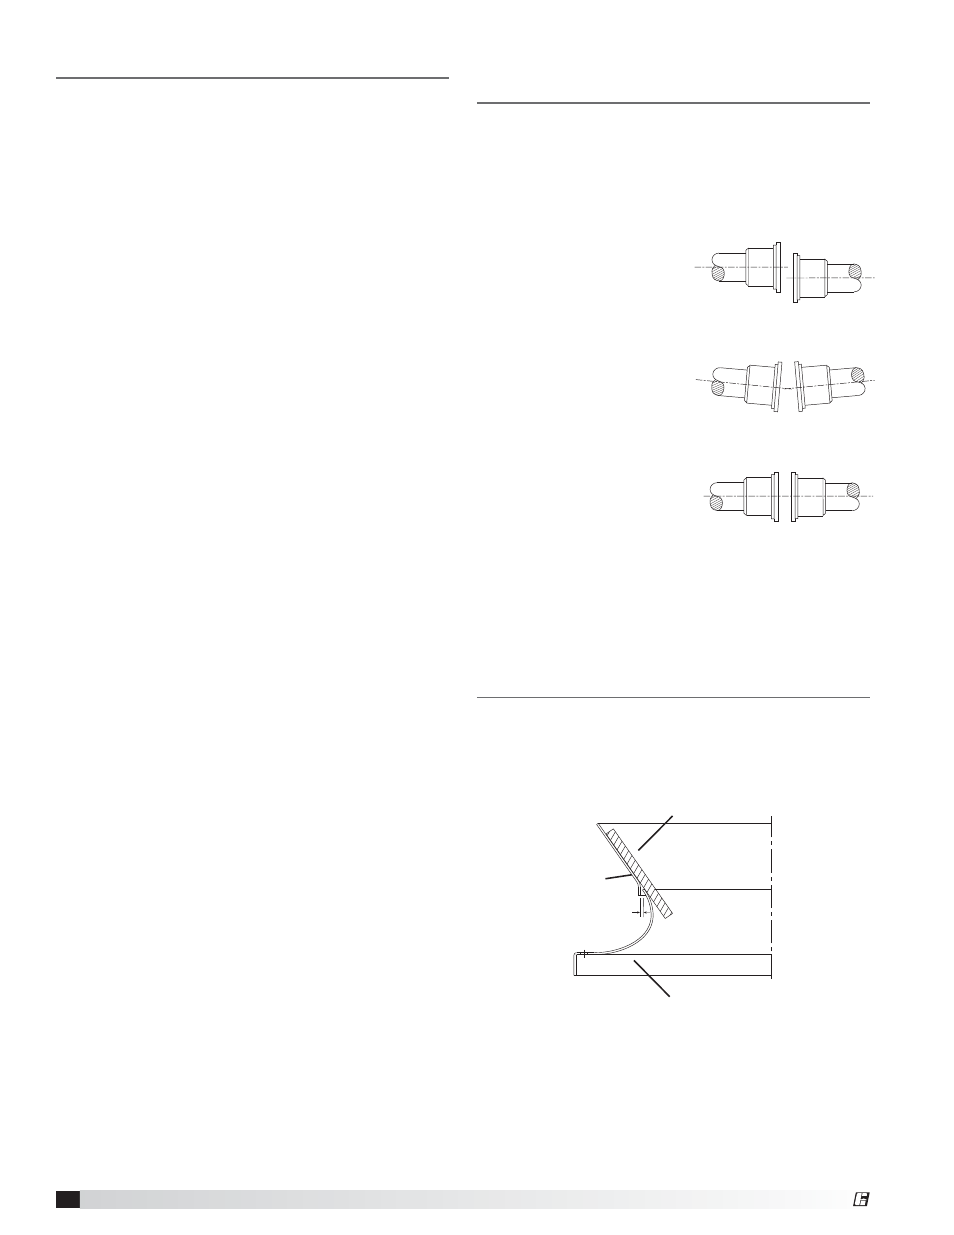
Check for misalignment between the two coupling
hubs. The three types of misalignment (parallel, angular,
and separation gap) are illustrated below. To minimize
misalignment between the hubs, a straight edge can be
used as a quick guide in aligning the shafts.
The Vektor direct drive
single shaft bearing permits
the shaft to swivel and
essentially eliminates parallel
misalignment.
But an excessive angle in
the fan shaft will cause a
higher degree of angular
misalignment. It is best to have
the motor shaft and fan shaft
as close to parallel as possible.
The coupling provided allows
up to one degree of angular
misalignment between the two
joining hubs. No lubrication of
the coupling is required.
Refer to the coupling
manufacturer’s information / installation instruction
sheet provided with the fan for additional details.
Coupling should not be installed to support the weight
of the fan shaft and wheel.
Parallel
Angular
Separation
Radial Gap and Alignment
Efficient fan performance can be maintained by having
the correct radial gap and alignment. These items
should be checked before start-up when the unit has
been disassembled.
Straight Edge
Wheel Cone
Inlet Cone
Radial Gap: Adjust inlet cone position such that the
radial gap between the wheel cone and inlet cone is
evenly distributed around the wheel.
Alignment: If necessary, adjust wheel position by
loosening the wheel hub from the fan shaft so that a
straight edge held tight to the wheel cone just touches
the inlet cone.
Radial Gap
Motor Change-Out Procedure
Direct Drive
To remove the motor:
1. Install jib crane* in plenum mounting socket using
Greenheck supplied hardware.
2. Position jib crane boom above windband.
3. Utilizing windband lifting lugs, rig windband to jib
crane cable.
4. Remove all bolts used to secure windband to
nozzle.
5. Lift off windband and lower to rooftop.
6. Reposition jib crane boom above fan.
7. Lower jib crane cable through center of fan until it
reaches the motor.
8. Remove bolts securing the motor to its horizontal
mounting plate.
9. Decouple motor shaft from wheel shaft by
disassembling coupling.
10. Rig motor to jib crane cable.
11. Lift motor out of fan body and lower to rooftop.
To install the new motor:
1. Rig new motor to jib crane cable.
2. Attach coupling half to motor shaft. Make sure
coupling hub is flush with the end of the motor
shaft.
3. Position motor above fan body and carefully lower
to its intended mounting position.
4. Ensure motor is positioned correctly so mounting
bolts can be re-installed.
5. Install all coupling bolts to attach the motor shaft to
the fan wheel shaft.
6. Install all bolts to attach motor to fan body
mounting plate.
The Vektor fan was designed to ensure that when the
new motor is installed, the relative angular alignment
of the motor shaft to fan wheel shaft will be within
+/-1 degree.
*If jib crane was not supplied with the Vektor system, a
portable crane or hoist can be used.
18
Laboratory Exhaust Systems
®