Bearing replacement – Greenheck Vektor-MH, Vektor-MD, and Vektor-MS (464652) User Manual
Page 16
Bearing Replacement
The intent of this Vektor fan design with its large side
access openings is to allow a field service technician
to replace bearings with the fan remaining in place in
its intended application. All work can be conducted
by accessing the bearings through the blower housing
side access openings. This procedure assumes power
source has been locked out prior to removing guards
and covers, belts and pulleys have been loosened and
removed properly and extended lubrication lines have
been disconnected at the bearing. In some cases it may
be necessary to remove the motor and mounting plate.
It may also be necessary to remove the fan inlet cone
and wheel if the bearings cannot be removed due to
corrosion or damage. See Radial Gap and Alignment
section to realign wheel upon installation.
Belt Drive
This procedure assumes proper safety measures have
been taken and the driven sheaves and belts have
already been removed. Shaft black coating can be
removed with a solvent similar to brake cleaner. Read
through these directions completely prior to starting this
procedure.
1. Scribe line at the top of both the top and bottom
bearings. These marks are used to locate the proper
mounting position for the new bearings
2. Loosen and remove top bearing from fan shaft. Use
spanner wrench or blunt punch to loosen bearing.
Follow bearing manufacturer’s instructions on
removal. An emery cloth may be required to clean
and remove burrs off shaft. Finish removing top
bearing.
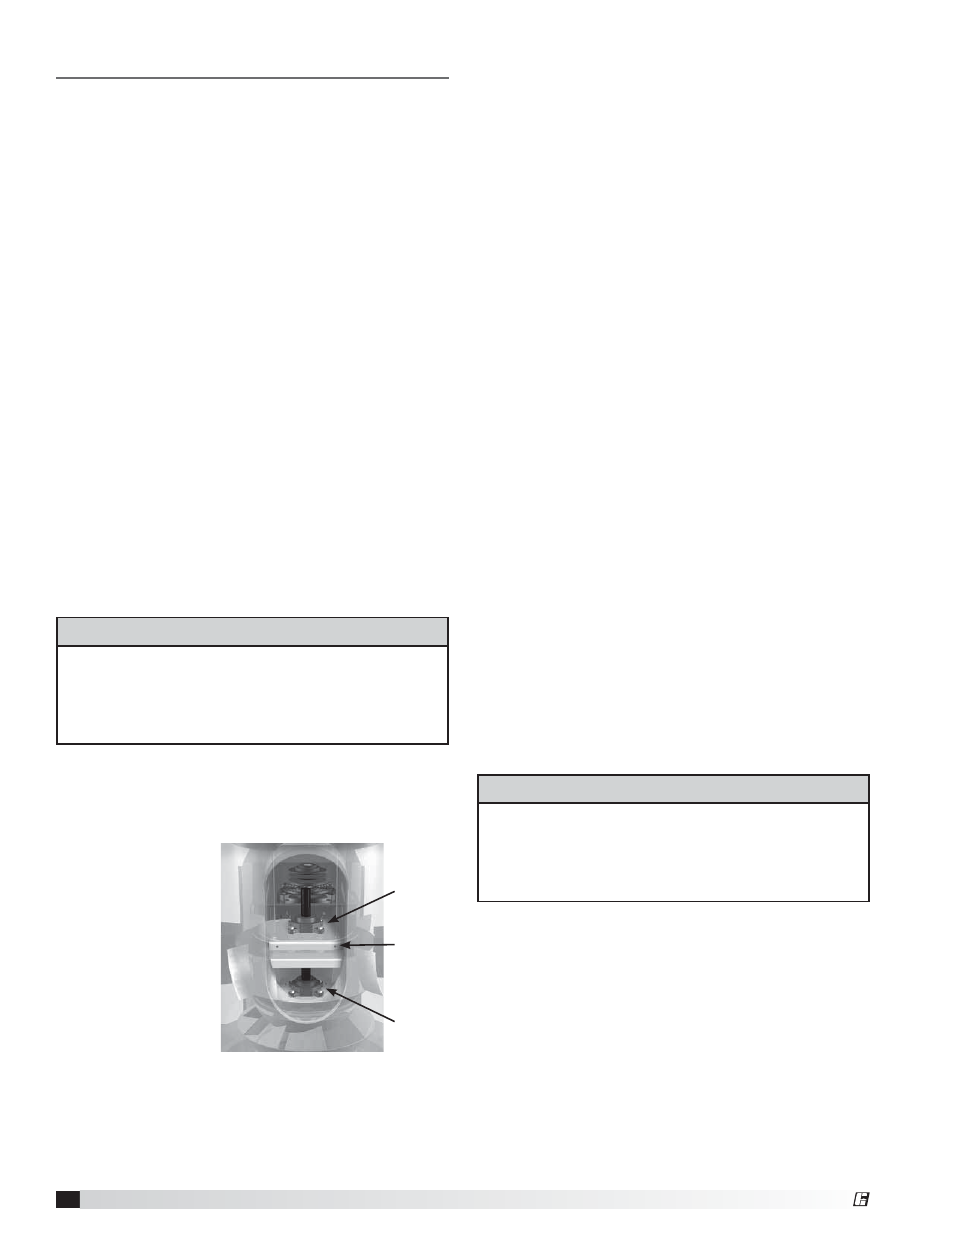
3. Install two shaft
collars flush with
the top support
plate to hold and
support the shaft
when removing
bottom bearing.
4. Loosen bottom
bearing. Caulk
seal may need
to be broken
around perimeter
of flange housing and bottom support plate. Use
emery cloth to clean shaft and remove any burrs.
5. Install second set of shaft collars flush with top of
bottom support plate.
6. Remove shaft collars on top support plate and
Top
Bearing
Support
Plate
Bottom
Bearing
EQUIPMENT REQUIRED
• Four shaft collars
• Emery cloth
• Caulk
• Replacement bearings
• Spanner wrench and sockets
finish removing bottom bearing.
7. Install new bottom bearing in reverse of this
procedure. Remember to re-install top set of shaft
collars prior to removing lower shaft collars.
8. Align the top of the bearing with the scribed mark
indicating the correct mounting location. Secure
lower bearing to bottom support plate. Do not
secure the bearing to the fan shaft.
9. Turn the wheel approximately 20 – 30 rotations
to allow the shaft to properly set in the bottom
bearing.
10. Finish installing bearing on fan shaft according
to bearing manufacturer’s installation procedure.
Rotate the wheel again for 20 rotations. If resistance
is felt the bearing did not set properly. Reset the
shaft in the bearing.
11. Remove top set of shaft collars and install top
bearing according to bearing manufacturer’s
instructions making sure the top of the bearing
lines up with scribed mark indicating the correct
mounting location.
12. Connect extended lube lines to new bearings. Zerk
fittings from old bearings may need to be installed
in replacement bearings
13. Reinstall drive sheave and belts. Check for
alignment.
14. Caulk around bottom bearing flange for an
improved water tight seal.
Direct Drive
This procedure assumes proper safety measures have
been taken and power locked out prior working on fan
shaft / motor assembly. Shaft black coating can be
removed with a solvent similar to brake cleaner. Read
through these directions completely prior to starting this
procedure.
1. Scribe line at the top of the shaft bearing and
also under the lower coupling halve on the fan
shaft. These marks are used to locate the proper
mounting positions when reassembling the fan.
2. Open side access panel and place blocking
materials under wheel to prevent it from shifting
down during bearing replacement.
EQUIPMENT REQUIRED
• Blocking materials
• Emery cloth
• Caulk
• Replacement bearing
• Spanner wrench and sockets
16
Laboratory Exhaust Systems
®