Fixed preset registration/cancel, Free size preset registration/cancel – Formax FD 4170 User Manual
Page 17
13
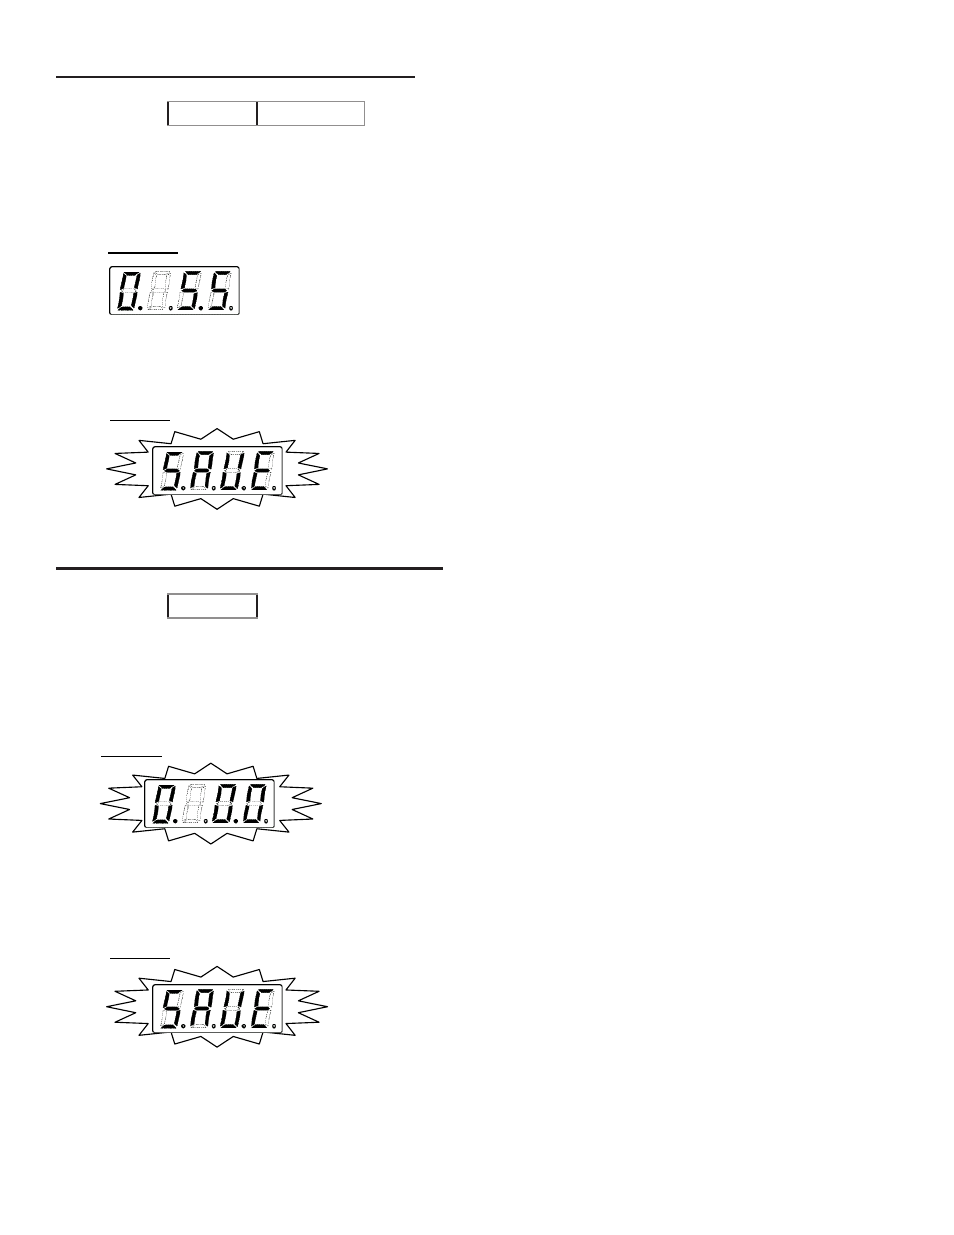
TO INPUT FREE SIZE PRESET
1.
Select preset No. 13 by pressing the speed up or speed down button.
2.
Input the cut size by pressing the “+” and the “-” buttons.
To add more presets, repeat steps 1 and 2.
TO CANCEL FREE SIZE PRESET
Example:
No. 13
5.5”
3.
Fixed/Free Size Preset Setting is saved by pressing the JOG button.
* The display blinks while being accepted. Do not turn off power during this stage.
■
Fixed Preset Registration/Cancel
z
Fixed Preset Registration
Example: No.0 8.5” x 11” Vertical 2-cut
1. Select preset No.0 by pressing the speed up key and the slow down key.
* The display blinks before registration.
2. Press the + key to register preset.
Blinking
27
Lights up
* When you desire to continue registration, repeat the above procedures 1 and 2.
3. Fixed/Free Size Preset Setting is registered all at once by pressing the JOG key.
* The display blinks while registration is in process. Do not turn off the power.
Blinking
z
Fixed Preset Cancel
Example: No.0 8.5” x 11” Vertical 2-cut
1. Select preset No.0 by pressing the speed up key and the slow down key.
2. Press the – key to cancel preset.
Lights up Blinking
* When you desire to continue cancel, repeat the above procedures 1 and 2.
3. Cancel of Fixed/Free Size Preset Setting is registered all at once by pressing the JOG key.
* The display blinks while registration is in process. Do not turn off the power.
Blinking
[ NOTE ]
Do not turn off the power while registration is in process. If it is turned off by mistake, please
register the setting again.
1.
Select preset No. 13 by pressing the speed up or speed down button.
2.
Set cut size to “0”.
To cancel more presets, repeat steps 1 and 2.
3.
Fixed/Free Size Preset Setting is cancelled all at once by pressing the JOG button.
* The display blinks while being accepted. Do not turn off power during this stage.
■
Fixed Preset Registration/Cancel
z
Fixed Preset Registration
Example: No.0 8.5” x 11” Vertical 2-cut
1. Select preset No.0 by pressing the speed up key and the slow down key.
* The display blinks before registration.
2. Press the + key to register preset.
Blinking
27
Lights up
* When you desire to continue registration, repeat the above procedures 1 and 2.
3. Fixed/Free Size Preset Setting is registered all at once by pressing the JOG key.
* The display blinks while registration is in process. Do not turn off the power.
Blinking
z
Fixed Preset Cancel
Example: No.0 8.5” x 11” Vertical 2-cut
1. Select preset No.0 by pressing the speed up key and the slow down key.
2. Press the – key to cancel preset.
Lights up Blinking
* When you desire to continue cancel, repeat the above procedures 1 and 2.
3. Cancel of Fixed/Free Size Preset Setting is registered all at once by pressing the JOG key.
* The display blinks while registration is in process. Do not turn off the power.
Blinking
[ NOTE ]
Do not turn off the power while registration is in process. If it is turned off by mistake, please
register the setting again.
■
Free Size Preset Registration/Cancel
z
Free Size Preset Registration
Example: No.13 5.5”
1. Select preset No.13 by pressing the speed up key and the slow down key.
2. Input cut size by pressing the + key and the – key
.
Lights up
* When you desire to continue registration, repeat the above procedures 1 and 2.
3. Fixed/Free Size Preset Setting is registered all at once by pressing the JOG key.
* The display blinks while registration is in process. Do not turn off the power.
Blinking
z
Free Size Preset Cancel
Example: No.13
1. Select preset No.13
by pressing the speed up key and the slow down key.
2. Set cut size to “0”.
Blinking
* When you desire to cancel registration, repeat the above procedures 1 and 2.
3. Cancel of Fixed/Free Size Preset Setting is registered all at once by pressing the JOG key.
* The display blinks while registration is in process. Do not turn off the power.
Blinking
28
[ REFERENCE ]
When cut size is 2.5 - 9.9 inches: preset is available.
When cut size is 0: preset is cancelled.
To register non-cut process (just feeding): register “PASS” in Fixed Preset.
[ NOTE ]
Do not turn off the power while registration is in process. If it is turned off by mistake, please
register the setting again.
Example:
No. 13
■
Free Size Preset Registration/Cancel
z
Free Size Preset Registration
Example: No.13 5.5”
1. Select preset No.13 by pressing the speed up key and the slow down key.
2. Input cut size by pressing the + key and the – key
.
Lights up
* When you desire to continue registration, repeat the above procedures 1 and 2.
3. Fixed/Free Size Preset Setting is registered all at once by pressing the JOG key.
* The display blinks while registration is in process. Do not turn off the power.
Blinking
z
Free Size Preset Cancel
Example: No.13
1. Select preset No.13
by pressing the speed up key and the slow down key.
2. Set cut size to “0”.
Blinking
* When you desire to cancel registration, repeat the above procedures 1 and 2.
3. Cancel of Fixed/Free Size Preset Setting is registered all at once by pressing the JOG key.
* The display blinks while registration is in process. Do not turn off the power.
Blinking
28
[ REFERENCE ]
When cut size is 2.5 - 9.9 inches: preset is available.
When cut size is 0: preset is cancelled.
To register non-cut process (just feeding): register “PASS” in Fixed Preset.
[ NOTE ]
Do not turn off the power while registration is in process. If it is turned off by mistake, please
register the setting again.
NOTES:
When cut size is 2.5 - 9.9 inches: preset is available.
When cut size is 0: preset is cancelled.
To choose non-cut process (just feeding): choose “PASS” in fixed preset.