Counter display and reset, Preset mode, Manual setting – Formax FD 4170 User Manual
Page 14: Preparation before operation
10
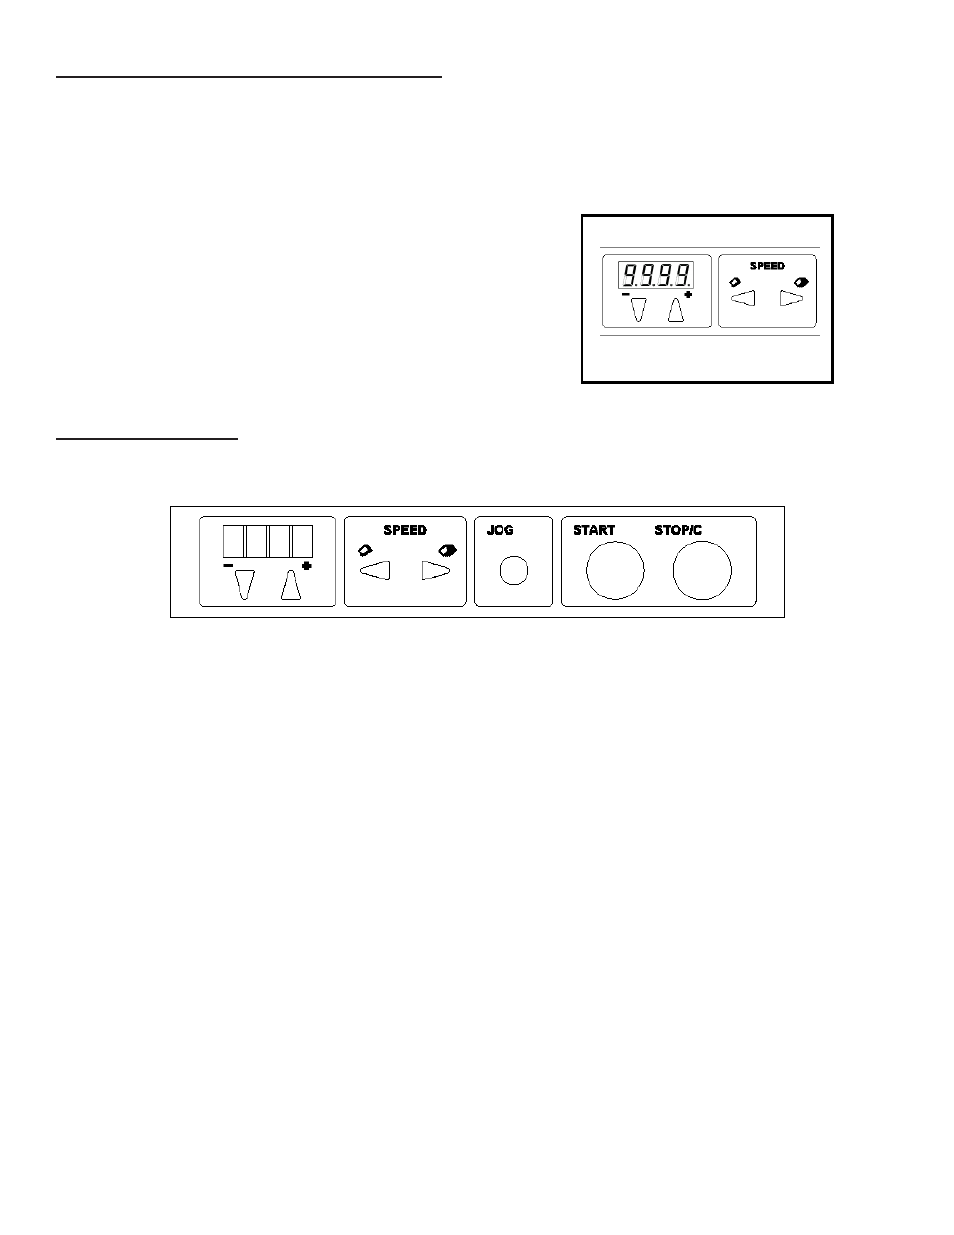
COUNTER DISPLAY AND RESET
1. To display the number of cut sheets after a previous reset, press and hold the STOP/C button in stand-by mode.
2. The counter display disappears by releasing the STOP/C button.
Counter Display
To reset the counter, press both the STOP/C button and
the “-” button and hold for three seconds or more.
Counter Reset
■
Preparation Before Operation
1.Set bursting speed.
Ex.: Speed 1
Setting range: Speed 1 - 5
22
Speed
Number of sheet processed
[sheet/min.]
(A4 vertical)
1 / JOG
40
2
60
3
84
4
107
5
130
2.Feed the paper by pressing the JOG key to
perform test cut.
* If test cut does not succeed, check the cut size
setting.
3.Adjust the paper stopper and the paper guides
wider by approx. 0.12 inch
than burst paper with a
hand.
4. Start the machine by pressing the START key.
* The machine automatically stops after processing.
5. Counter appears on the LCD while the machine
is working.
[ REFERENCE ]
The value on the counter is incremented as
[0→1→ .··· 9999].
The counter returns to “0” after “9999”.
PRESET MODE
Preset Mode is different from Standard Mode and can register cut size selected in Preset Selection Setting in advance.
1. Turn on power while pressing the STOP/C button on the control panel.
2. To select Preset # press either the speed up or down button. See Preset Table on the following page.
Speed up button: Increases the value of the Preset number.
Speed down button: Decreases the value of the Preset number.
3. Preset is saved by pressing the “+” button and cancelled by pressing the “-” button.
Preset Setting is not available at factory setting.
■
Manual Setting
Manual setting is standard mode that each cut size is input on a case-by-case basis.
[ NOTES ]
When cut size is registered as Preset Setting, “Preset Selection Setting” is automatically selected.
“Manual Setting” and “Preset Selection Setting” cannot be selected simultaneously.
Cancel all preset registrations to change “Preset Selection Setting”
to “Manual Setting”.
* Refer to ”
■ Fixed Preset Registration/Cancel” or “■ Free Size Preset Registration/Cancel”
on pages 27 - 28 for canceling preset registration.
1. Turn on the power to make the machine stand-by status.
* Cut size previously set is displayed.
2. Input cut size.
Value of each digit is incremented by pressing the + key.
Value of each digit is decremented by pressing the - key.
* Refer to “
■ Cut Size Setting Example“ on the following page.
* Truncate the value for cut size to first decimal place.
[ REFERENCE ]
* Setting range: 0, 2.5 - 9.9 inches
* When cut size is 0, the paper is just fed without bursting.
3. Execute “
■ Preparation Before Operation“ on page 22
according to the desired set value.
19
Registering Preset Mode
5. To quit Preset Mode, turn power off and on, or press the STOP/C button for more than 3 seconds. This will make the
Preset Setting available.
4. Save/Cancel information is stored by pressing the JOG button.