4 auto tune switch, 5 quick calibration switch, 6 valve stability switch – Flowserve 420 IOM User Manual
Page 16: 7 spare switch, 4 stroke calibration, Troke, Alibration
User Instructions - Logix® 420 Series Digital Positioners FCD LGENIM0106-06 12/13
flowserve.com
16
modify the Custom curve, use the DTM. See section 10.3.6
Configuration (Characterization
8.3.4
Auto Tune Switch
This switch controls whether the positioner will automatically
tune itself during the stroke calibration (Quick-Cal), or use
preset tuning parameters.
On - Selecting On enables an auto tune feature that will
automatically determine the positioner gain settings. The
automatic tuning will be based on response parameters
measured during the latest Quick-Cal. The valve response is
a combination of these response parameters and the current
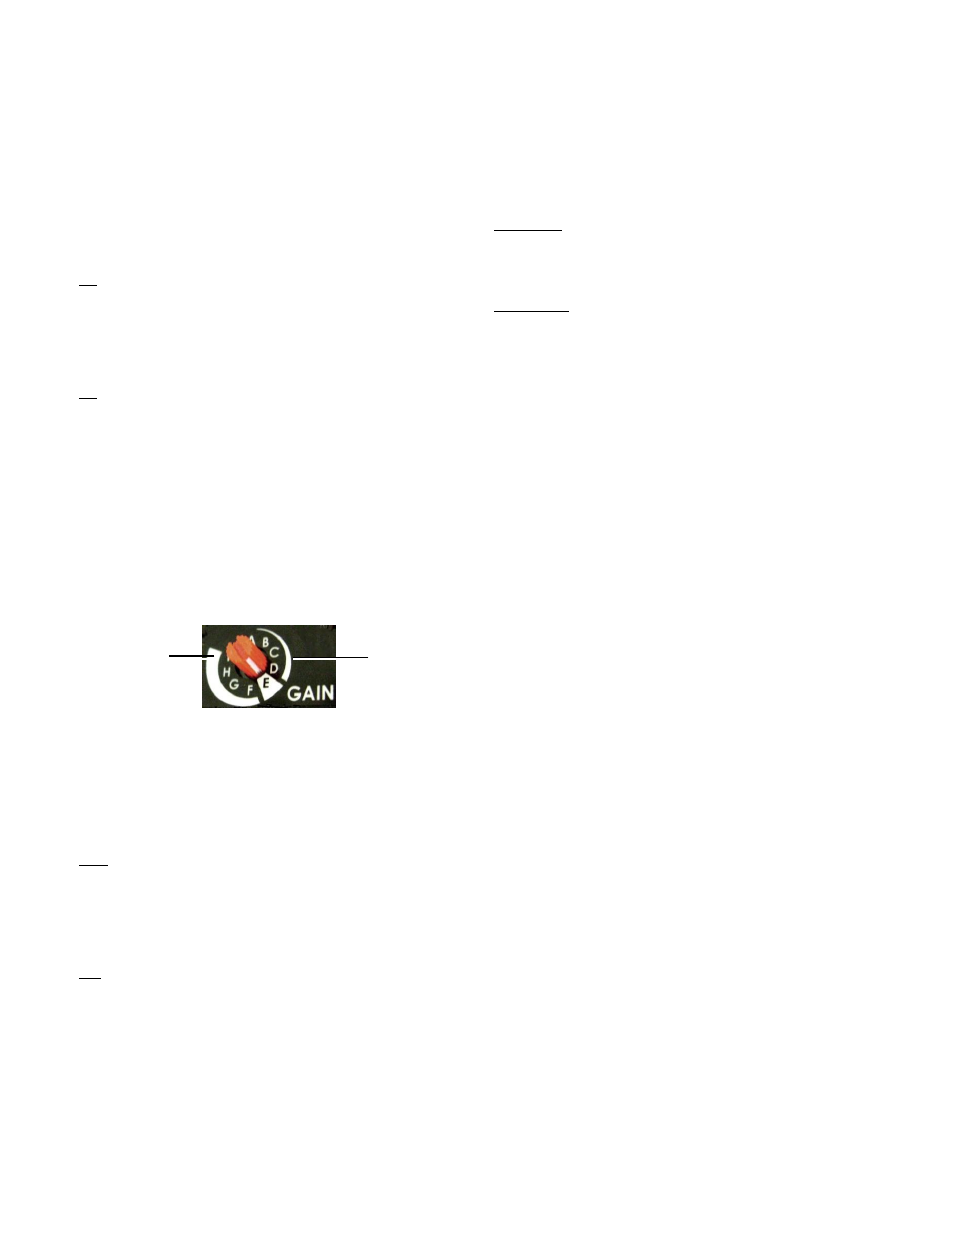
position of the Selectable GAIN Switch.
Off - Selecting Off forces the positioner to use one of the
factory preset tuning sets determined by the Selectable GAIN
Switch
. Settings “B” through “J” are progressively higher
predefined tuning sets.
Selecting “A” on the Selectable Gain
Switch during a Quick-Cal allows the user to use and
preserve manually adjusted gains.
See section 8.4 Stroke Calibration for more details.
NOTE: The gain switch is live meaning that regardless of the
Auto Tune selection, the gain settings can be adjusted at any
time during operation by changing the selectable GAIN
switch position.
Figure 10: Selectable GAIN Switch
8.3.5
Quick Calibration Switch
This switch selects between Auto and Jog calibration modes.
Auto - Use the Auto setting if the fully opened position of the
valve has a mechanical stop. This is typical for most valves.
In Auto mode during a stroke calibration (Quick-Cal), the
positioner will fully close the valve and register the 0%
position, then fully open the valve to register the 100%
position.
Jog - Use the Jog setting if the fully opened position of the
valve has no hard stop, but needs to be set manually. In Jog
mode during a stroke calibration (Quick-Cal), the positioner
will fully close the valve and register the 0% position, then
wait for the user to move the valve to the 100% open position
using the
▲Up and ▼Down buttons. Press the
►ACCEPT/QUICK-CAL button to accept the 100% location.
See section 8.4 Stroke Calibration for more details.
8.3.6
Valve Stability Switch
This switch adjusts the position control algorithm of the
positioner for use with low-friction control valves or high-
friction automated valves.
Lo Friction - Placing the switch to Lo Friction optimizes the
response for low friction, high performance control valves.
This setting provides for optimum response times when used
with most low friction control valves.
Hi Friction - Placing the switch to the right optimizes the
response for valves and actuators with high friction levels.
This setting slightly slows the response and will normally stop
limit cycling that can occur on high friction valves. See
section 10.3.7 Configuration (Pressure Control
details.
8.3.7
Spare Switch
If special features have been purchased they may be
controlled by this switch. See associated documentation for
more details.
8.4 Stroke Calibration
The
►ACCEPT/QUICK-CAL button is used to initiate an
automatic stroke calibration. The stroke calibration
determines the closed (0%) and open (100%) positions of the
valve and gathers information about the response of the
valve (such as valve stroke time) in order to determine the
gains. The gains are then set automatically. After a stroke
calibration, the positioner is ready to control.
To perform a Quick-Cal, first ensure the Quick Calibration
Switch is set to Auto or Jog (to manually adjust the stroke
limits)
as
appropriate.
Press
and
hold
the
►ACCEPT/QUICK-CAL button for approximately 3 seconds.
This will initiate the automatic stroke calibration. While the
calibration is in progress, the LED lights will flash status
codes indicating the calibration progress. See section 14.3
Status Code Descriptions for an explanation of the status
code sequences.
The initial calibration of extremely large or very small
actuators may require several calibration attempts and will
perform these automatically. The positioner adapts to the
actuator performance and begins each calibration where the
last attempt ended. On an initial installation it is
recommended that after the first successful calibration that
one more calibration be completed for optimum performance.
More
Stable
More
Responsive