DR Power Chipper User Manual
Page 20
20
DR
®
CHIPPER ATTACHMENT
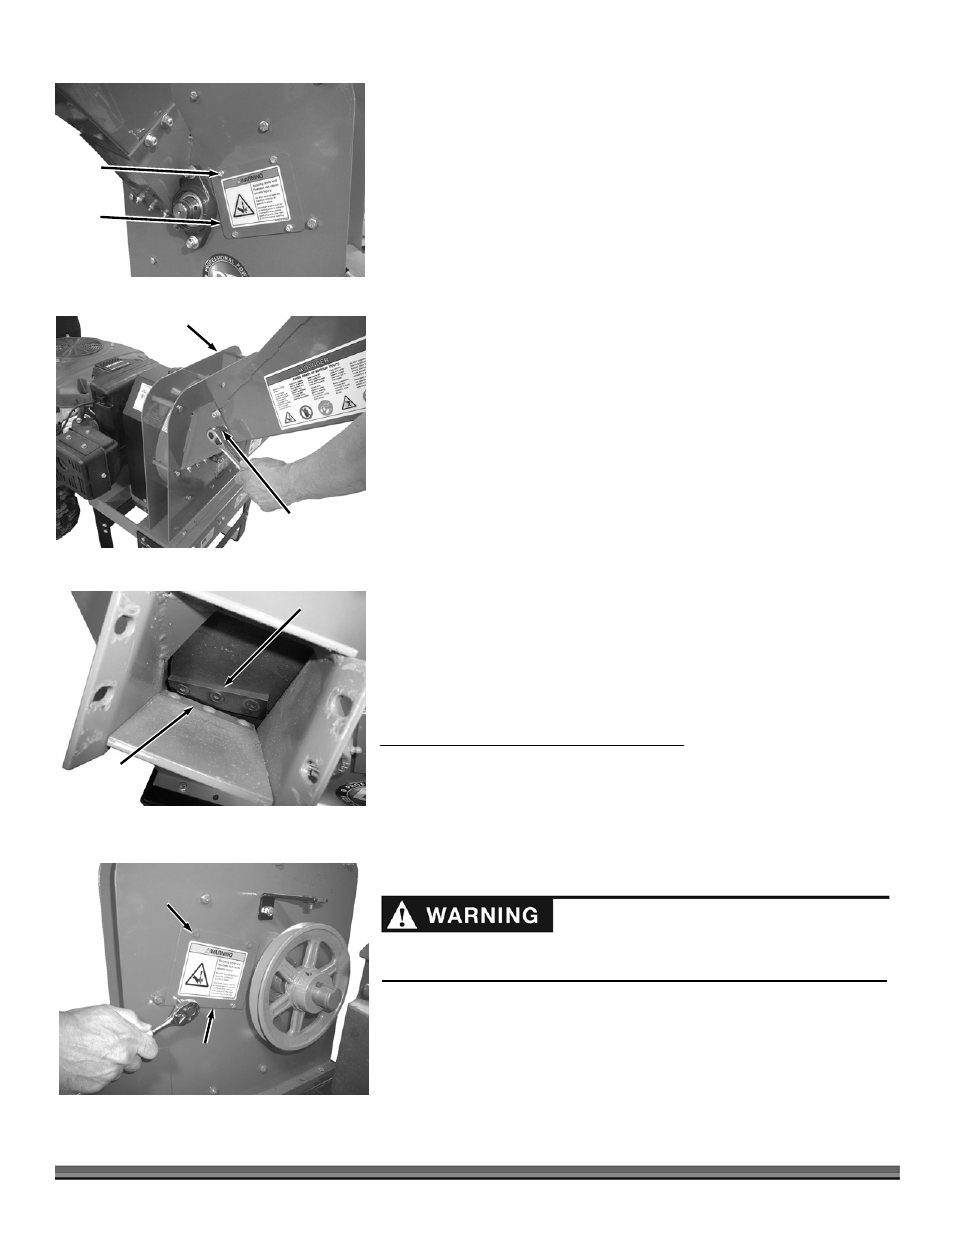
1. Remove the four Screws that secure the Front Access Cover with a 5/16"
wrench and remove the Access Cover (Figure 33).
NOTE: You may need to remove the Belt from the Chipper Pulley so the Flywheel is
allowed to turn freely for the next step.
2. Rotate the Flywheel with a long stick until the Knife is visible.
3. If the Knife has visible nicks or damage it must be sharpened or replaced
(see “Removing and Replacing the Chipper Knife” in this chapter).
4. If the Knife does not appear to have any damage, replace the Access Cover
and secure with four Screws using a 5/16" wrench.
VISUAL INSPECTION OF THE CHIPPER KNIFE AND WEAR PLATE (every 8-10
hours)
Tools Needed:
1/2" Wrench
1. Use a 1/2" wrench to remove the four Carriage Bolts, Washers and Locknuts
that support the Hopper to the Chipper Assembly (Figure 34).
2. Remove the Hopper from the Chipper Assembly.
NOTE: You may need to remove the Belt from the Chipper Pulley so the Flywheel is
allowed to turn freely for the next step.
3. Use a long stick to rotate the Flywheel until the Knife is next to the Wear
Plate.
4. Closely inspect the Chipper Knife and Wear Plate for nicks or dull (rounded)
edges (Figure 35).
5. If necessary, sharpen or replace the Chipper Knife and/or Wear Plate per the
following procedures.
6. Replace the Hopper when finished.
Removing and Replacing the Chipper Knife
Tools and Supplies Needed:
5/16" Wrench
3/16" Allen wrench
1/2" Socket
Awl or Sharp Tool
Gloves
1. Remove the Hand Knob and then remove the Belt Guard.
2. Using a 5/16" Wrench, remove the Self -Tapping Screws and remove both
Knife Access Covers from the front and back of the Chipper Assembly
(Figure 36).
NOTE: You may need to remove the Belt from the Chipper Pulley so the Flywheel is
allowed to turn freely for the next step.
Hopper
Figure 34
Bolt, Washer and
Locknut (4 places)
Chipper
Assembly
Screws
Figure 33
Front
Access
Cover
Rear Knife Access
Cover (one on the
front side also)
Figure 36
Self -
Tapping
Screws
Chipper
Knife
Figure 35
Wear
Plate
Be careful and wear gloves when working near the chipper knife. The knife
edge can cut you if you come in contact with it.