DR Power Chipper User Manual
Page 12
12
DR
®
CHIPPER ATTACHMENT
Mounting the Chipper Attachment to the Field and Brush Mower
1. Remove the Deck or other attachment from the Field and Brush Mower (see
your Field and Brush Mower Safety and Operating Instructions Manual).
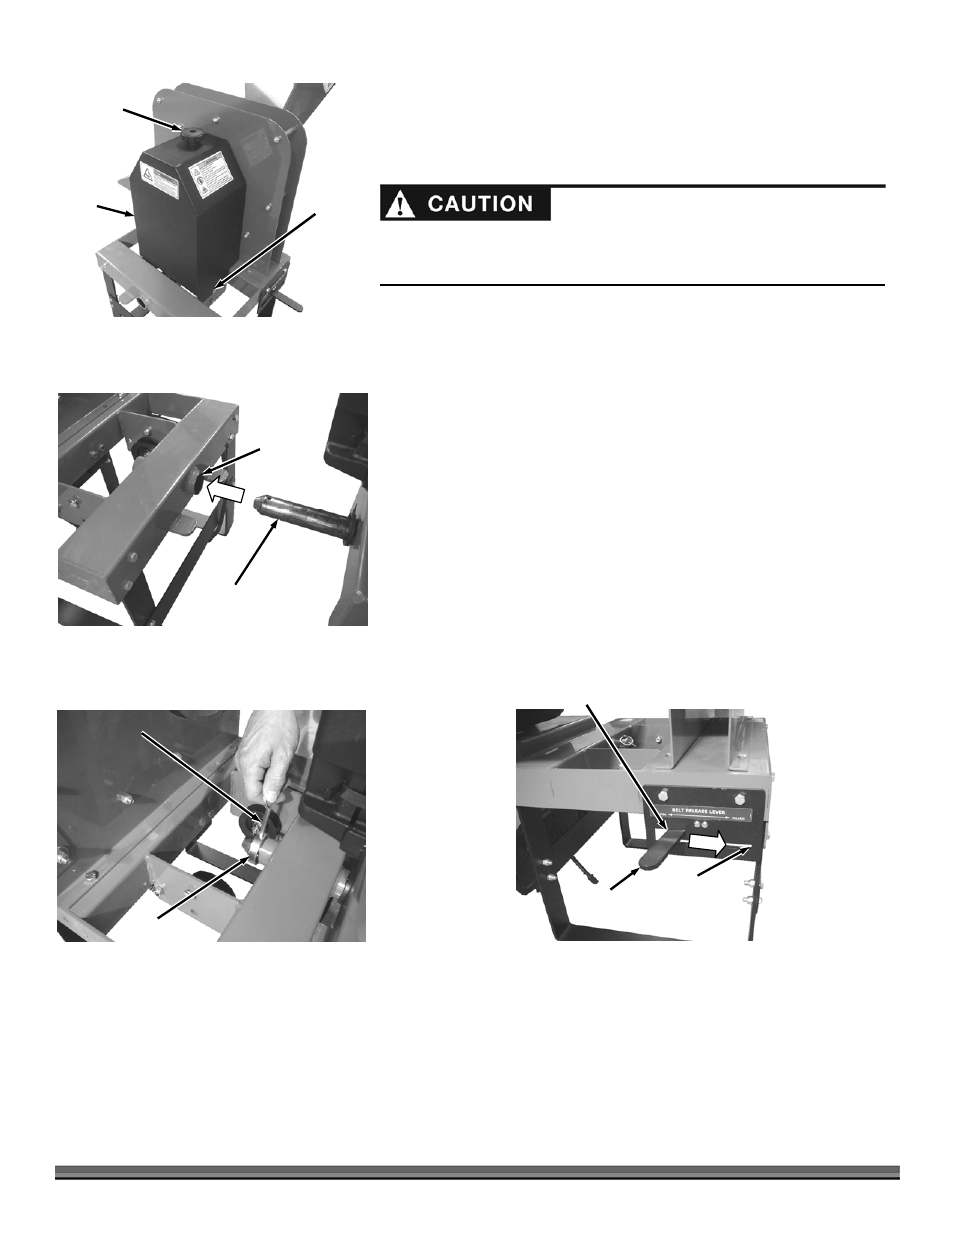
2. Remove the Hand Knob from the top of the Belt Guard and remove the
Guard (Figure 20).
3. Make sure the Retaining Pin and Collar are removed from the Mounting
Shaft of the Field and Brush Mower.
4. With the help of another person to steady the Chipper as you position the
Field and Brush Mower; line up the FIELD AND BRUSH MOWER Mounting
Pin with the Mounting Hole in the Chipper Frame. Push the Field and Brush
Mower until the Pin is all the way into the Mounting Hole (Figure 21).
5. Reinstall the Pin and Collar onto the Mounting Shaft (Figure 22).
6. Make sure the Belt Release Lever is in the “Release” position (Figure 23).
Mounting
Hole in
Chipper
Frame
Figure 21
Field and Brush Mower
Mounting Shaft
Belt Release
Lever
Figure 23
Tighten Belt Position,
Left and Up
Release Belt
Position,
Down and
Right
Collar
Figure 22
Retaining
Pin
Figure 20
Hand
Knob
Belt
Guard
Carriage
Bolt
Guides
Do not pull the Chipper or Brush Mower Attachment away from the Field and
Brush Mower unless you have someone holding the handlebars to prevent it
from falling backward.