Operating the chipper attachment, Starting the chipper – DR Power Chipper User Manual
Page 14
14
DR
®
CHIPPER ATTACHMENT
Chapter 3: Operating Your DR CHIPPER ATTACHMENT
Operating the Chipper Attachment
It may be helpful to familiarize yourself with the features on your Machine by reviewing Figure 1 in Chapter 2 before beginning the
steps outlined in this chapter. The instructions in your DR Field and Brush Mower Safety and Operating Instructions Manual
indicate that the engine will shut off if you release the Operator Presence Lever. Although this is true with some attachments, it
does not apply to the Chipper Attachment when installed properly. The Operator Presence override feature of the Chipper
Harness that you installed in Chapter 2 will enable you to operate the Chipper even though the Operator Presence Lever is not
held down as long as the Key Switch in the “Run w/light” position. When the Chipper is disconnected from the Field and Brush
Mower, the Operator Presence lever will function normally for other
attachments.
Starting the Chipper
NOTE: Remove any debris buildup from the machine before every use of the
Chipper.
1. Ensure that the Belt Release Lever on the Chipper Attachment is in the
“Tighten” position.
2. Set the Parking Brake on your DR Field and Brush Mower.
3. Make certain that the Shift Lever is in the Neutral position and the Blade
Control Knob (newer Field and Brush Mower) is pushed down to the
“Disengaged” position (Figure 28).
NOTE: For an older Field and Brush mower, without a Blade Control Knob, you will
need to move the Blade Control Lever back towards you to the “Disengaged”
position (Figure 29).
4. Start the engine in accordance with the Safety & Operating Instructions for
your DR Field and Brush Mower and make sure the Key Switch is in the
“Run w/light” position.
5. After the engine has warmed up, set the Throttle to Run.
NOTE: Always operate the Field and Brush Mower at maximum RPM when
chipping.
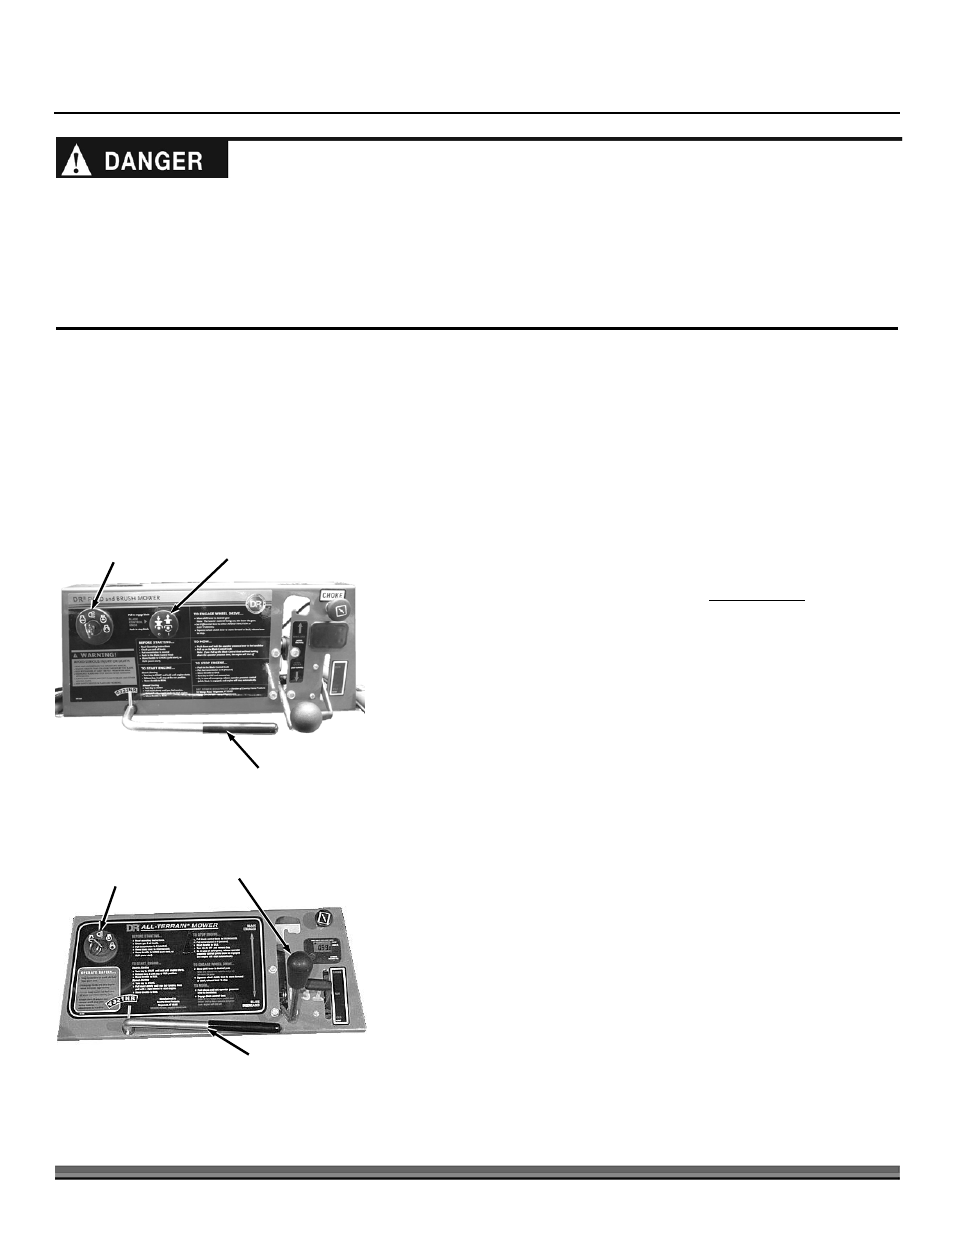
6. To start the Chipper, pull up on the Blade Control Knob (newer Field and
Brush Mower) to the “Engaged” position (Figure 28).
NOTE: For an older Field and Brush mower, without a Blade Control Knob, you will
need to move the Blade Control Lever forward away from you to the “Engaged”
position (Figure 29).
Run w/Light
Switch Setting
Figure 29
Blade Control
Lever
Shift Lever
OLDER FIELD AND BRUSH MOWER
Run w/Light
Switch Setting
Figure 28
Blade Control
Knob
Shift Lever
NEWER FIELD AND BRUSH MOWER
This machine was designed for chipping wood. Never use this machine for any other purpose as it could cause serious injury.
Contact with internal rotating parts will cause serious personal injury. Never put hands, face, feet, or clothing into chipper
hopper or discharge opening or near the discharge area at any time.
Before performing any maintenance procedure or inspection, disengage the blade at the control panel of the Field and Brush
Mower. Shut down the engine, wait for all moving parts to come to a complete stop, remove spark plug wire keeping it away
from the spark plug to prevent accidental starting, then wait 5 minutes before proceeding. Use only a wooden stick to clear
jammed material.