DR Power Chipper User Manual
Page 17
CONTACT US AT www.DRpower.com 17
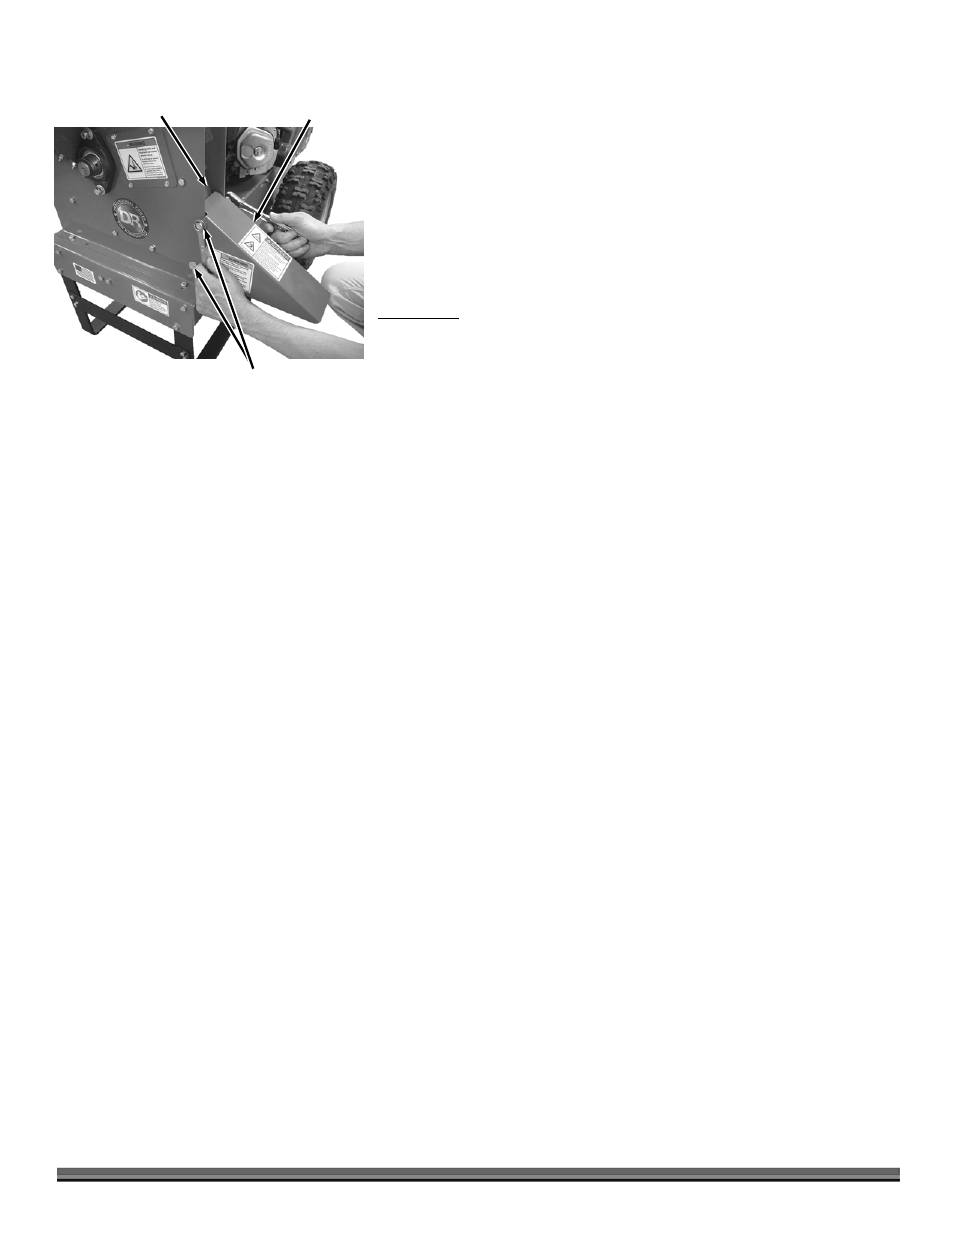
2. Remove the two Bolts, four Washers and two Locknuts that secure the
Deflector to the Chipper Assembly with two 1/2" wrenches and then remove
the Deflector (Figure 31).
3. Check to see if the Deflector opening is clogged. If it is, clear it with a
branch.
NOTE: You may need to remove the Belt from the Chipper Pulley so the Flywheel is
allowed to turn freely for the next step.
4. With a wooden stick, loosen and remove any material left in the Chipping
Chamber and make sure the Flywheel turns freely with the stick.
Reassemble:
1. Position the Deflector onto the Chipper Assembly and secure with two Bolts,
four Washers (one on each side) and two Locknuts using two 1/2" wrenches
(Figure 31).
2. Reconnect the spark plug wire, start the DR Field and Brush Mower engine,
engage the Blade Control Knob; allowing the remaining material in the
Chipping Chamber to discharge.
3. If the Chipping Chamber doesn’t clear and the flywheel is still jammed,
repeat above process.
NOTE: Be certain the Chipping Chamber is clear before trying to process more
material into the Chipper Hopper.
Figure 31
Discharge
Chute
Bolts and
Locknuts
Scroll
Weldment