DNF Controls Tally Manager User Manual
Page 6
Page 6 of 16
3.
Configure Channel Mode in Protocol Assignment Table
1) Launch your web browser and enter the Device Controller’s IP address. The DC Home
Page is displayed.
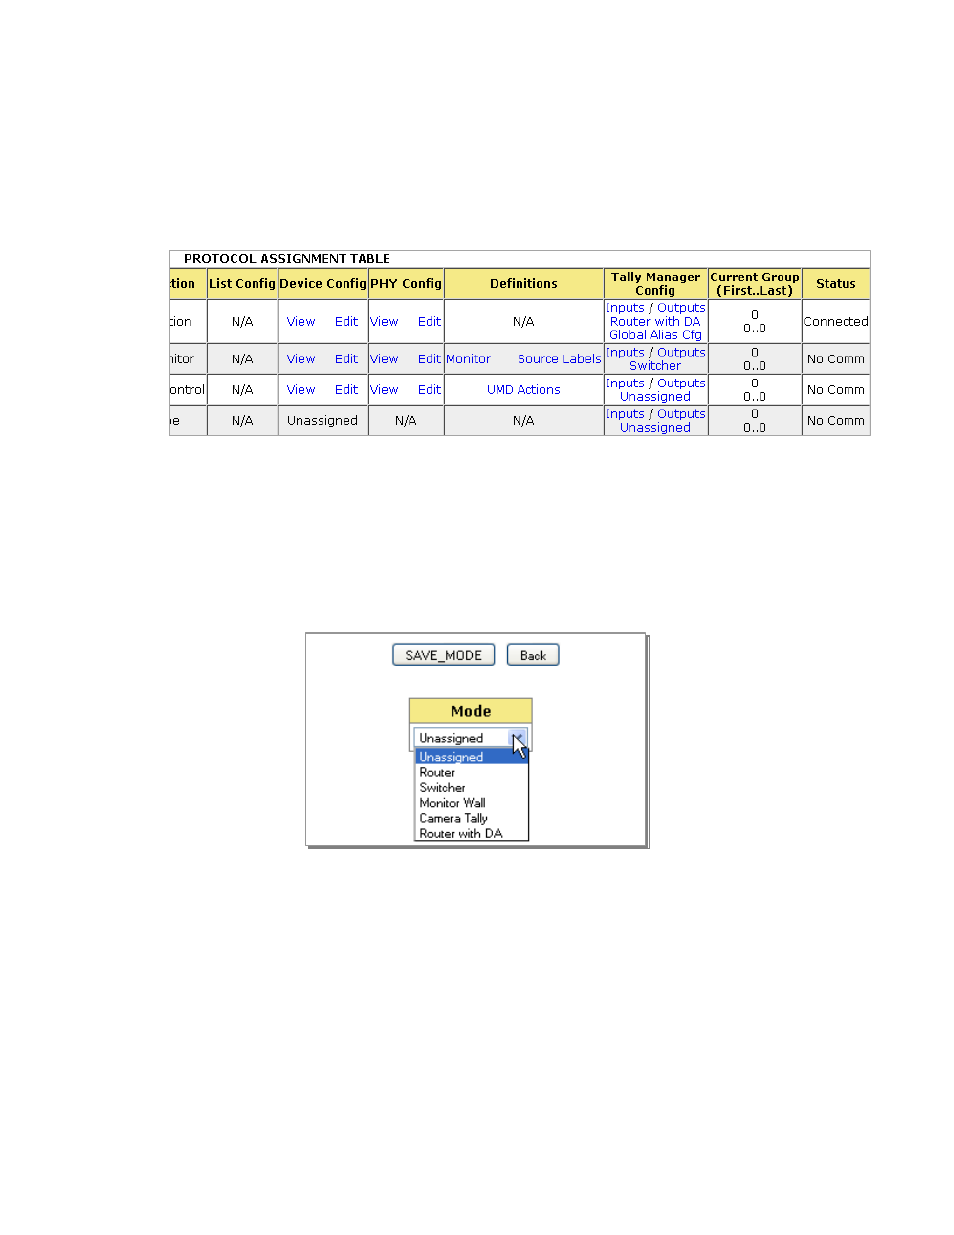
2) Click on the “Protocol Assignment” link at the top of the page. The Protocol
Assignment Table is displayed.
3) On the Protocol Assignment Table, on the Channel 1 row, in the “Tally Manager
Config” column, click on the “Unassigned” link. The Channel Mode configuration web
page is displayed.
4) Click on the “Edit” link at the top of the web page.
5) Select the appropriate channel mode (device type) from the drop down menu that
describes the device connected to this DC channel. The available device types are
Router, Switcher, Monitor Wall, Camera Tallies and Router with DA. For example, if
a router is connected to Channel 1, select “Router”.
NOTE: If Router is selected, each router output can assigned to only one
production switcher or monitor wall Input. Select “Router with DA” to allow
a single router output to be assigned to multiple Inputs.
NOTE: Select “Camera Tallies” device type only on a channel with “Control
Protocol” set to “Unassigned“.
6) Click on the “SAVE MODE” button to save selection, or click on “BACK” button exit
without saving.
7) Click on the “Go Back” link to return to the Protocol Assignment Table web page. The
“Unassigned” link is replaced with the selected channel mode.
8) Repeat steps 3 through 7 for each Tally Manager channel.