Optional temperature sensor mounting, Optional temperature sensor mounting -4, Figure 9: temperature sensor eave/wall mount – Daktronics AF-3180-64-R,A User Manual
Page 18: Figure 10: temperature sensor display mount, 6 optional temperature sensor mounting
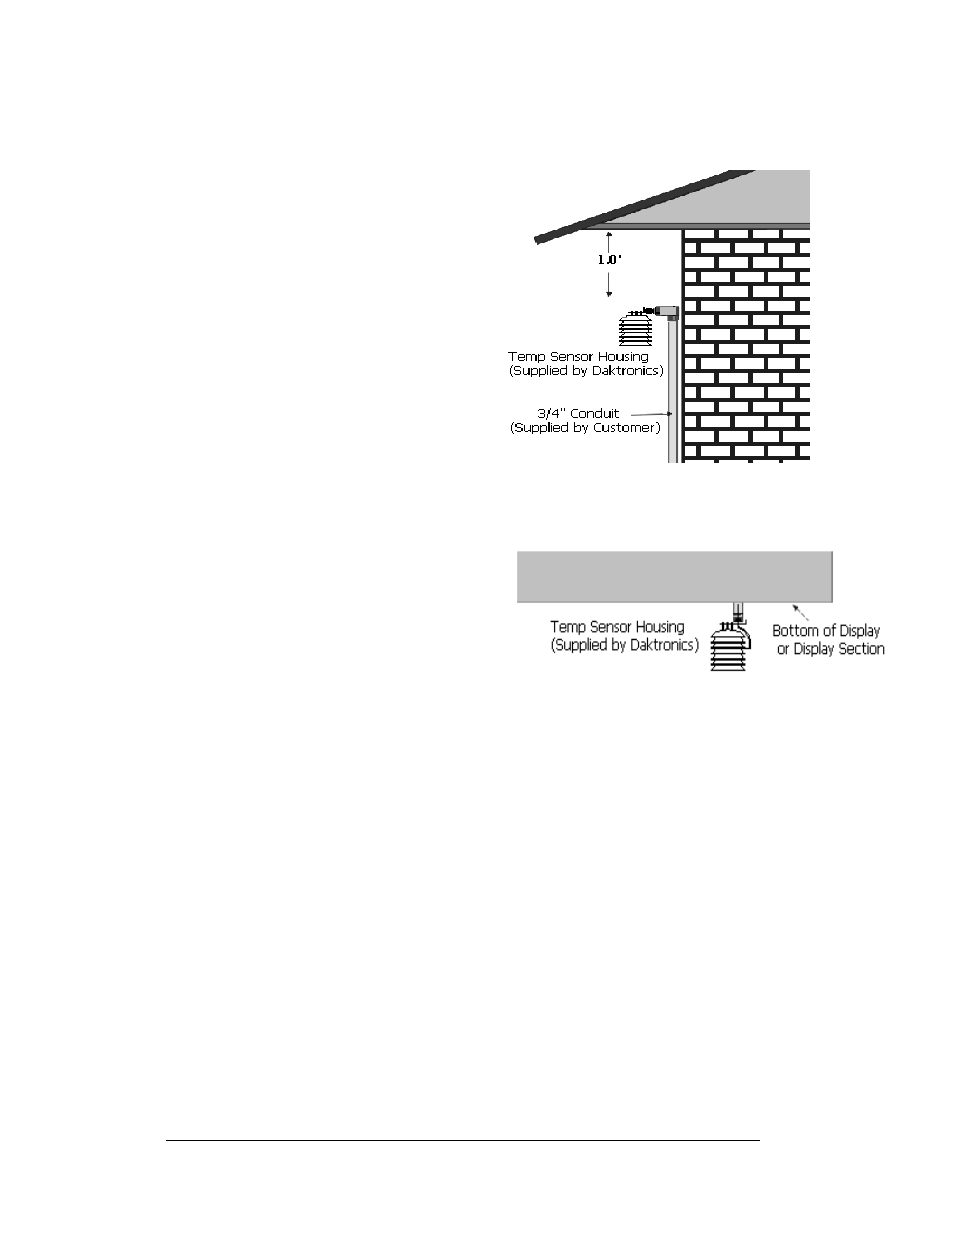
2.6 Optional Temperature Sensor Mounting
The temperature sensor mounts
separately and requires a location away
from the influence of chimneys, air
conditioners, vents, tar roofs, concrete,
and parking lots, which can cause
abnormal temperature fluctuations.
Usually, a separation of at least 20-30
feet horizontally and 8 feet vertically is
required to achieve this. Locations where
air movement is restricted are also
unsatisfactory.
Figure 9: Temperature Sensor Eave/Wall Mount
The ideal sensor location is a north eave
or a northern exposure, above grass and
away from direct sunlight. This location
gives extra stability and accuracy to the
sensor because of the added shading
usually obtained on a northern exposure.
See Figure 8 on the right for details.
The second choice for locating
a temperature sensor is on the
display itself, or somewhere on
the display structure. A light-
colored display is preferred in
this application. Location of the
sensor should be above, below,
or on a northern edge of the
display to keep the sensor
shaded. If mounting below the
display, a minimum of 8 feet
above ground is required
Figure 10: Temperature Sensor Display Mount
Do not mount the sensor between the displays.
Greater accuracy is obtained if grass is below the sign rather than concrete or some
other material.
1. The temperature sensor will be connected to the display through a Quick
Connect input plug on the back of the first face. The sensor connects to the
display at J31. Remember to secure any excess cable to prevent vandalism.
2. The quick connect signal cable between displays connects both
communication and temperature signal, thus no additional wiring is
required from display to display for the temperature sensor.
Mechanical Installation
2-4