Care and cleaning, Cleaning instructions, Warning – Dacor OB52 User Manual
Page 46: Cleaning the grill compartment
17
Care and Cleaning
Cleaning Instructions
to keep your outdoor grill looking and operating its
•
best, clean it after every use. Spills that remain on
the parts may be very difficult to clean, especially if
allowed to burn on. Certain types of food, such as
tomatoes, citrus juices, vinegar, alcohol and milk can
damage the finishes if you allow them to stand for any
length of time.
Porcelain parts are exposed to extremely high tem-
•
peratures and acidy foods. they are also put under
a lot of stress when hot utensils are placed on them.
these severe operating conditions, cause the porce-
lain enamel parts on your outdoor grill to undergo a
change in appearance over time. If you care for and
clean these parts carefully, you will slow down, but
not eliminate, the aging process.
warning
to avoid an electrical shock or fire hazard, disconnect
•
the power plug and close the gas shut-off valve
before cleaning.
Avoid the potential for grease fires by frequently
•
cleaning the drip tray.
Check and clean the burner/venturi tubes for insects
•
and insect nests regularly. A clogged tube can create
a fire hazard.
to avoid burns, make sure that all parts are cool
•
before cleaning or removing the drip tray.
Do not submerse the rotisserie motor in water or
•
cleaning fluids. Do not allow water or cleaning fluids
to get into the holes or slots on the rotisserie motor.
Do not use a steam cleaner to clean the outdoor
•
grill or rotisserie motor. Steam could penetrate the
electrical components and cause a short circuit.
After cleaning, make sure the burners, the flame
•
spreaders, the grates and the drip tray are dry and
completely reassembled before use.
Use only the cleaners specified to clean this
•
appliance. Other cleaners may cause permanent
damage to surfaces. Do not use aerosol cleaners.
they may be flammable or cause corrosion of metal
parts. Use only a sponge, soft cloth, fibrous or plastic
brush or nylon pad for cleaning the surfaces of your
outdoor grill.
Do not clean any of the outdoor grill parts in a
•
dishwasher. they may be damaged.
Do not attempt to manually clean the rotisserie
•
burner or optional sear burner. Burn off grease and
grime according to these instructions.
Do not try to remove heavy spills with a sharp object
•
such as a knife or metal spatula. Sharp objects may
scratch your outdoor grill’s surfaces.
Cleaning the Grill Compartment
Disconnect the power cord from the electrical outlet and
close the gas shut-off valve before cleaning.
cleaning the grill compartment interior and Standard
u Shaped Burners
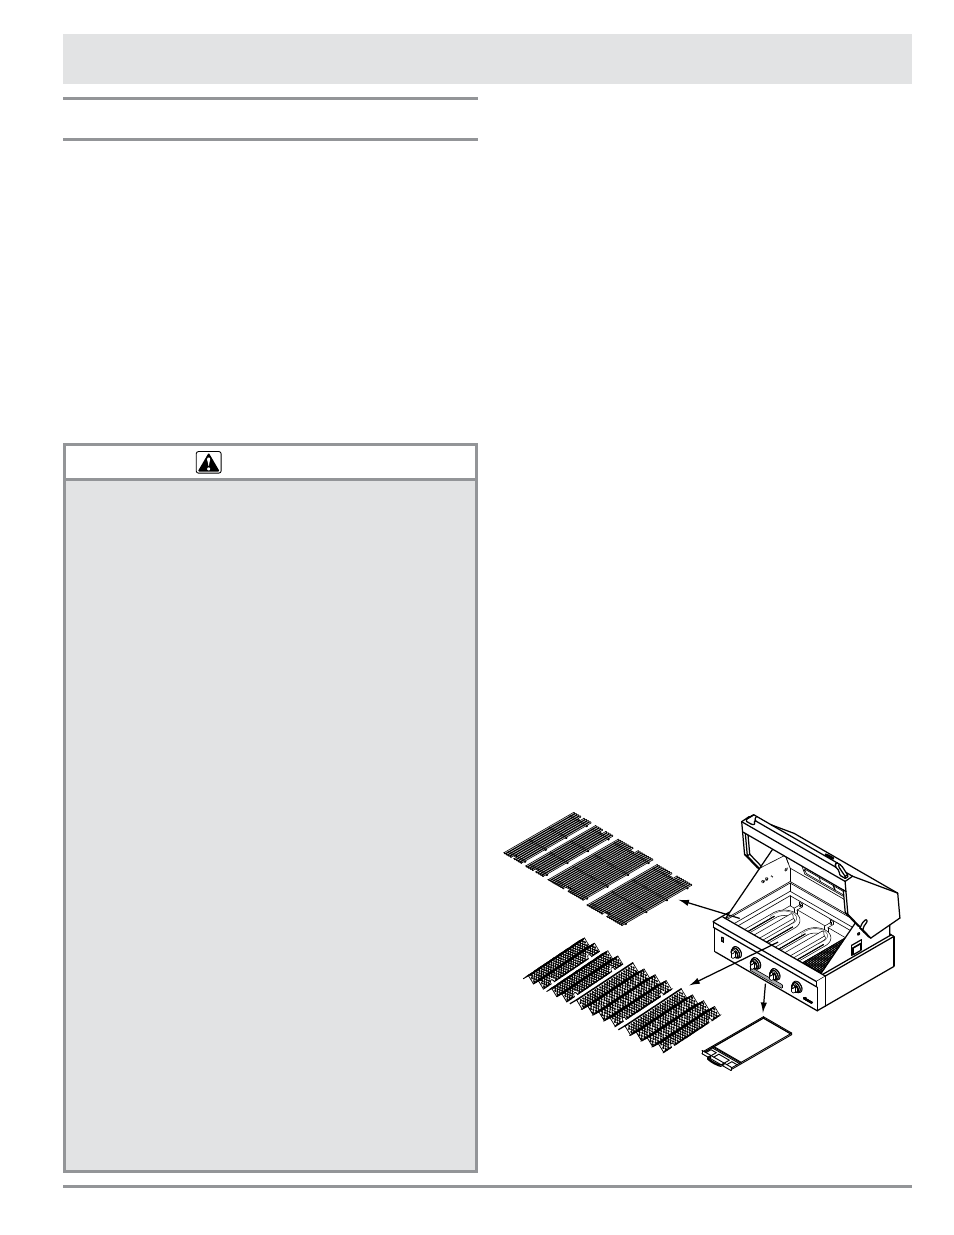
When the outdoor grill is cool, open the canopy and
1.
remove the grates and flame spreaders from the grill
compartment. remove the drip tray.
the “U” burner ignitors are the two wire electrodes
2.
located under a cover just behind the front panel,
inside the grill compartment. each “U” burner has one
set. the ignitors must be clean for proper operation.
to clean, gently brush completely around the igniter
electrodes. A stiff toothbrush is ideal for this pur-
pose. Use care while cleaning them because they will
not work properly if bent. the porcelain bases hold-
ing the electrodes in place can also crack or break if
not treated with care. Do not use water to clean the
igniters. If necessary, use a small amount of rubbing
alcohol to help dissolve grime.
Clean the “U” burners with a steel brush. Clear
3.
blocked holes on the burners with a straightened
paper clip, needle or wire. If there is excessive grime
and grease build up, the “U” burners may be removed
from the grill compartment for cleaning. remove the
burners also to inspect inside for insects and insect
nests. See page 21 for the burner removal instruc-
tions.
Clean the inside of the grill compartment with a solu-
4.
tion of hot dishwashing soap and the coarse side of a
sponge. Rinse and dry with a soft, lint-free cloth.
If there is excessive grime and grease build up around
5.
the drip tray cover, located on the floor of the com-
partment, it may be removed for cleaning.
Drip try
flame spreaders
Grates