1setup, 9pgmⅢ programmable ethernet control system – CREATOR CR-PGMIII User Manual
Page 16
CREATOR CHINA 2011-03
WWW.CREATOR1997.COM
9
PGMⅢ Programmable Ethernet Control System
Img.3-6
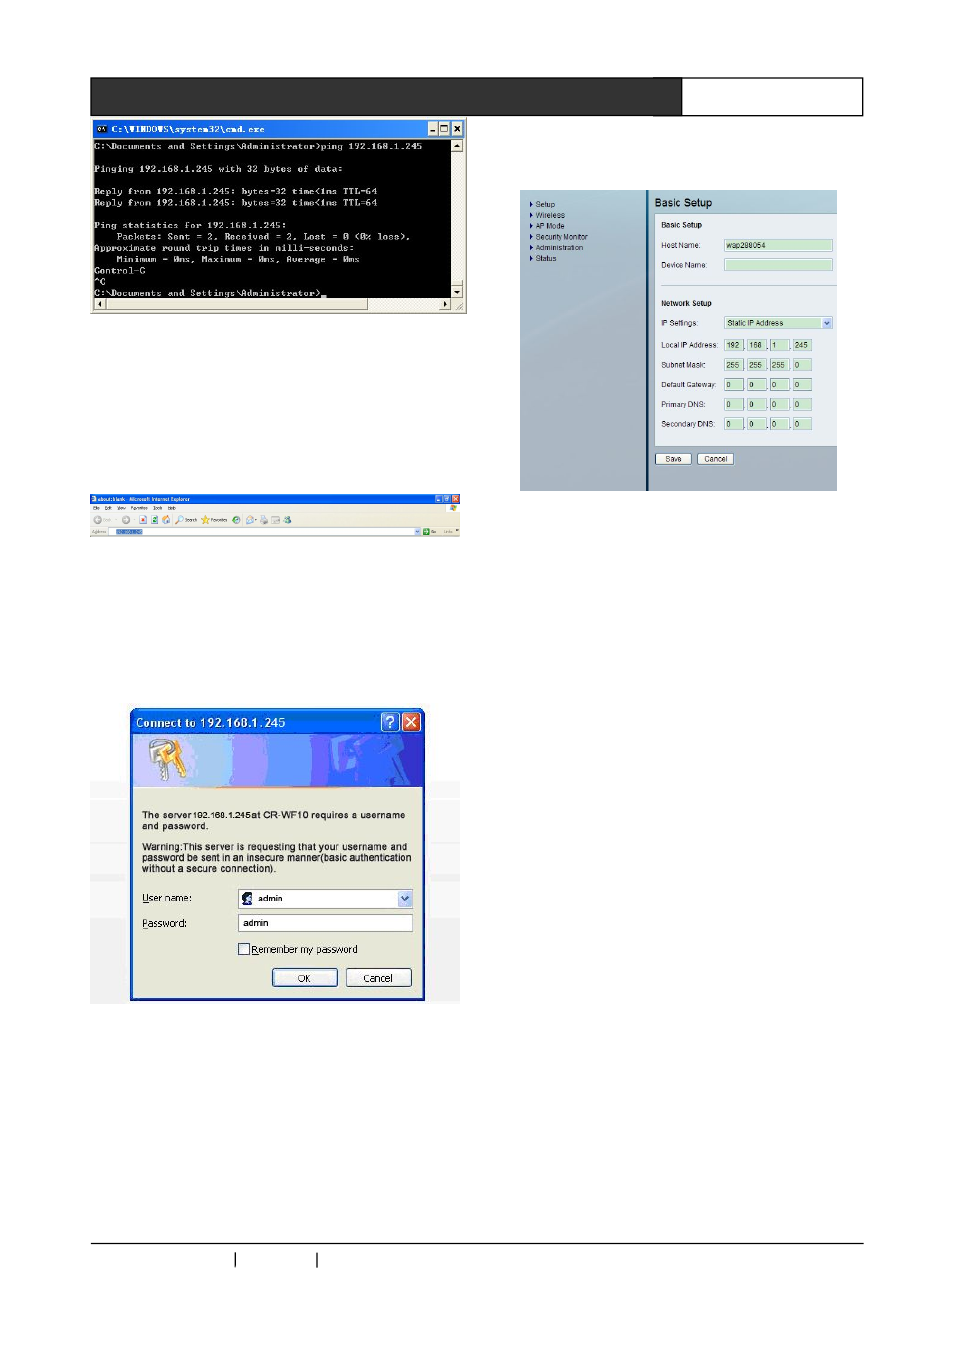
3. Log in the CR-WIFI 10 (based on Windows XP
OS)
Open IE browser, and type 192.168.1.245 into the
address bar, then press Enter, as shown in the
Img. 3-7:
Img. 3-7
Use the username: admin (default) and the
password: admin (default) to log in at the pop up
window, and press Enter, as shown in the Img.
3-8:
Img. 3-8
Step Three: Wireless Settings
The settings page of the CR-WIFI 10 will open
after procedures shown in Img. 308, and the page
is as shown in Img. 3-9, which includes setting
options as: Setup Wireless AP Mode Security
Monitor,Administration, and Status. What need to
be changed are only the Setup, Wireless, and the
Administration.
Img. 3-9
3.1.1.1 Setup
Basic settings and network settings can be down
under this option. The interface is as shown in
Img. 3-4.
◆
Basic Setup
Basic Setting: to perform settings of Host name
and Device Name. The Host Name can be used
to access the network, and build up the DNS
through the network.
Host name:Set the controller’s name. A
proper name is suggested for easier manage.
Device Name:Set the device’s name: it can
be any name.
◆
Network Setup
Network settings: IP can be changed under this
option.
IP Settings:Set up the law for IP assignment:
static or dynamic. The default way is static IP, and
the same default value should be kept for the
controller’s settings. The CR-WIFI 10’s IP can be
changed by the following procedures:
Local IP Address: fill in your IP address,