Part names and functions, 5 part names and functions – Denon DVD-1000 User Manual
Page 13
13
ENGLISH
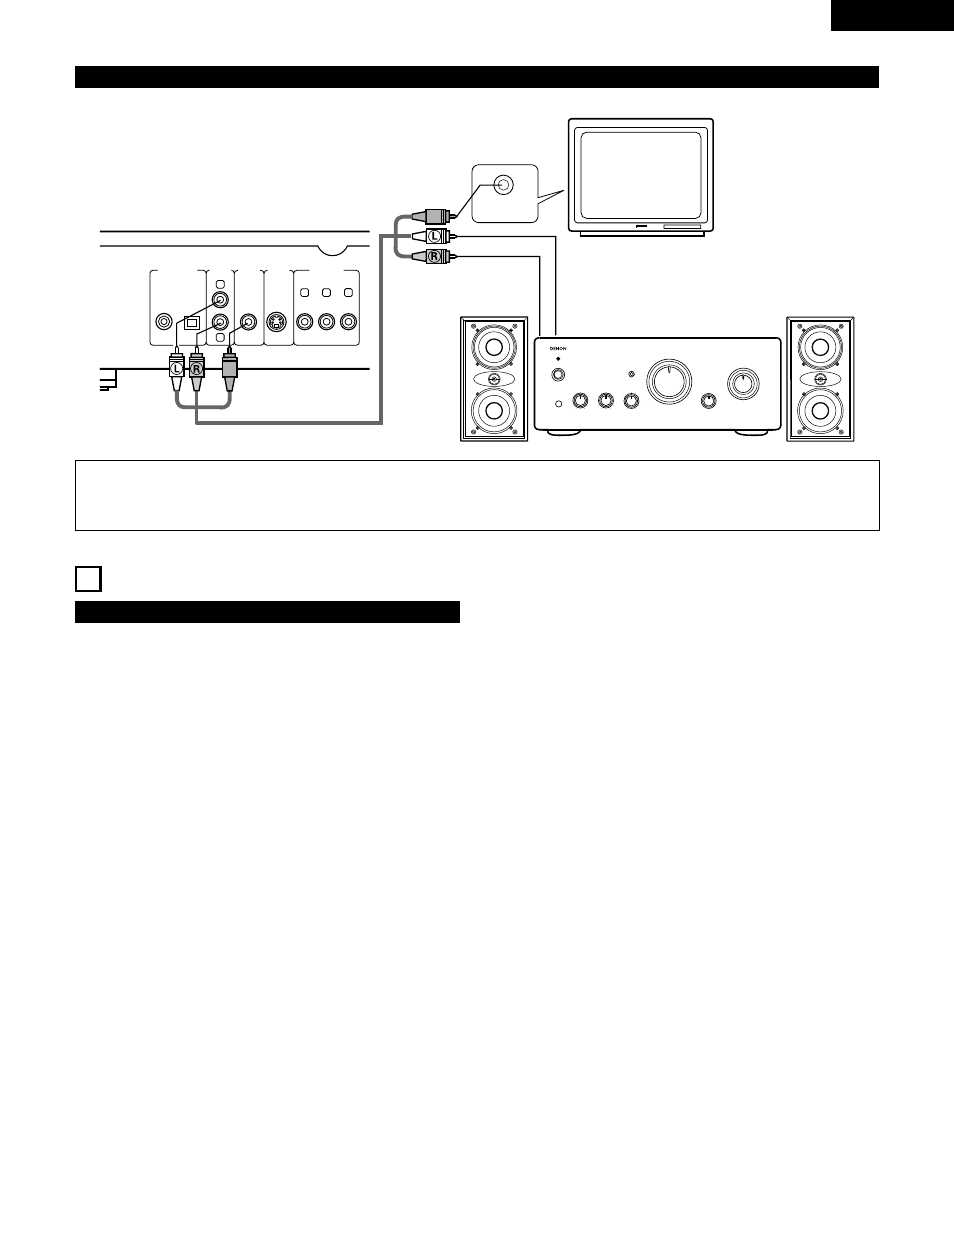
(5) Connecting to a Stereo Component
Y
C
B
C
R
COMPONENT
VIDEO OUT
R
L
AUDIO
OUT
VIDEO
OUT
S-VIDEO
OUT
DIGITAL OUT
(PCM/BITSTREAM)
OPTICAL
COAXIAL
VIDEO IN
TV
DVD-1000
Stereo component
5 PART NAMES AND FUNCTIONS
(1) Front Panel
q
POWER button
• Press once to turn the power on.
• Press again to set to the “OFF” position and turn the
power off.
• Set the power to the standby mode by pressing the
POWER button on the remote control unit while the
power is on.
• Turn the power on from the standby mode by pressing the
POWER button on the remote control unit.
w
Power indicator
• This indicator lights when the power is on and when the
power is in the standby mode.
e
Disc tray
• Load discs here.
• Press the OPEN/CLOSE button
r
to open and close the
disc tray.
• The disc tray is also closed when the PLAY button
y
is
pressed.
r
OPEN/CLOSE button (
5
OPEN/CLOSE)
• Press this button to open and close the disc tray.
t
Skip button (
8
SKIP)
• Press this to move back to the beginning of the current
track (or chapter).
• Press again to move back to the beginning of the previous
track (or chapter).
y
PLAY button (
1
PLAY)
• Press this to play the disc.
u
Skip button (
9
SKIP)
• Press this to move ahead to the beginning of the next
track (or chapter).
i
STILL/PAUSE button (
3
STILL/PAUSE)
• Press this to temporarily stop images or music and to play
images frame by frame.
o
Slow/Search button (
6
SLOW/SEARCH)
• Press this to set the slow play mode and to search in the
reverse direction.
!0
STOP button (
2
STOP)
• Press this to stop the disc. (See page 20.)
!1
Slow/Search button (
7
SLOW/SEARCH)
• Press this to set the slow play mode and to search in the
forward direction.
!2
Remote control sensor
!3
Display
• Information on the disc that is currently playing is shown
on the display. (See page 14.)
!4
AUDIO OUTPUT button (AUDIO OUTPUT)
• Press this to change audio output.
!5
TITLE button (TITLE)
• Press this to display the title menu recorded on the disc.
NOTES:
• Set the
“
AUDIO OUTPUT
”
in
“
AUDIO SETUP
”
in
“
SETUP
”
setting to
“
ANALOG
”
. (See page 38. Default setting is “ANALOG”.)
• Set the
“
TV TYPE
”
in
“
VIDEO SETUP
”
in
“
SETUP
”
comply with your TV's video format. When the TV is NTSC formated, set to NTSC.
(See page 37.)