Setting the print position, Setting the print position -9 – Avery Dennison Monarch 9416 XL Intelligent Kit User Manual
Page 21
Setting Up the Printer 2-9
Setting the Print Position
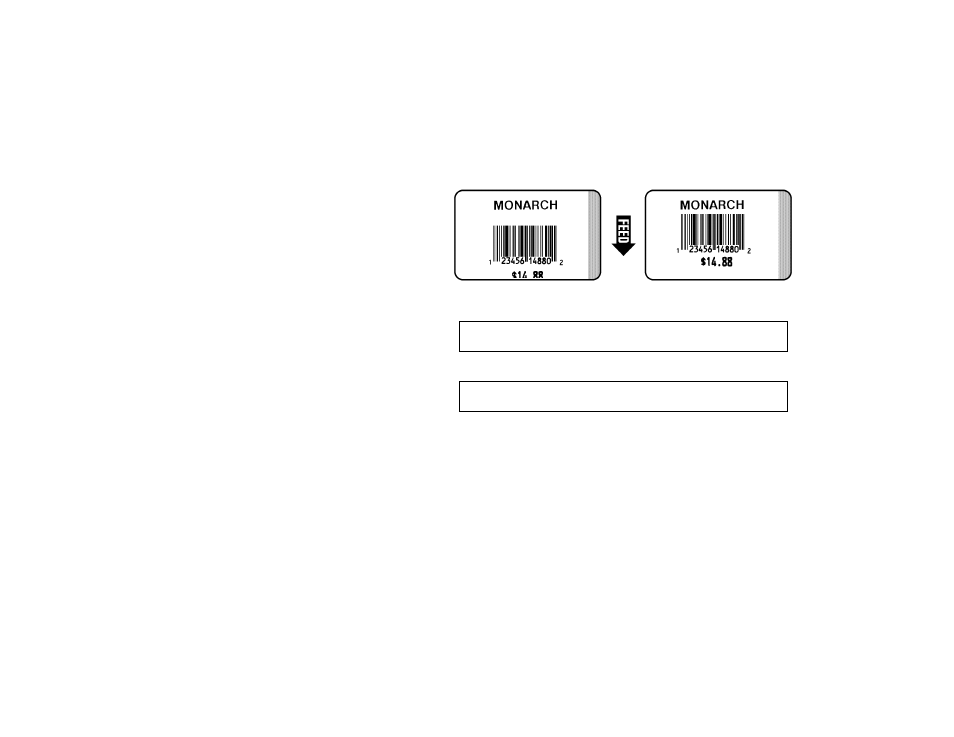
This function adjusts where data prints vertically on the supply. Adjust
the print if it is too close to the top or bottom of the supply, or overtypes
the pre-printed area. The adjustments are in dots (0.0049 inch). The
range is -99 to +99 and the default is 0.
If the data is too close to the bottom, increase the number.
If the data is too close to the top, decrease the number.
1. From the Config Menu, press
or until you see
12. Set Print Position
2. Press Enter. You see
Enter print pos
[-99/99] +0
3. Press
or to change the contrast in increments of 1 dot.
Press
or to change the contrast in increments of 10 dots.
Pressing
or decreases the value (moves the image down);
or increases it (moves the image up).
4. When you are finished, press Enter. You return to the
Config Menu.