Lower panel – Avalon Firestyles Lower Panel User Manual
Page 2
Lower Panel
DVS / DVL Insert EF II
96100340
© Travis Industries
17601429
Page 2 of 2
060320
3
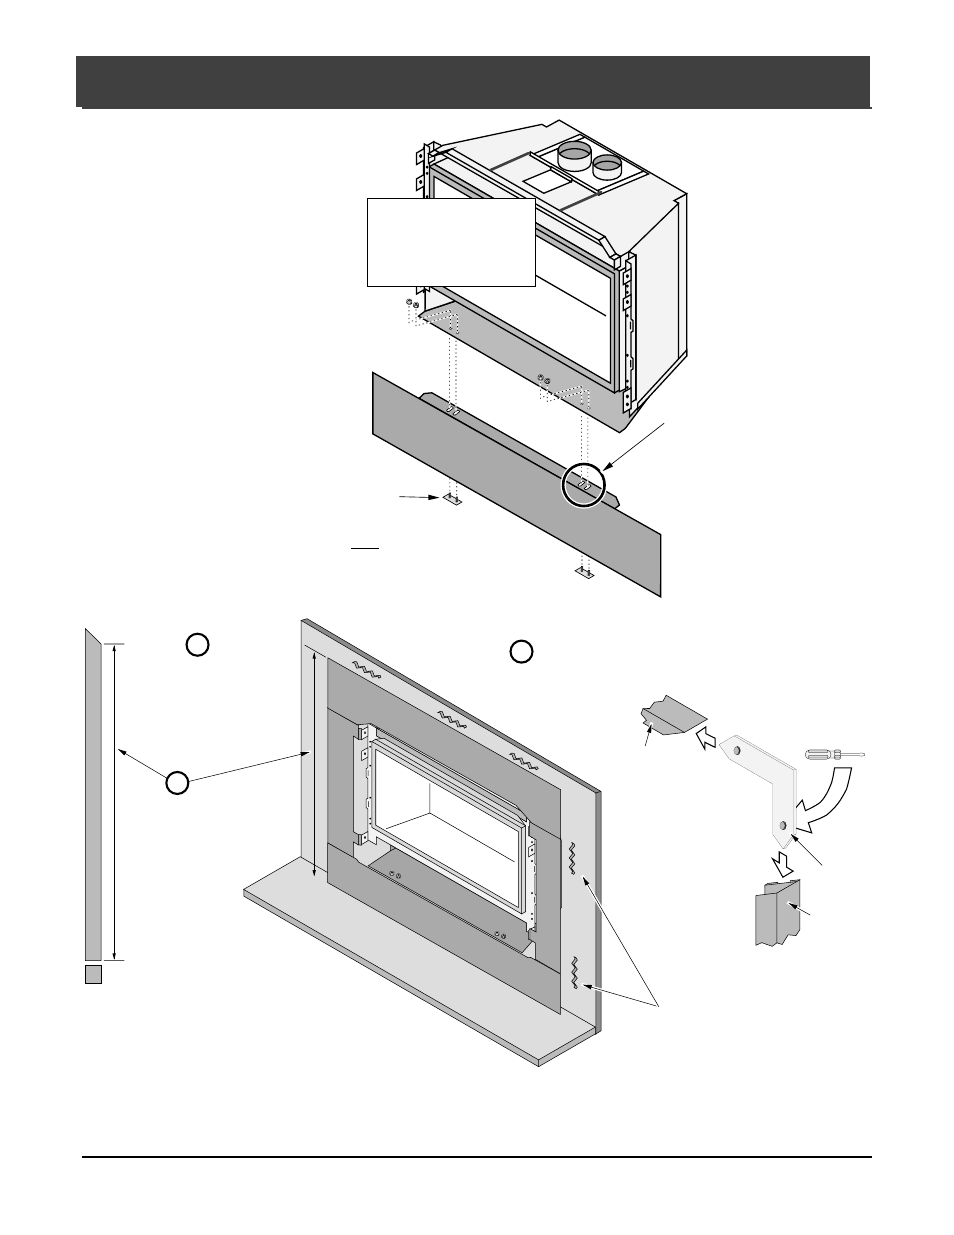
Install the lower
panel (see the
illustration to the
right). Make sure
the panel is
aligned with the
side panels before
tightening the nuts.
4
Cut and install the
trim following the
directions below.
5
Install on/off switch
and rheostat (see
the owner's
manual for
details).
HINT: You may wish to tape the
stud plates to the lower panel to
hold them in place.
Stud
Plate
These slots allow for the
lower panel to be aligned
with the side panels.
Attach the lower surround
panel to the insert with the
included nuts and stud
plates.
a
Discard the two side pieces of
trim included with the surround
panels (use the side trim
included with the lower panel).
Construct the panel trim.
Insert one leg of each "L"
bracket into the top and side
trim piece. Align the trim and
secure with the two set
screws. Slide the trim over
the panels. Use the spring
clips to hold the trim in place.
Tighten the set screws
from the back side with a
small standard screwdriver
"L" Bracket
Right Side
Trim
Top Trim
c
Attach the side trim (included with the lower panel) to the top trim
(included with the surround panels) following the directions below.
Spring Clips
(included with the surround panels)
Use a hack saw to cut the side
trim to match the panel size
(measured to the inside edge).
b