Enable, Mode, Gpio – Adtec digital YUV2QAM (version 01.02.01) Manual User Manual
Page 34: Connector, Pinout, Configure, Network, Triggering, How to enable eas mode, Eas gpio connector pinout
15.00 Mbps will be allocated to channel 1 because the source is standard definition.
19.10Mbps will be allocated to channel 2 (this is the available band with after VAFs
calculation)
If VAF is set to off the video rate can be manually adjusted for each channel. If you
configure a channel at a video rate that would cause a egress overflow the VAF logic will
constrain the misconfiguration and reconfigure the video rate for both channels.
Example:
TMR is set to 40 Mbps.
Both channels have a HD1920x1080i source.
Both channels audio = 256 kbps
Video fill is set to off.
If both encoders are set to 19.10 Mbps and you want to reconfigure them to say 15.00
Mbps for channel 1 and 25.00 Mbps for channel 2. This would cause an egress overflow
condition because you have not factored in the 3.5% reserve and bandwidth occupied by
audio pids. Even though VAF is set to off it’s logic will override the configuration request
and constrain the video rates back down to 19.10 Mbps for both channels. To obtain the
desired configuration. You would need to recalculate your rates. Then configure channel 1
to 15.00 Mbps then channel 2 to 23.00 Mbps.
How to enable EAS mode
EAS can be enabled from an automation system contact closure or from the webUI EAS tab.
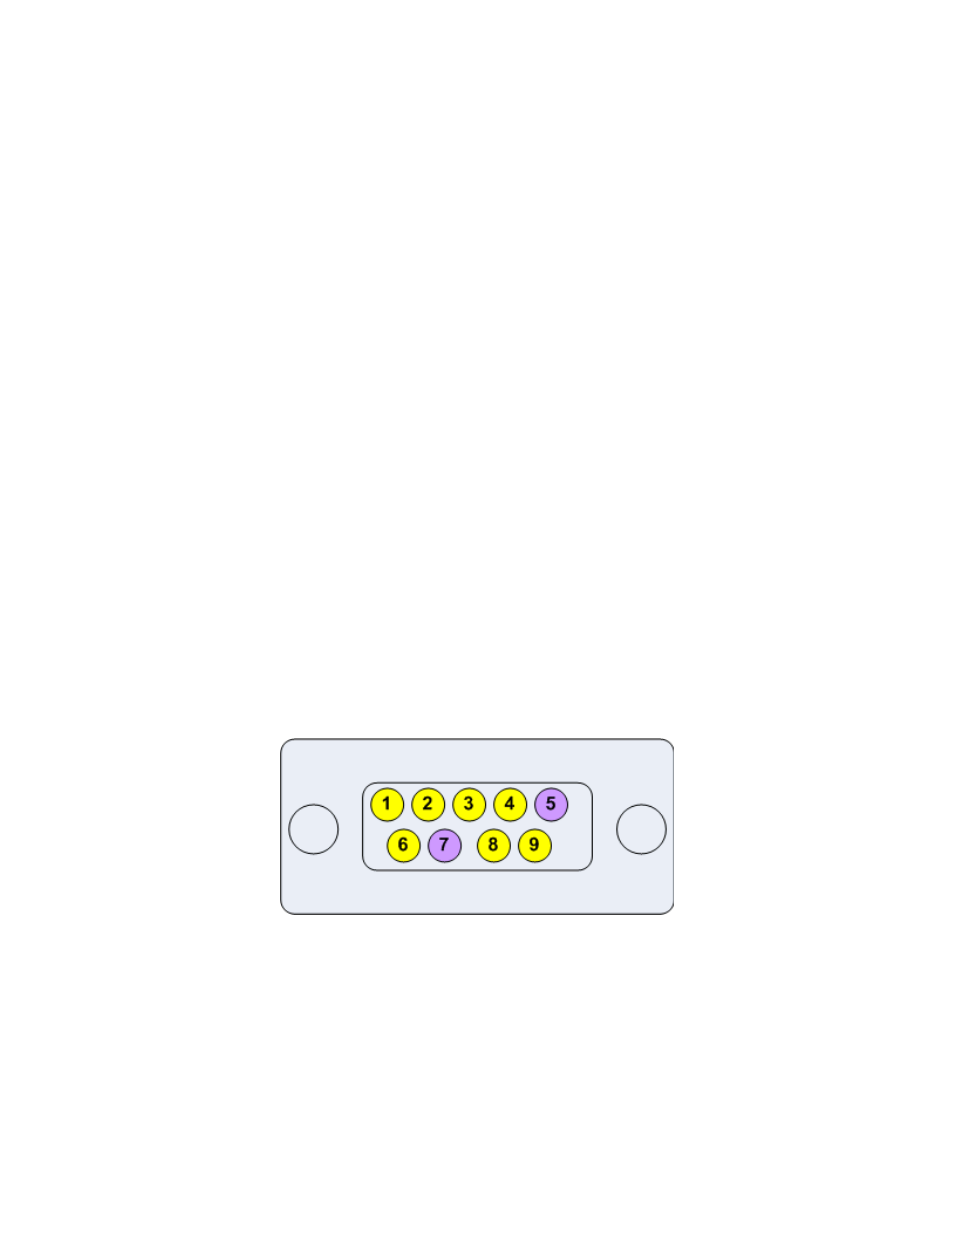
To enable EAS in VIDEO+AUDIO via the 9 Pin GPIO, short pin 5 to pin 7.
EAS GPIO Connector Pinout
To enable EAS mode from the webUI. Click the EAS tab. Select the desired EAS mode, then
click the large GO button. To disable EAS mode press the large STOP button.
How to configure Network EAS Triggering
By default the YUV2QAM is configured to send a trigger over the network to all other dual
channel encoders (HDMI2QAM, YUV2QAM, or EN-20) to also enter EAS enabled state. This
feature can be disabled by unchecking the box next to “Network EAS Triggering” then
pressing the apply button on the EAS tab.