Zilog ZAURCT User Manual
Page 25
UM022903-0311
ZAURA System Installation and Configuration
ZAURA
™
RF Wireless Lighting Control
Installation Guide
19
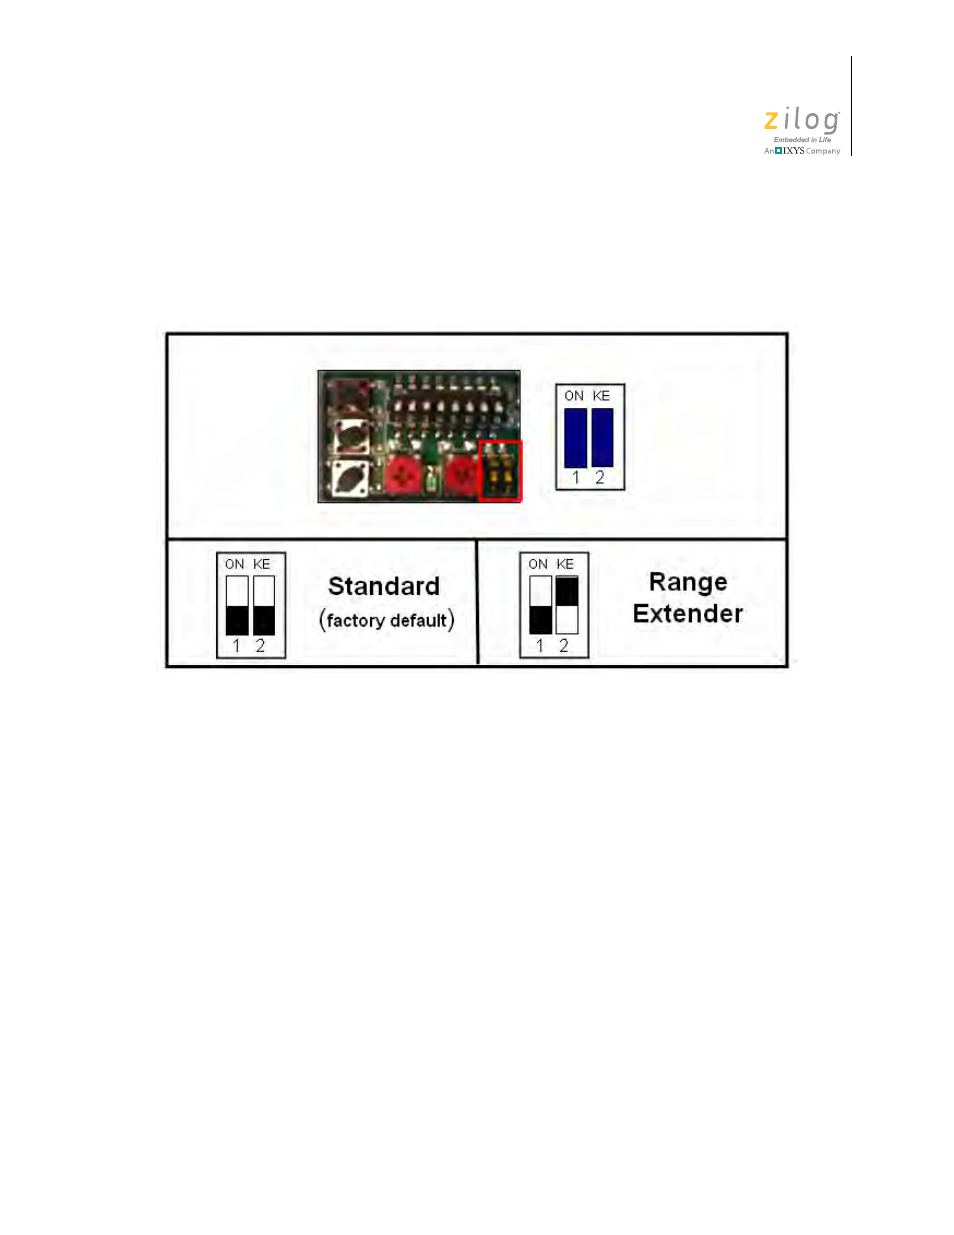
Set the Master Type DIP Switch
Begin configuring your ZAURA Master by first setting the Master Type DIP Switch to the
Standard (OFF, OFF) position, as illustrated in Figure 14.
Special Modes Setting
A Special Modes setting can provide assistance during installation or system testing. Spe-
cial Modes are activated by first setting the required mode via the DIP switches, as shown
in Figure 15, then depressing the
Set Mode
button until the green LED blinks one time.
The following paragraphs describe these special modes.
Normal Operation.
Normal operation is enabled; it is the factory default setting.
Toggle All Lamps.
When activated (i.e., the SET MODE pushbutton is pressed), the state
of all ZAURA Starters is changed to the opposite state. For example, if the luminaries are
currently turned on, then
Toggle All Lamps
will turn off all luminaries, including all Vir-
tual Dimming luminaries. The new state is retained for the lesser of one minute (after
which normal operation returns) or until a new press of the
Set Mode
button. This mode
can be used after the association of ZAURA Starters to validate that the Starters associated
properly.
Toggle Dimming Lamps.
When activated, the state of the ZAURA Virtual Dimming
Starters is changed to the opposite state. For example, if the luminaries are currently
turned on, then toggling the dimming state will turn off the Virtual Dimming luminaries.
The new state is retained for the lesser of approximately one minute (after which normal
Figure 14. Setting Master Type DIP Switches
ON
↑
↓
OFF