Paxton Superchargers 4.6L SOHC Mustang GT User Manual
Page 12
P/N: 4809655
©2007 Paxton Automotive
All Rights Reserved, Intl. Copr. Secured
16AUG07 v1.0 96-03MusGT(4809655v1.0)
1-6
I.
Using a 13mm socket, remove the two nuts
and stud bolts located at the top of the passen-
ger’s side cylinder head. (See Fig. 1.3-i.)
Fig. 1.4-a
Fig. 1.4-b
Fig. 1.3-f
Fig. 1.3-g
STUD BOLT TO
BE REMOVED
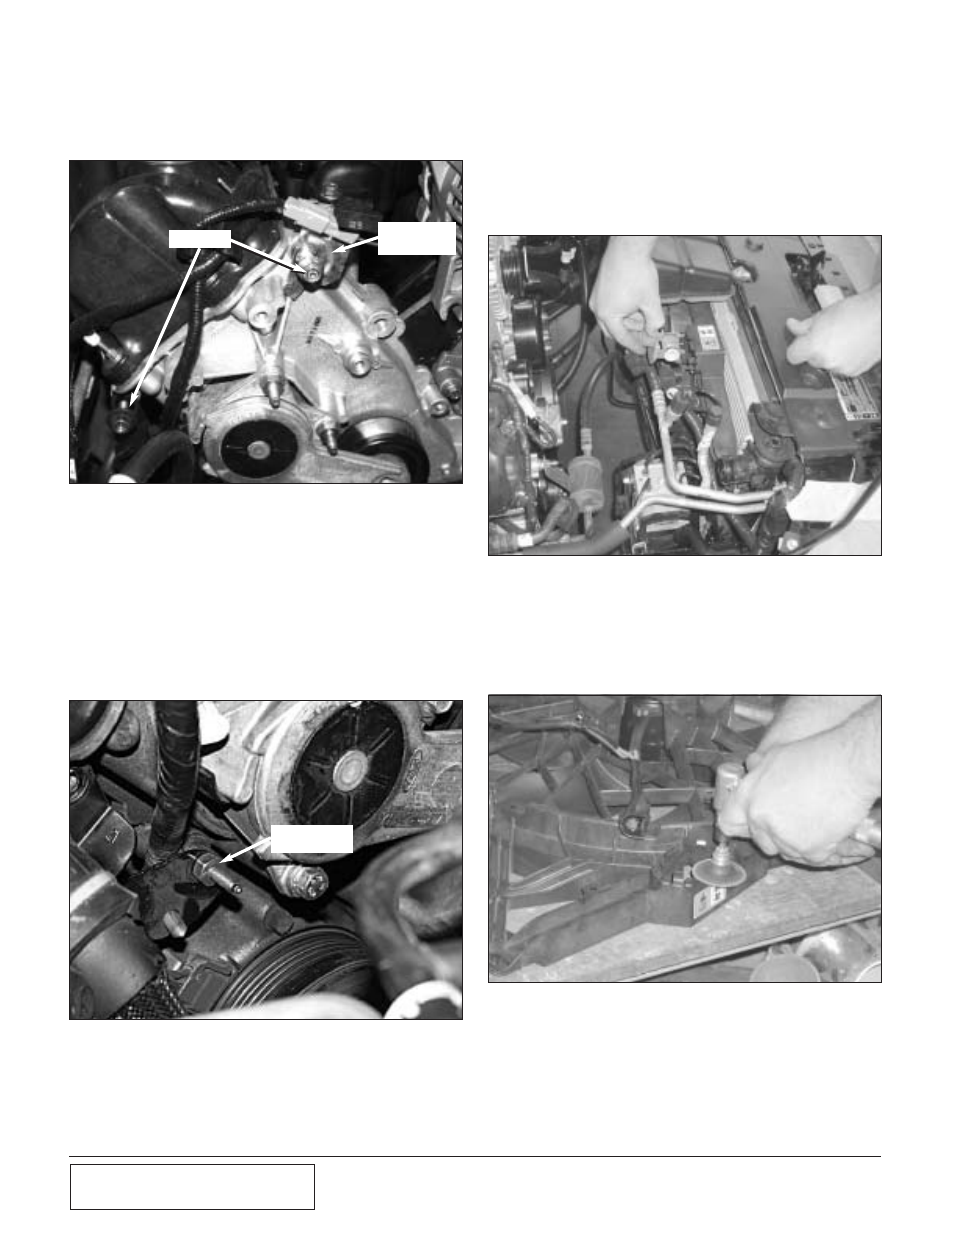
J. Remove the electrical connector mount. Set
the mount aside to be relocated in a later step.
(See Fig. 1.3-f.)
K. Remove the 13mm nut located to the left of
the belt tensioner (passenger’s side). (See
Fig. 1.3-g.) Push the bracket to the left to gain
access to the stud bolt located at the top of the
passenger’s side cylinder head. Remove the
stud bolt and set aside - it will not be reused.
REMOVE
CONNECTOR
MOUNT
B.
Trim the fan resistor mounting tabs on the
fan shroud to provide clearance for the air
intake assembly. (See Fig. 1.4-b.) The fan
shroud should look like this after trimming.
(See Fig. 1.4-c.)
1.4
FAN RESISTOR RELOCATION
2001-2003 Models Only
A. Disconnect the wiring harness from the fan
resistor. (See Fig. 1.4-a.) Remove the clips
holding the fan resistor to the fan shroud.
Attach the fan resistor to the supplied bracket
using the supplied hardware.