CRU RAX840-IR User Manual
Page 8
CRU
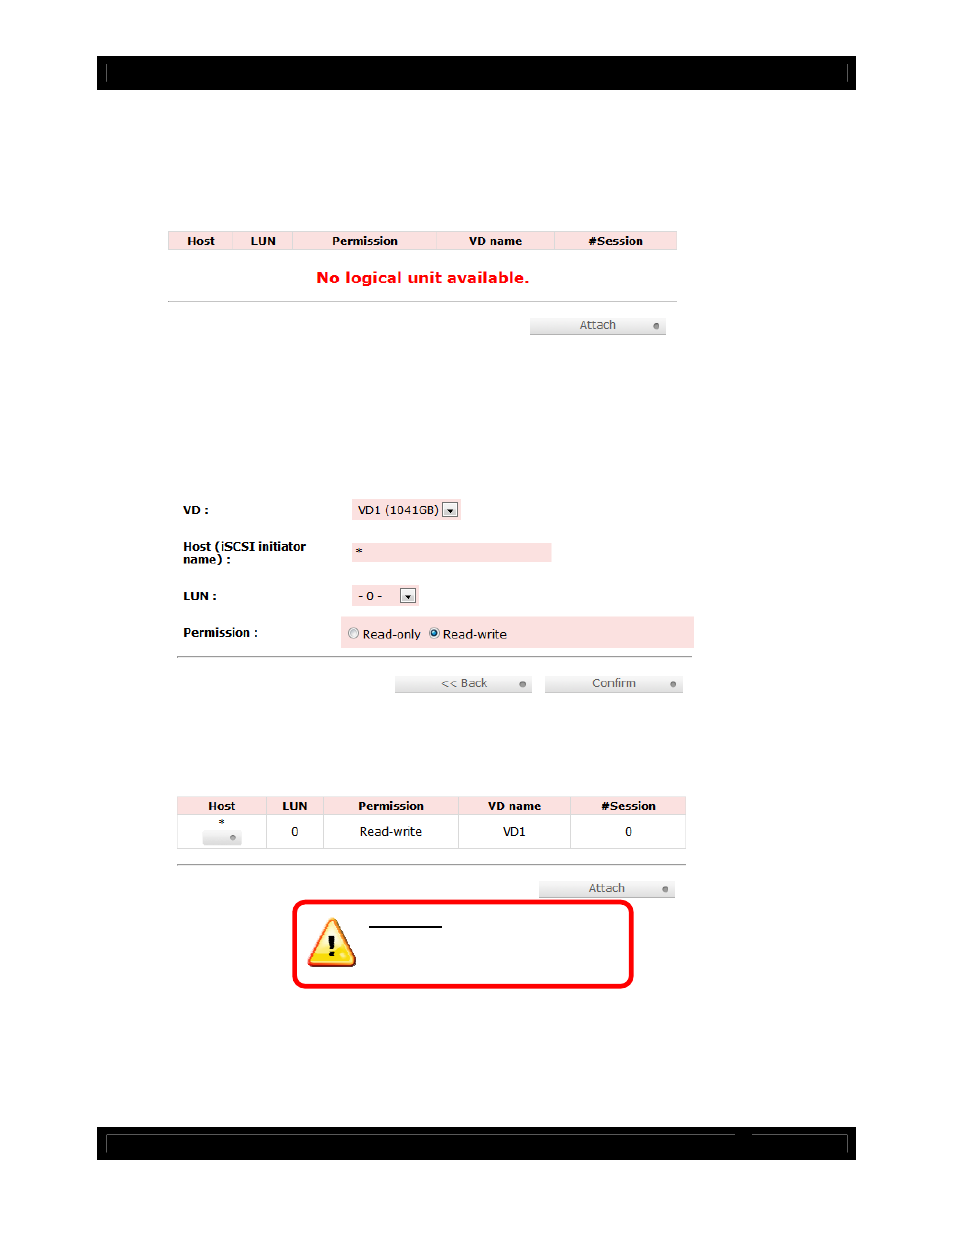
3.6 Manually Attaching a Logical Unit
You will need to attach at least one Logical Unit to a Virtual Disk to access its RAID Group, although
multiple Logical Units can be attached to the same Virtual Disk.
a)
Click the “Attach” button to attach a Logical Unit to a Virtual Disk.
b)
You will see the screen below. Fill in the information. Select the Virtual Disk to which you wish to
attach a Logical Unit. The Host name can remain as an asterisk if you want any host to access
the Virtual Disk. Otherwise, change the field to limit access to specific hosts. Then select the LUN
that will be used. The default setting on this is acceptable. Finally, select the permissions that
hosts accessing this Logical Unit will have. Then click “Confirm”.
c)
The main Logical Unit Screen will now display the Logical Unit you have just created. If you’ve
been following the instructions for manually creating a usable RAID set, you have now completed
setup and can now access the RAID set through iSCSI initiator software.
R A X 8 4 0 - I R Q u i c k S t a r t G u i d e A 9 - 8 4 0 - 0 0 0 4 - 1 R E V 1 . 0
- 8 -
3.7 Quick Installation
WARNING:
Changing RAID levels will
erase any data on the drives. Make a
backup copy of any data you wish to
keep before changing the RAID.
CRU-DataPort does not recommend using the Quick Installation option to set up your RAX.
Quick Install uses all physical disks in RAX and the maximum amount of space they contain to create a
RAID Group using one Virtual Disk. There will be no space set aside for spares. If some disks are used in
other RAID Groups, Quick Install cannot be run.