CRU RAX840-IR User Manual
Page 7
CRU
e)
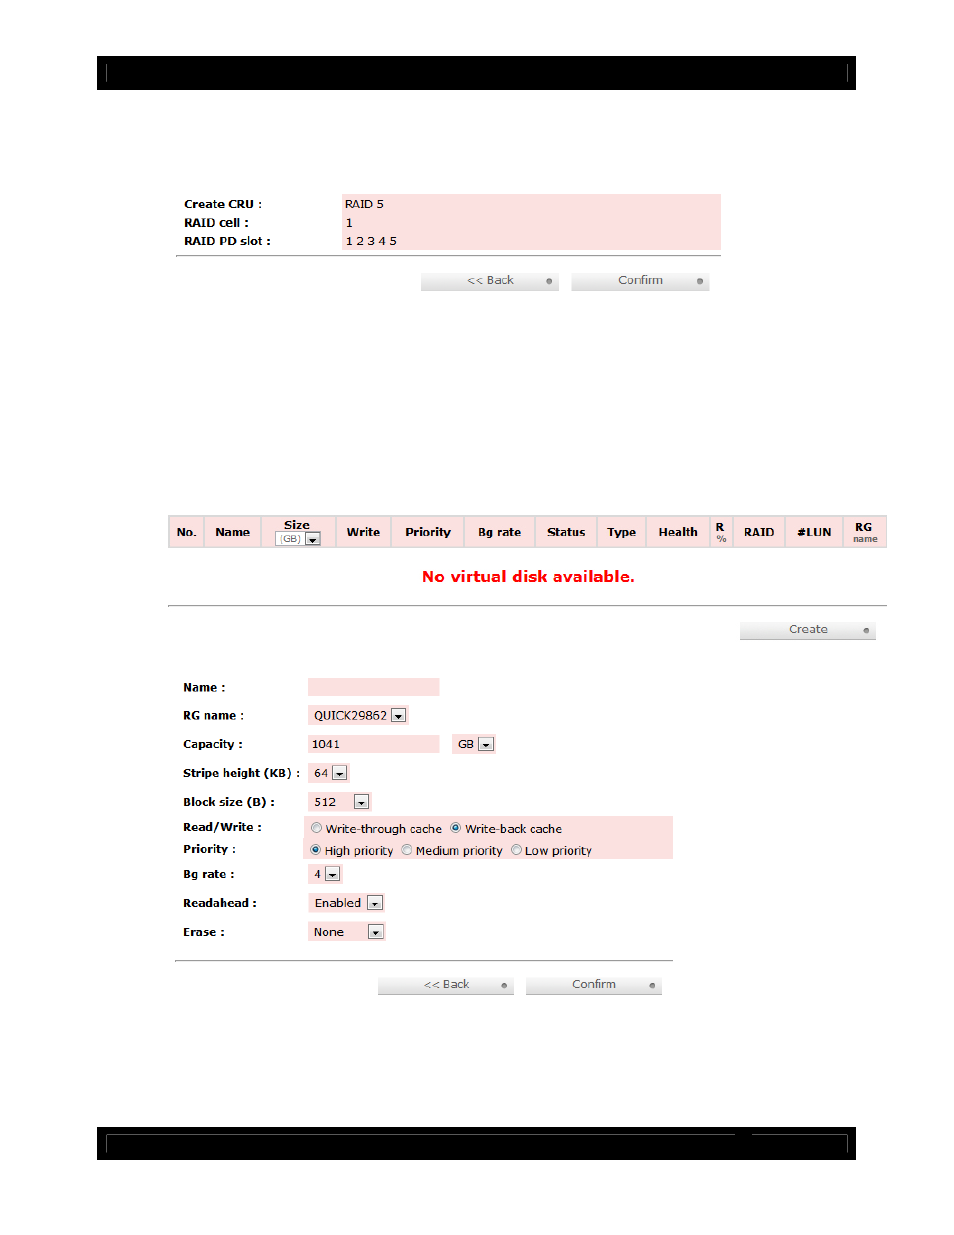
On the confirmation screen, verify that the RAID level is correct and all of the disks you selected
are displayed under “RAID PD slot”, then click “Confirm” to create the RAID Group.
The RAID Group will now display on the main RAID Group screen. To finish manually creating a usable
RAID set, a Virtual Disk still must be created and a Logical Unit must be attached. Go to the next section,
“Manually Creating a Virtual Disk”
3.5 Manually Creating a Virtual Disk
After a RAID Group has been created, you can create associated Virtual Disks. You must create at least
one Virtual Disk to access the drives of RAX with a computer.
a)
Click the “Create” button at the bottom of the page to open the Virtual Disk creation screen.
b)
You will see the screen below. Fill in the information and then click “Confirm”.
c)
The Virtual Disk will now display on the main Virtual Disk screen. If you have enabled an Erase
option, do not shut down or reboot RAX while the Virtual Disk is initializing or the erase process will
stop.
To finish manually creating a usable RAID set, at least one Logical Unit must be attached. Go to the
next section, “Manually Attaching a Logical Unit”.
R A X 8 4 0 - I R Q u i c k S t a r t G u i d e A 9 - 8 4 0 - 0 0 0 4 - 1 R E V 1 . 0
- 7 -