CONTA-CLIP EMS-Engraver User Manual
Page 8
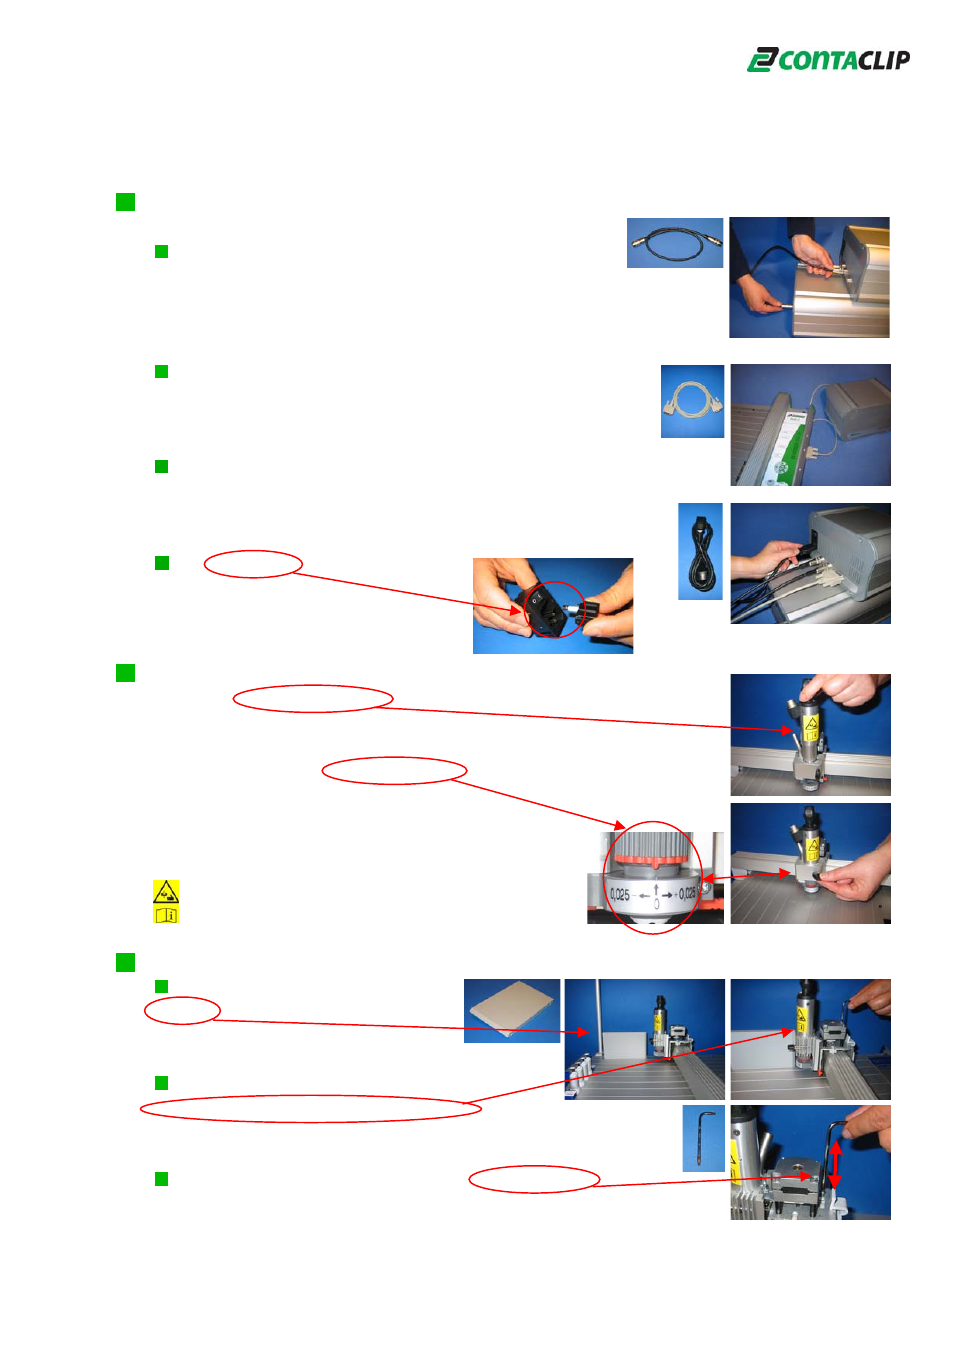
3.5 Connecting the cables
Connect the Vacuum cleaner cable between the
Vacuum cleaner EVC and the Controller EC, tighten
the plugs on each end.
Connect the Controller cable between the EMS-2 and
the Controller EC, tighten the plugs on each end.
Connect the power cord to the Controller EC and the
electrical outlet.
The main fuse (4 amp) is placed
within the socket next to the
On / Off switch.
3.6 Installing the Engraving spindle into the Engraving head
Insert the engraving spindle into the engraving head as shown and
tighten the spindle with the clamp screw. The engraving spindle has
a 0.5 mm engraving needle pre-installed from the factory.
The red mark of the depth controller needs to be in line with the
arrow of the engraving head.
Important: Do not turn the depth controller in any direction as the
precise alignment will not be possible.
Attention: Please read and follow the safety
instructions for using.
3.7 Alignment of the Engraving unit, only necessary for the first start up!
Place the calibration plate on the
EMS-2 as shown.
Move the arm with the engraving head
manually against the calibration plate, the
EMS-2 must be turned off.
Align the engraving head vertically, turn the screw with the tool
CW or CCW as shown.
7