CONTA-CLIP EMS-Engraver User Manual
Page 11
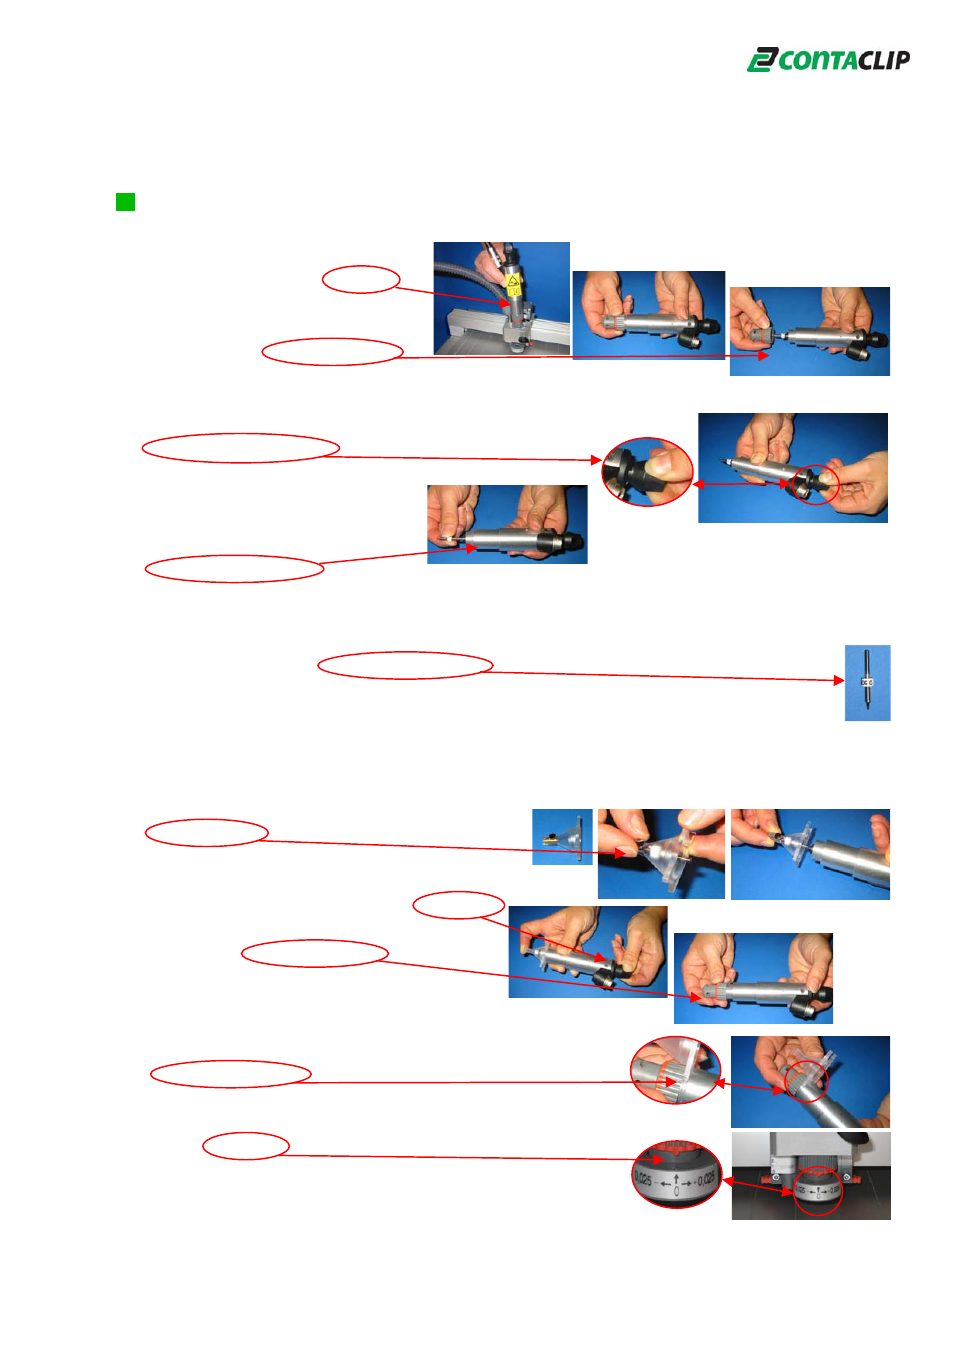
5.
Changing the Engraving needle
In order to change the engraving needle, please follow the steps below:
Loosen the clamp screw at the
engraving head and take out
the
spindle. The connecting cable
can be left on.
Unscrew the depth controller of
the
the engraving spindle completely.
Attention: Engraving needle and spindle could be hot!
Thereafter, the clamp holding the needle needs to be opened
by pressing the knob at the end of the spindle
towards the needle. Find the position with the
lowest point and turn the knob
CCW, that opens the clamp and
the engraving needle can be
pulled out carefully.
Attention: Open the clamp only a few turns to pull out the engraving needle,
open the clamp completely for cleaning purpose only.
In order to insert the engraving needles with the correct length, use always the
tool. Please use the engraving needles supplied by us only, with the use of other
brands we will not be responsible for the lack of quality or any damage to the
unit.
Attention: The point of the engraving needle is very sensitive and needs to be
treated carefully. Prevent damaging the point, if damaged the engraving quality
will be extremely limited. Use always the tool for inserting the new needle.
Insert and fix a new engraving needle within
the tool and push the needle with the tool
into the spindle.
Close the clamp by turning the knob CW,
unscrew and remove the tool.
Screw the depth controller onto the
spindle.
The controller has reached its zero
position with a distance of approx. 3 mm to the spindle.
Use the tool as a distance check by holding the one
side open washer between the depth controller and the
spindle, as shown.
Insert the spindle into the engraving head by checking the position
of the red mark of the depth controller, needs to be in
line with the arrow at the engraving head. Tighten the
spindle with the clamp screw.
10