Creating template files in gencg – Compix AutoCast 3.1 User Manual
Page 10
Chapter 1 Getting Started
Creating Template Files in GenCG
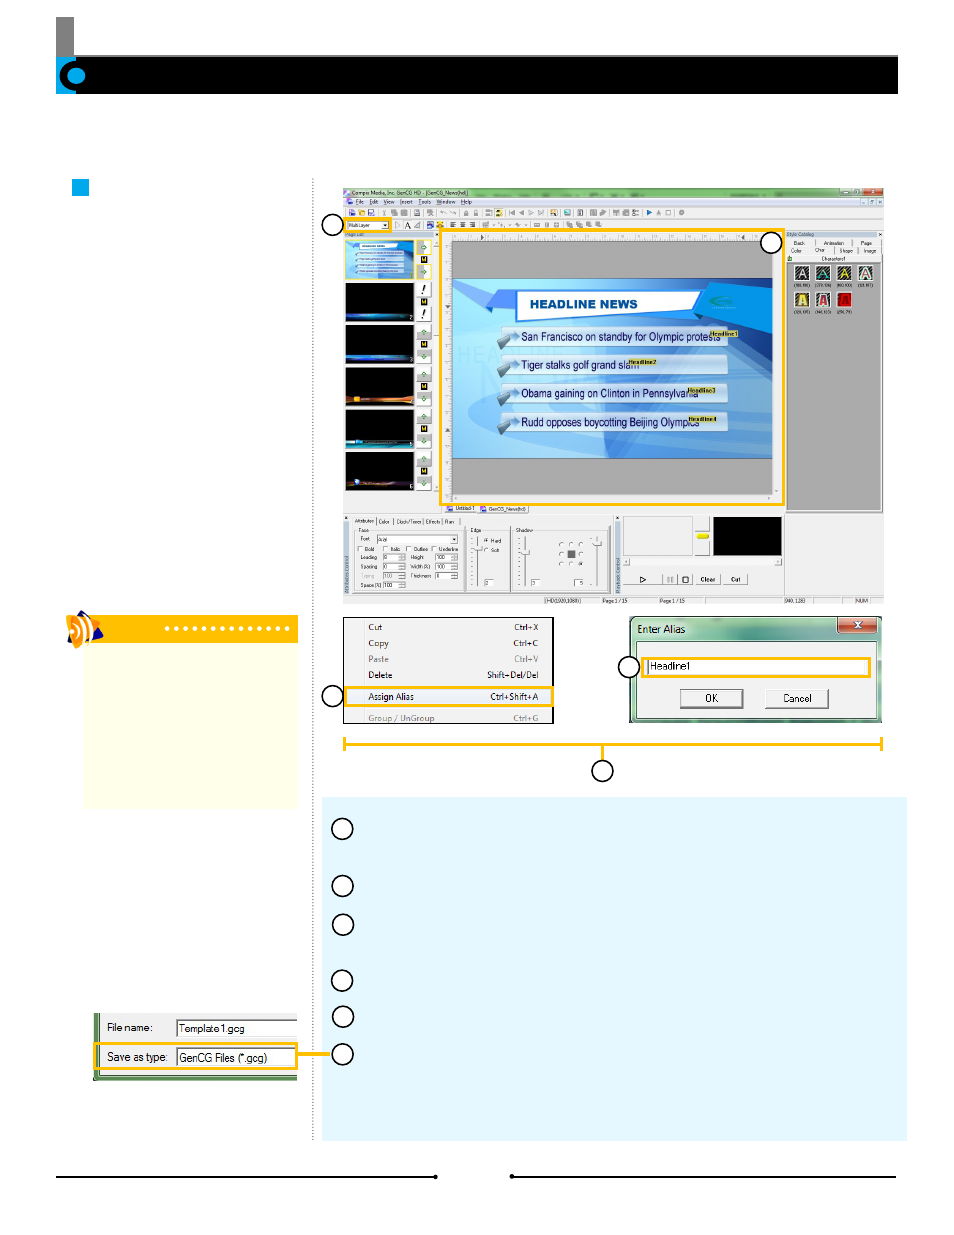
Open a new project in GenCG and set the first page to [Still] or [MultiLayer] in
the Page Mode drop down menu.
Create the graphic with the appropriate objects.
Right click a text, image, or animation object to be replaced within AutoCast,
then click on [Assign Alias].
Type a name for the object’s alias in the [Enter Alias] window and click [OK].
Repeat steps 3 to 4 for all desired objects to be replaced within AutoCast.
Once finished, save this template as a *.gcg file into one of the folders below.
Windows XP: C:\Program Files\Compix\AutoCast\Template
Windows 7: C:\Users\UserName\Documents\Compix\AutoCast\Templates
Before operating AutoCast 3.1, a library of template files should be prepared ahead of time. These templates contain the desired
color, font, and other attributes which will be brought to air.
Static Templates
Template files allow the user to
choose the the appropriate custom
graphics. Certain objects are speci-
fied to accept text or image files by
assigning a name or Alias. Template
files for AutoCast 3.1 are created in
GenCG.
Tip
It is recommended that alias objects
have names that easily identify their
purpose. For example, a lower third
template that is intended to display a
reporter name and location should have
two text fields. The aliases for these text
objects could be “Reporter Name” and
“Location”.
1
2
4
6
1
3
2
3
5
4
5
12
Compix Media AutoCast
Document No: 2.3.003 Revision: 2.2 Updated: 9/12/2012