Woodhaven 577: Horizontal Router Table - Angle Ease User Manual
Page 3
3
4
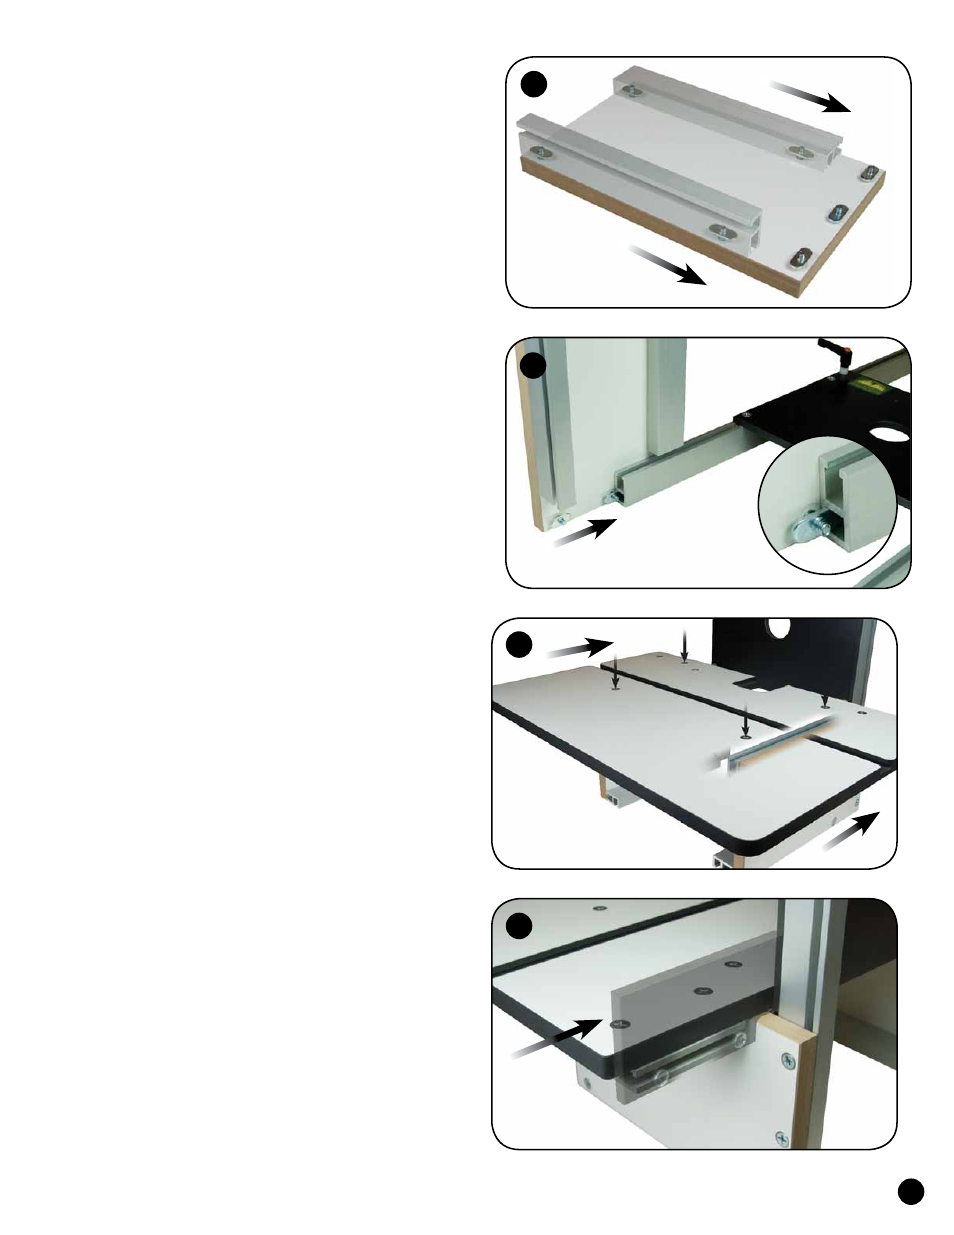
3. ASSEMBLE THE SIDES
Install a 1-1/4" screw (MF020) thru the countersunk
holes in the pair of MDF sides (578C) and start an oval nut
(5760B) on the ends of the screws. Slide a 9-3/4" double
track (4010) onto the oval nuts located on the long edges
of both sides. Adjust the two tracks even with the end
and edges of each side and tighten the screws. One track
should be oriented vertically and the other should lay flat.
Mirror this setup for the second side. See fig. 3 & 4
2
5
6
4. ATTACH THE SIDES AND PLATE GUIDES
Slide the assembled sides onto the 24" double track, with
the oval nuts in the T-slot of the 24" track, until they're even
with the end of the track and tighten the screws. See fig. 4.
5. INSTALL THE TABLE TOP
Install a 1-1/4" screw (MF020) thru the four countersunk
holes shown in the phenolic table (578B) and start an oval nut
(5760B) on the ends of the screws. Slide the table/oval nuts
onto the T-slot of the 9-3/4" tracks at the top of the MDF sides.
Position the table so its edge is approximately 1/32" away from
the face of the router plate and tighten the screws. See fig. 5.
6. ASSEMBLE & INSTALL THE FENCE BRACKETS
Install a 1-1/4" screw (MF020) thru the four remaining
countersunk holes in the phenolic table (578B) and start
an oval nut (5760B) on the ends of the screws. Slide a
4" double track (4004) onto the oval nuts so the T-slot
in the edge of the track faces towards the edge of the
phenolic table and hangs past it slightly. Center the track
on the oval nuts and tighten the screws. See fig. 6.
Insert a 3/4" screw (5771B) thru the holes in the
phenolic fences (578G) as shown and install an oval nut on
the ends of the screws. Slide the oval nuts/fences onto the
4" double tracks, with the end of the fence 1/32" from the
edge of the plate and tighten the screws. Using a straight
edge, loosen the two screws holding the fence bracket
on the phenolic table, adjust the fence face even with
the face of the router plate and re-tighten the screws.