Woodhaven 577: Horizontal Router Table - Angle Ease User Manual
Page 2
BEFORE BEGINNING
Identify and verify that you have all the parts
listed. Read the instructions at least once, familiarizing
yourself with the parts, before beginning. You’ll
need a #3 Phillips screwdriver for assembly.
ANGLE-EASE ASSEMBLY
Assemble the 1424 according to the
instructions that are included in the bag with the 577
instructions and the 577P. Set it aside for now.
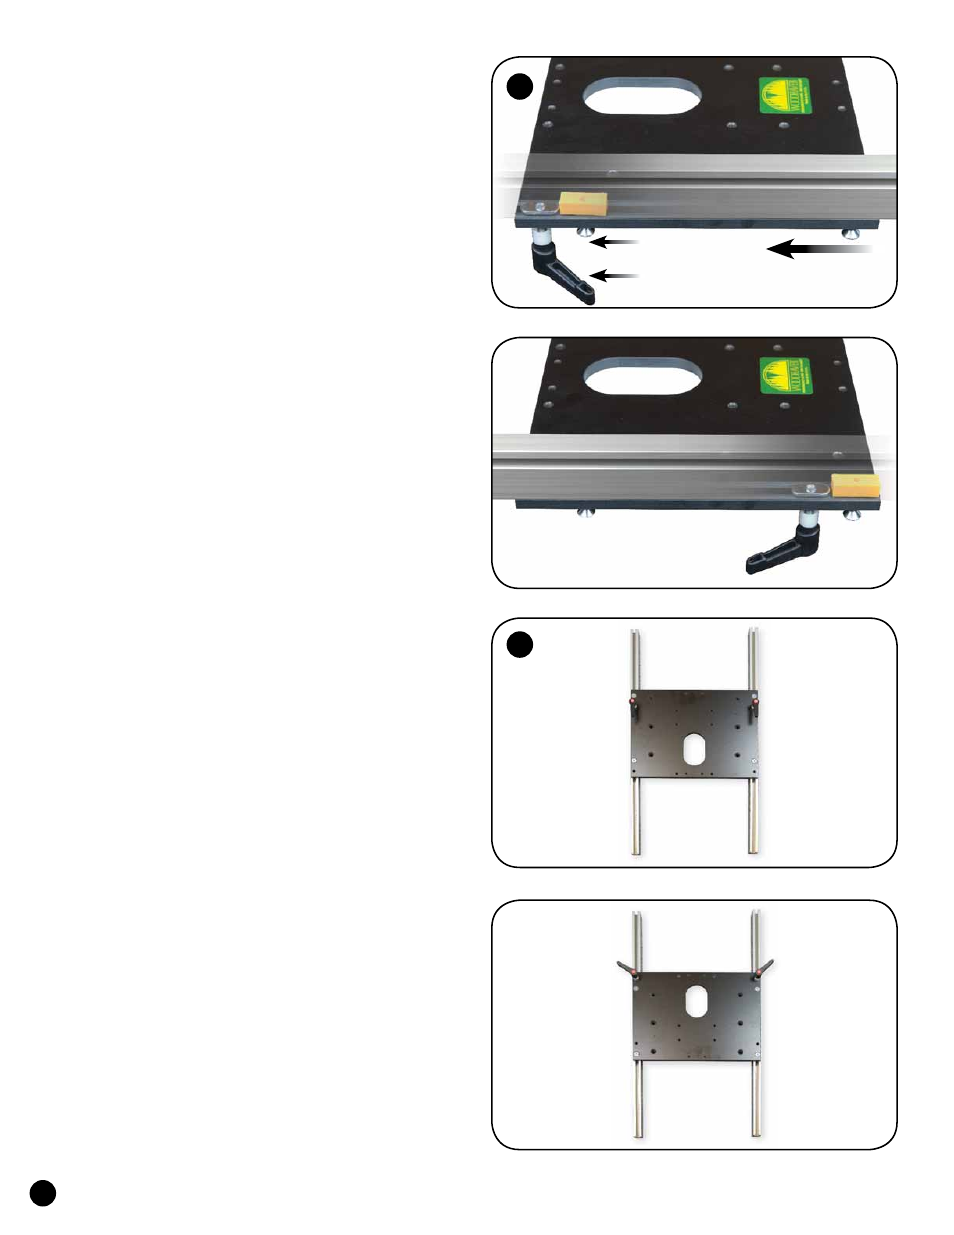
1. PLATE GUIDE ASSEMBLY
The router plate (577P) can be mounted in one of two
ways. Generally, for safety, we recommend you mount
it so the the bit is always between the work and the table
during use. If the bit opening in the router plate is placed at
the top, the router will tilt down and the bit will tilt up. If
you place the bit opening in the router plate at the bottom,
the router will tilt up and the bit will tilt down. Decide
which way you want to tilt the router/bit. See fig. 2.
The router plate has ribs that guide the plate in the
tracks. Install a spacer (BUSH5038) on the threaded stud
of both ratchet handles (5863) and insert the studs thru the
holes at the top corners of the router plate (577P). Start
an oval nut (5760B) on the end of both studs. See fig. 1.
Install the four 1" screws (MF015) thru the four
countersunk holes in the router plate. Start a track guide
(578E) on the ends of the screws. Note that one side
of the track guide hole is chamfered. Start the screws
into the threaded holes from the chamfered side. You'll
notice that the hole gets tighter as you turn the screw
further into the track guide. This reduces any chance
of vibration from your router loosening the screws
and affecting your router plate height. See fig. 1.
Install a 24" double track (4024) on the
oval nut and both track guides on each side
of the router plate. See fig. 1 & 2.
2. PLATE ADJUSTMENT
Make sure the T-slot on the side of the track faces
out, away from the router plate. The rib on the back of
the router plate (on each side) should be in the T-slot of
the track. Snug all four screws until the track won't slide,
then loosen the screws until the track just begins to slide,
but not too easily. There should be a little tension on the
track. Position the tracks approximately centered on the
router plate and tighten the ratchet handles. See fig. 2.
1
2
1
Bottom of Plate
Top of Plate
MF015 & 578E
5863, BUSH5038 & 5760B
Top of Plate
Bottom of Plate
Top of Plate
Bottom of Plate