Woodhaven 8250K: Portable Router Table, Fence & Leg Set User Manual
Page 3
2
7
8
7
8
9
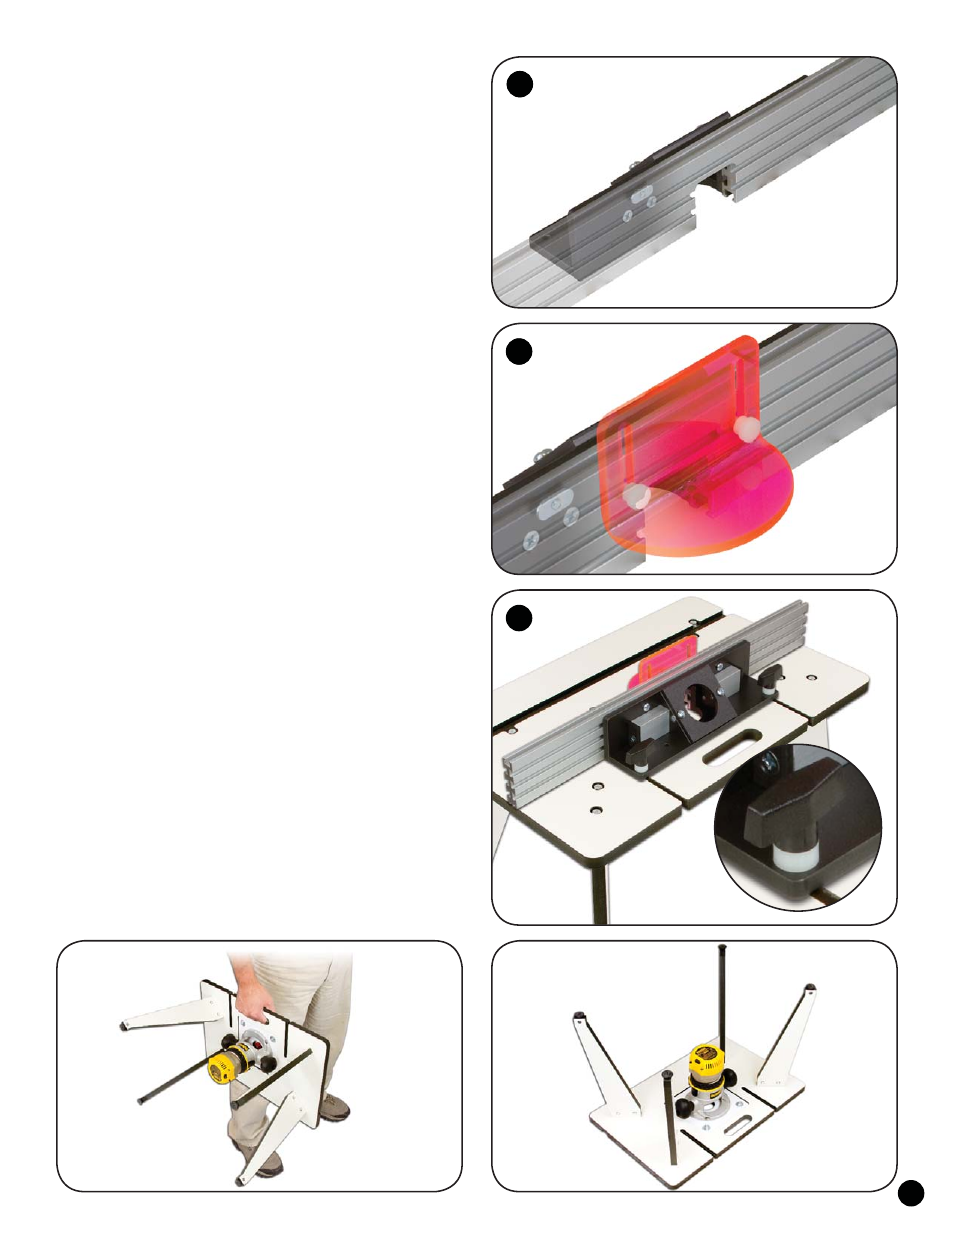
ROUTER FENCE ASSEMBLY
Insert a 5/8" screw (5775B) thru the two holes in the
vertical Base and start an oval nut (5760B - raised side first) on
the end of each screw. Slide the 24" Aluminum Fence (201A -
use either side) onto the oval nuts, center its bit opening with
the bit opening in the Base and tighten the screws. See fig. 7.
Insert a 1/2" thumb screw (5503) thru the two slots in
the Guard (224) and start an oval nut (5760B - raised side
first) on the end of each screw. Slide the oval nuts/Guard in
the upper T-slot in the vertical face of the Aluminum Fence,
center it on the bit opening and tighten the screws. See fig. 8.
Insert a 3/8" long spacer (BUSH050) on both of the
T-Knobs (5548S), insert the stud of the T-Knobs thru the
holes near the corners in the horizontal Base and start
an oval nut (5760B - flat side first) on the end of each
stud. Slide the oval nuts/Fence into the slots in the Table
and tighten the T-Knobs. Use the remaining hole in the
horizontal Base to hold the Starting Pin (101A). See fig. 9.
USING THE PORTABLE ROUTER TABLE
The Portable Router Table is designed to be carried by
the handle opening machined in the table. It is not necessary
to remove the router or fence when transporting it, but make
sure the fence and router lock are tight before transporting.
To change bits, set the table on its side for easy
access to the router. If you want a more permanent
table mount, attach a 16" x 24" plywood base to the
bottom of the four legs in place of the non-skid feet,
then mount it on a stand or cabinet of your choosing.
STORING THE ROUTER TABLE - READ ME!!!!!
Our Table & Router Plate is resistant to sagging and
flexing during use. However, long term storage of the table/
router in the upright position is not advisable. Prolonged
hanging may cause the table/plate to sag, proving again that
gravity works. After use, remove the router fence and store
the table/router upside down with it laying on a flat surface.
STARTING PIN
The Starting Pin (101A) is used with piloted type
bits to aid in starting the cut in an odd or irregular
shaped piece. It is a safety device and should be
used in lieu of trying to start the cut freehand.
©Copyright WOODHAVEN INC. 11/15/10
(800) 344-6657 or WWW.WOODHAVEN.COM