Router table instructions, Please read carefully – Woodhaven Router Plate and Table User Manual
Page 4
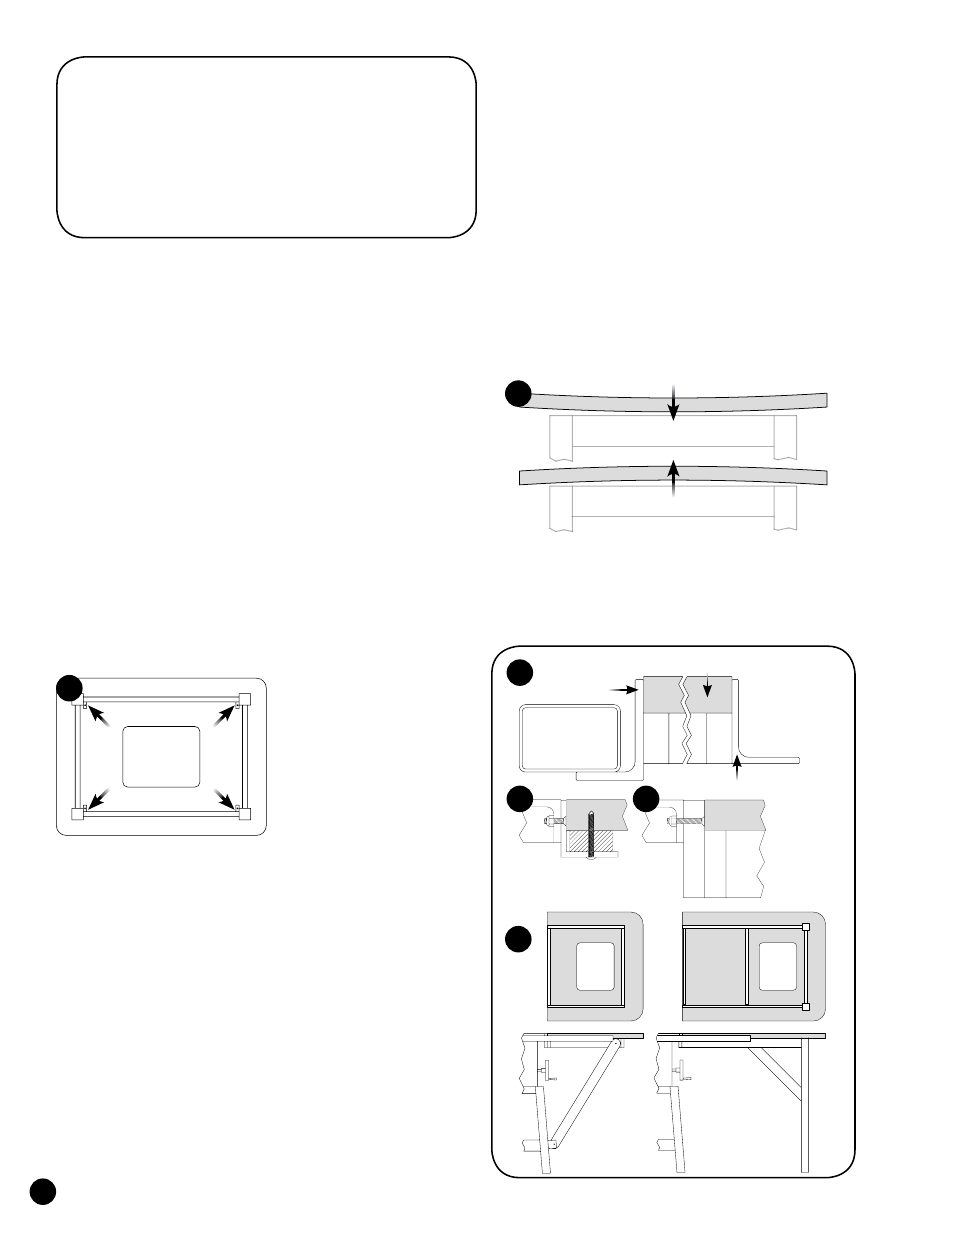
5. TABLE FLATNESS SPECS
Our tops are guaranteed flat to within .001 (one
thousandths of an inch) per 1" of table length. For example,
a 24" x 32" table can be up to .024" out of flat across the 24"
width and up to .032" out of flat across the 32" length and
still be within our specs. It is rare for a table to be that far
out of spec and if it does warp it will usually only be in one
direction. An exception to our flatness specs is a table with a
miter slot. These can warp along the length of the slot. We do
not guarantee table flatness on these tables because cutting
a miter slot relieves stress on one side of the table and can
cause it to warp. The good news is that it is easily re-flattened.
If your table is warped slightly but within our specs,
or warped along the miter groove, it can be re-flattened by
pulling the "high" part of the table down and/or applying
shims between the leg rail and the underside of the table
to force the "low" part of the table up. See fig. 5.
If your table is out of spec we will replace it, provided
that it is not warped along the miter slot and it has
been mounted to one of our leg sets or cabinets, or a
leg set that meets our design criteria for support.
The Woodhaven router table you have purchased is one
of the best investments you can make in your shop. We hope
you enjoy this product and are able to put it to good use. To
aid you in getting the most out of this router table we have
prepared this brief instruction sheet. Please read it carefully.
1. INSPECT THE ROUTER TABLE
We take every precaution to insure that your router table
arrives in the same condition it was sent. After unpacking
your table, inspect it for any damage caused in shipping.
Dented edges or marks in the surface are some signs of shipper
damage. If you purchased the table directly from Woodhaven,
call us and we will let you know what to do next. If you
purchased the table from one of our dealers, call them.
2. INSTALL MITER TRACK
If your table includes an aluminum T-Slot Miter Track,
attach it to the table using the screws provided. The screws are
self-drilling and don't require a pilot hole. A power screwdriver
may be used too, but be careful not to strip the holes.
3. MOUNT THE TABLE
The router table needs to
be properly supported to
insure that it stays flat. This
requires a well designed
support frame, which
Woodhaven leg sets and
cabinets provide. Attach
the table to your homemade
leg set using four (or more)
1" angle brackets. We
recommend you place the angle brackets at, or near, the
four corners of the router table. See fig. 3. You can
screw into the bottom of our MDF tables, but not into the
edge. Our Phenolic tables have T-slots machined in the
bottom for attaching it to a leg set with angle brackets.
4. TABLE SAW ROUTER TABLES
These router tables can be mounted on the right or left
side of the table saw and may be trimmed shorter to suit
your needs. Sometimes a support frame can be attached
to the fence rails of the table saw. See fig. 4A. If not,
you will need an inboard bracket that attaches to the table
saw. See fig.4B & 4C. It will also need legs or braces to
support the outboard end of the frame/table. See fig.4D.
Router Table
Instructions
Please Read Carefully!
Angle brackets at
four corners
3
4A
4B
4C
4D
Fence Rails
Router Table
Support Frame
4
Warps up: pull down at ends, shim in center
Warps down: pull down center, shim ends
5