Oem supercharger pulley removal, cont’d – Vortech 2007-2009 FORD GT500 OEM POWER PACK UPGRADE User Manual
Page 9
DP/N: 007125v1.0
© 2010 Vortech Engineering, LLC
All Rights Reserved, Intl. Copr. Secured.
27AUG2010 GT500 OEM POWER PACK
4
1.
OEM SUPERCHARGER PULLEY REMOVAL, CONT’D
J.
Install the tool assembly onto the supercharger
pulley, with the back side of the OE pulley nested
into the step in the removal plate. (See Figure 1-i)
K.
Rotate the 5/8" screw clockwise so that the M8
set screw will thread into the end of the super-
charger shaft. Snug (do not tighten) the screw into
the supercharger shaft.
L.
Using either a 15/16” socket on a breaker bar or a
boxed wrench, hold the end of the 5/8” screw from
turning while using the other wrench to turn the
flanged nut to pull the pulley off.
M.
Listen for the “POP” to alert you that the pulley
has broken free, it will become easier to turn the
nut at this point and you should see the pulley
coming off. (See Figure 1-j)
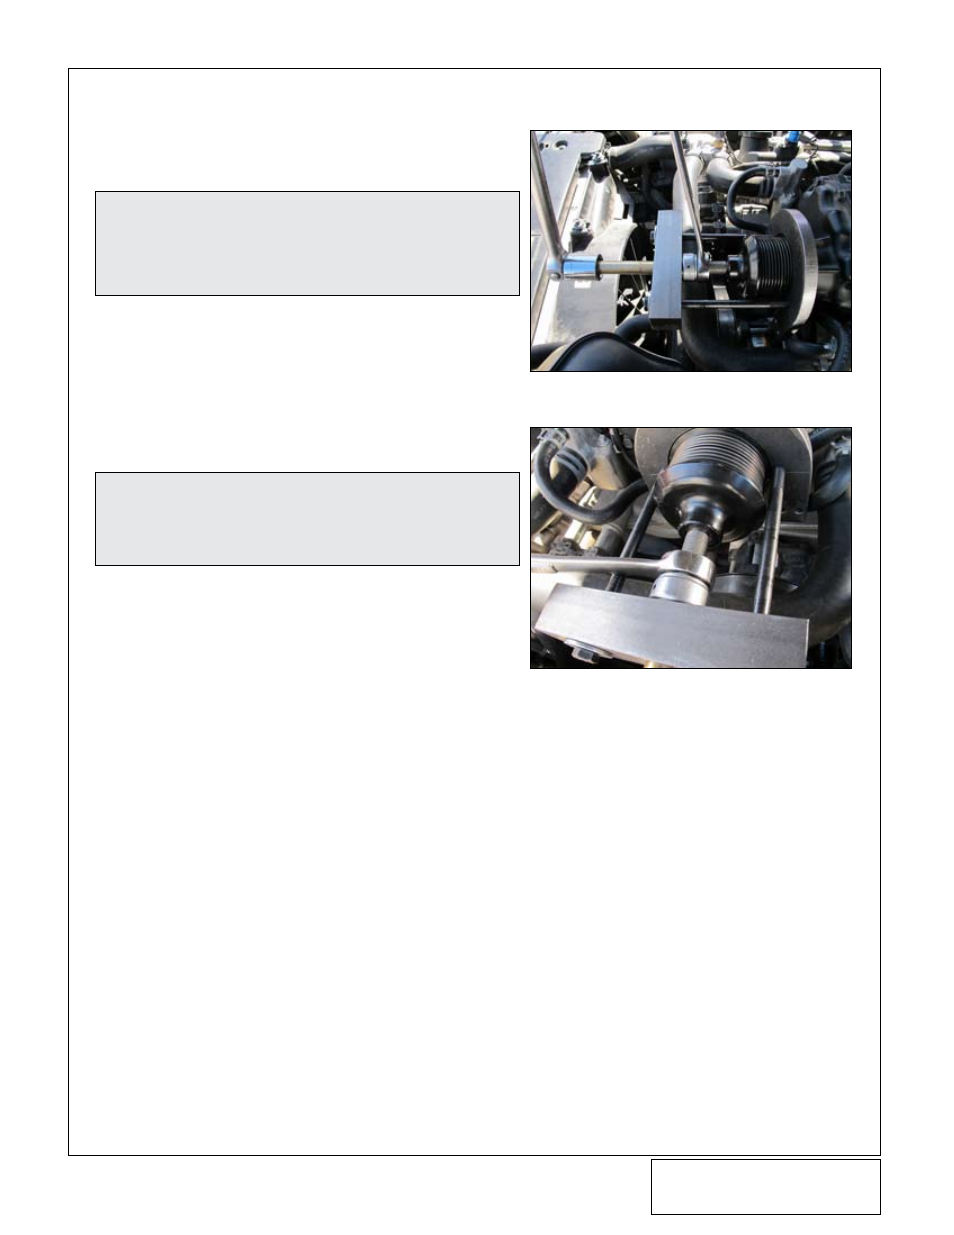
Fig. 1-i
Fig. 1-j
NOTE:
Removing the OEM pulley only after the engine
has been allowed to cool overnight will allow the
pulley to effectively “break loose” from the shaft
and produce a “POP” sound when it becomes
free.
NOTE:
Instead of an open end wrench, we recommend
installing a boxed end wrench on the flanged nut
to apply the torque more evenly and ensure the
wrench will not round the nut corners. Slide the
box wrench over the nut.