Auxiliary idler pulley installation – Vortech 2007-2009 FORD GT500 OEM POWER PACK UPGRADE User Manual
Page 12
DP/N: 007125v1.0
© 2010 Vortech Engineering, LLC
All Rights Reserved, Intl. Copr. Secured.
27AUG2010 GT500 OEM POWER PACK
7
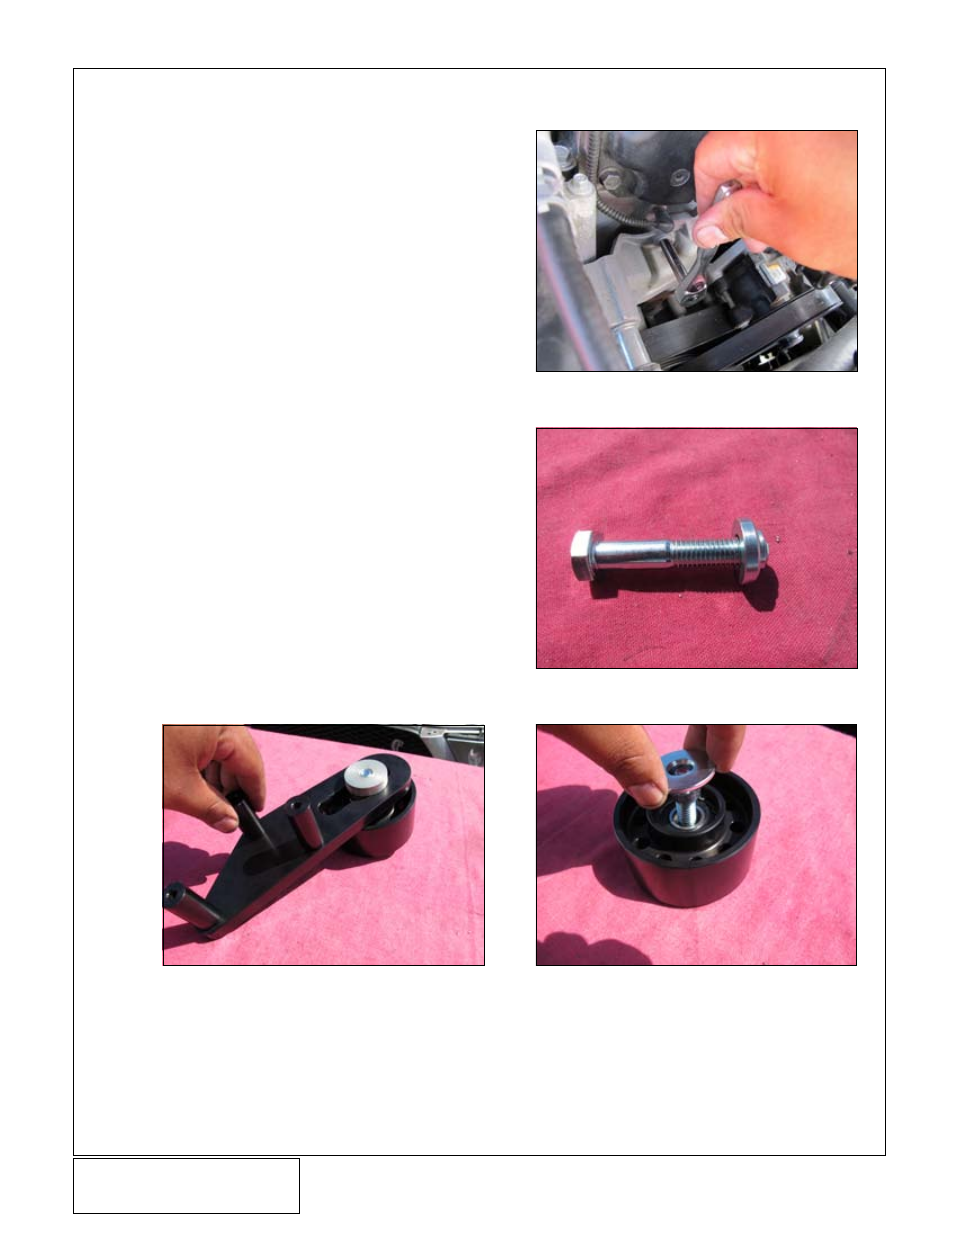
A.
Remove the three screws securing the OEM
Charge Air Cooler (CAC) water manifold to the
lower manifold using an 8mm socket (See Figure
3-a)
B.
Assemble the supplied Auxiliary Idler Pulley in the
sequence as follows:
1: Install the pilot spacer onto the M12 screw
with the smaller diameter facing away from the
head of the screw as shown (See Figure 3-b)
2: Insert the M12 bolt with pilot spacer through
the idler. Ensure that the snap ring inside the idler
is facing away from the head of the screw. (See
Figure 3-c)
3: Insert the idler spacer with the conical face
into the idler assembly (See Figure 3-c)
4: Insert the custom machined nut into the slot
in the bracket from the counter-bored hole side,
then thread the idler assembly from the opposite
side into the machined nut. DO NOT TIGHTEN
IDLER PULLEY AT THIS TIME. (See Figure 3-d)
5: Install the 1.65” long spacers into the coun-
ter-bored holes on the bracket. (See Figure 3-d)
6: Insert the three M6 screws with washers
through the bracket, from the idler assembly side.
3.
AUXILIARY IDLER PULLEY INSTALLATION
Fig. 3-b
Fig. 3-c
Fig. 3-d
Fig. 3-a