Oem supercharger pulley removal, cont’d – Vortech 2007-2009 FORD GT500 OEM POWER PACK UPGRADE User Manual
Page 8
DP/N: 007125v1.0
© 2010 Vortech Engineering, LLC
All Rights Reserved, Intl. Copr. Secured.
27AUG2010 GT500 OEM POWER PACK
3
1.
OEM SUPERCHARGER PULLEY REMOVAL, CONT’D
F.
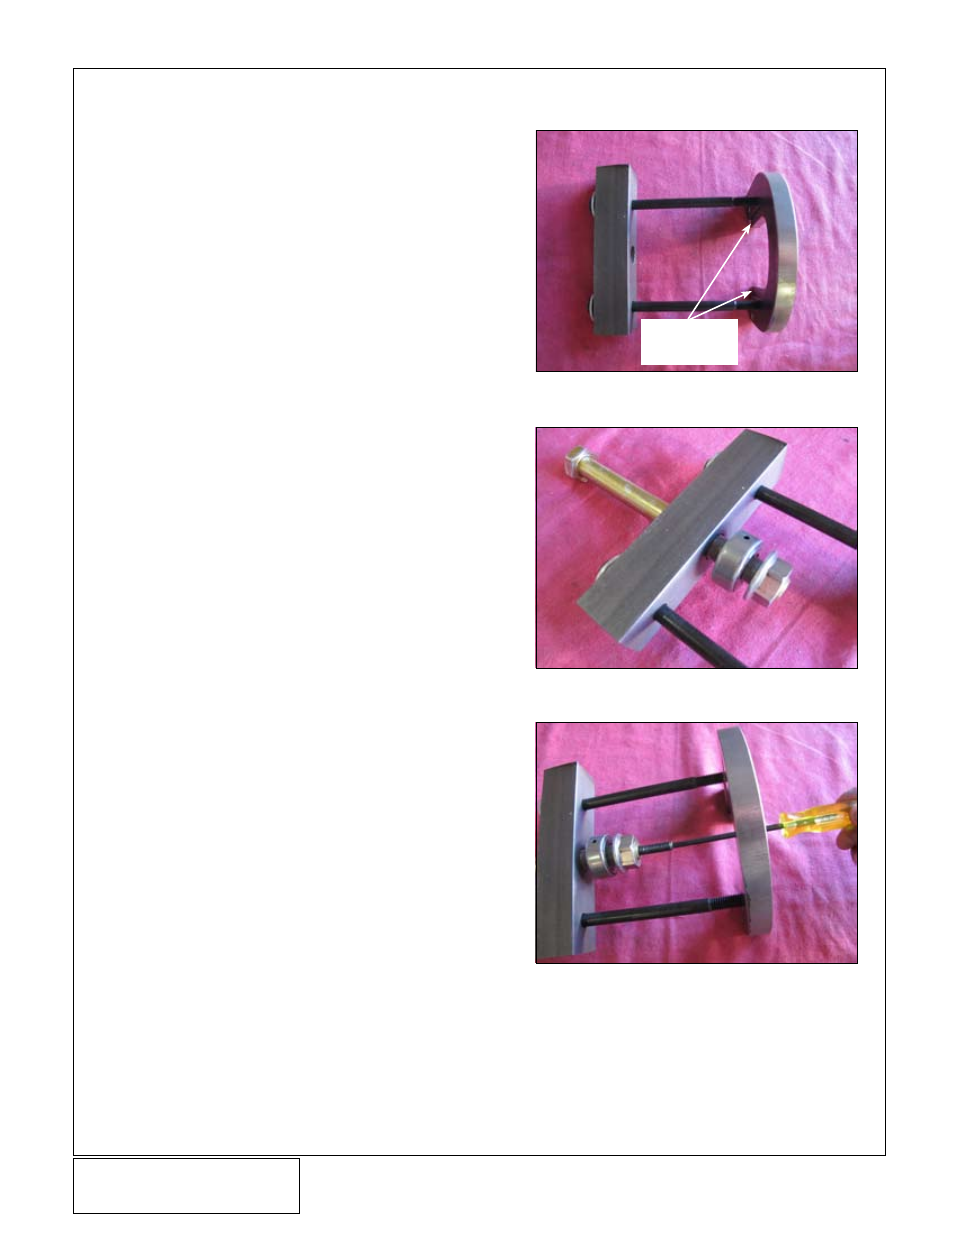
Pre-assemble the supplied tool as shown. Insert
the two 3/8”x6-1/2" screws with washers through
the outer holes of the pulley removal bar and
thread them evenly into the pulley removal plate.
Be sure the two 3/8” bolts are exactly flush to the
back of the pulley removal plate. It is very impor-
tant that the pulley removal plate and the pulley
removal bar are evenly spaced. (See Figure 1-f)
G.
At this time you will need to lightly apply anti-sieze
or moly grease to the threads of the 5/8” screw
and light oil into the thrust bearing. Then insert the
screw through the center hole of the pulley remov-
al bar.
H.
Assemble the thrust bearing with the free rolling
face towards the pulley removal bar, and install
the supplied 5/8” nut with the flange surface
towards the back of the thrust bearing. (See
Figure 1-g)
I.
Apply loctite onto the supplied M8 set screw and
thread it into the center of the 5/8” screw. Tighten
the set screw. This will aid in keeping the tool cen-
tered on the supercharger pulley shaft. (See
Figure 1-h)
Fig. 1-f
Fig. 1-g
Fig. 1-h
Step in plate must
face as shown