Vortech 1986-1993 Ford 5.0 Mustang User Manual
Page 13
P/N: 4FA020-010
© 2009 Vortech Engineering, Inc.
All Rights Reserved, Intl. Copr. Secured
16APR09 v4.1(86-93 5.0 Mus (4FA v4.1))
1
NEW ADDITIONAL PULLEY
BOLTS: 3/8-16 x 2"
RENEGADE/HIGH-OUTPUT PULLEY
STANDARD PULLEY
HIGH-OUTPUT BOLTS:
3/8-16 x 2-3/4"
RENEGADE BOLTS:
3/8-16 x 1-1/2"
1. PREPARATION/REMOVAL
A. Disconnect the battery negative cable.
B. Remove the accessory drive belt. Super High-Output (S.H.O.)
V-7 installations also require removal of the shroud and fan
from the vehicle.
C. Remove the radiator fan assembly and carefully place it in
the fan shroud, out of the way.
D. Remove all components that lead to the throttle body including
air filter assembly, rubber bellows, mass air flow (MAF) sensor
and bracket with rubber mounts and resonator from inner
fender. Separate the MAF sensor from the mounting bracket
and set aside.
E. The ground wire attached to the radiator support must be
rerouted so as to pass through the hole behind the right
headlight and secured from the front. Make sure to clean
away any paint that would insulate the end of the ground
wire from the grounding point on the vehicle.
F. Drain approximately one gallon of coolant. Remove upper
radiator hose and set aside.
G. Remove the crankcase vent tube from between oil filter and
throttle body.
H. Remove belt tensioner assembly.
I. Unplug wire connections and remove alternator assembly
(make sure the battery is disconnected).
J. Remove brace from between the smog pump and front engine
cover.
K. Disconnect hoses and remove smog pump and cast mounting
bracket.
L. Relocate the evaporative canister forward (at a slight angle)
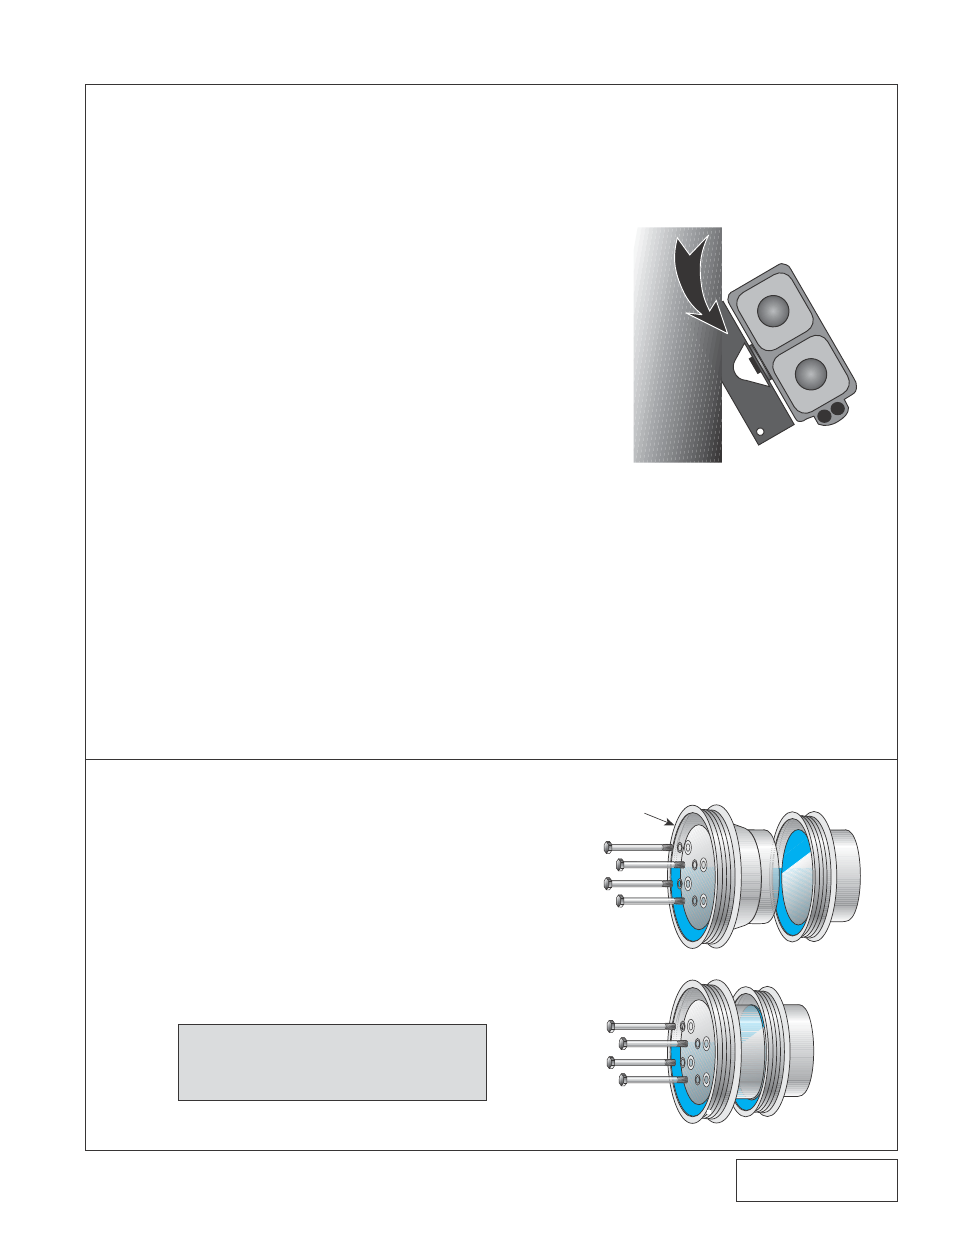
by using only the front bolt in the bracket rear hole. (See Fig.
1-a.)
2. CRANKSHAFT PULLEY
A. Remove crankshaft pulley.
B. For the standard output system, place the cast
Vortech crank pulley into the stock pulley as
shown and secure with the longer bolts and
washers as a unit.
C. For the Vortech High Output, S.H.O. or V -7
Renegade system, remove the factory crank
pulley and replace with the new high output
crank pulley; secure with the supplied bolts
and washers.
NOTE: Tighten bolts progressively and
evenly in a crisscross pattern
so that pulleys align properly.
Fig. 1-a
Fig. 2-a
Fig. 2-b
FRAME
RELOCATED
EVAPORATIVE
CANISTER ASSY.