Ee “using, Using the audio tone, Before you begin – Ubiquiti Networks airFibe5 User Manual
Page 19: Establishing a link
16
Chapter 2: Installation
airFiber
®
AF5/AF5U User Guide
Ubiquiti Networks, Inc.
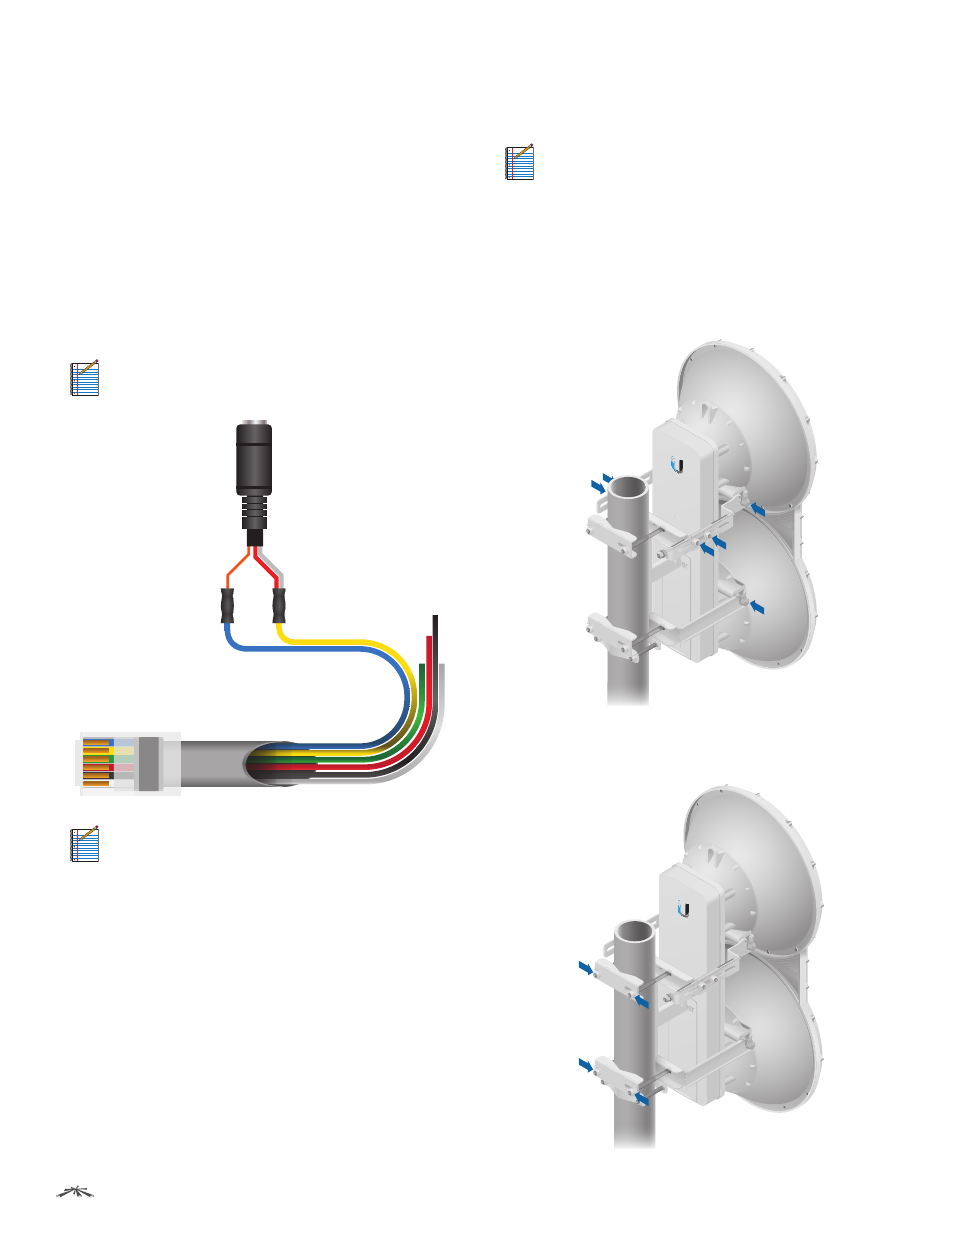
Using the Audio Tone
Before You Begin
Create your own cable adapter to connect the Aux port
to your headphones or other listening device. The cable
adapter requires two items:
• An RJ-12 cable with an RJ-12 connector
• A cable with a 3.5 mm, female, stereo phono jack (mono
jack is acceptable)
1. Attach the wire from pin 6 of the RJ-12 cable to the
return or shield wire of the 3.5 mm jack.
2. Attach the wire from pin 5 of the RJ-12 cable to both
the left and right channel wires of the 3.5 mm stereo
phono jack.
Note:
For a mono jack, connect the wire from pin 5
to the + wire of the mono jack.
RJ-12 Connector
Return/Shield
Left/Right
Channel
Wire to Pin 6
Wire to Pin 5
Pin
Audio Jack
6
5
4
3
2
1
Pinouts from RJ-12 to 3.5 mm Stereo Phono Jack
Note:
Wire colors may vary on RJ-12 cables.
Establishing a Link
Adjust the positions of the Master and the Slave to
establish a link.
Note:
The Master must be aimed first at the Slave
because the Slave does not transmit any RF signal
until it detects transmissions from the Master.
1. Ensure that the following bolts and nuts are loose:
• Four Pre-Installed M10x25 Flanged Bolts on the
airFiber radio (two on each side)
• Four M10 Hex Nuts used to lock the elevation
alignment on the Upper Mount Bracket (two on
each side)
2. Ensure that the pole mount is snug yet the four M10
Hex Nuts attaching the Pole Clamps are loose enough to
allow rotation around the pole for azimuth alignment.