Pole-mounting – Ubiquiti Networks airFibe5 User Manual
Page 11
8
Chapter 2: Installation
airFiber
®
AF5/AF5U User Guide
Ubiquiti Networks, Inc.
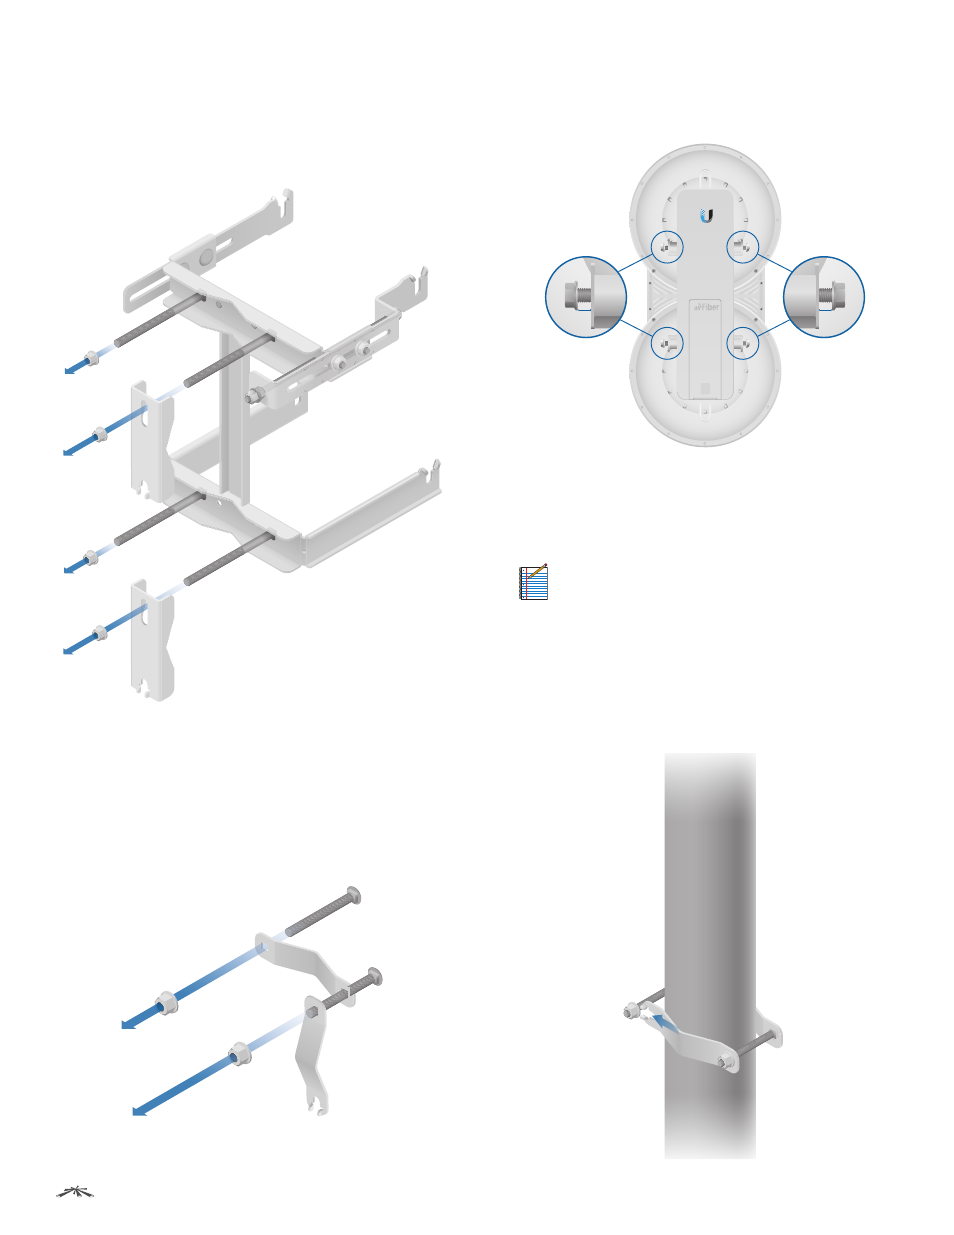
5. Attach the Pole Clamps to the Mount Brackets.
a. Slide the slotted hole of each Pole Clamp over one
upper and one lower M10x150 Carriage Bolt.
b. Place one M10 Serrated Flange Nut on each M10x150
Carriage Bolt.
6. Attach the Azimuth Support Brackets together.
a. Insert the two M10x100 Carriage Bolts into the Azimuth
Support Bracket that has two slotted holes.
b. Slide the slotted hole of the other Azimuth Support
Bracket over one M10x100 Carriage Bolt.
c. Place one M10 Serrated Flange Nut on each M10x100
Carriage Bolt.
7. Ensure that there is a 13 mm gap between the head
of each Pre-Installed M10x25 Flanged Bolt and the
corresponding trunnion on the airFiber radio.
13 mm
13 mm
Pole-Mounting
1. Attach the Azimuth Support Brackets to the pole just
beneath the area where the airFiber radio will be
attached.
Note:
The mounting assembly can accommodate a
Ø 38.1 - 101.6 mm (1.5" - 4.0") pole.
a. Orient the Azimuth Support Brackets around the pole so
it is aimed in the direction of the other airFiber radio.
b. Slide the open slot of the Azimuth Support Bracket over
the corresponding M10x100 Carriage Bolt.
c. Tighten the M10 Serrated Flange Nuts to approximately
50 N-m.